PARKING BRAKE CABLE REMOVAL

Tech Tips
-
The following procedure is for the No. 1 parking brake cable assembly and No. 3 parking brake cable assembly.
-
Use the same procedure for the No. 3 parking brake cable assembly and No. 2 parking brake cable assembly.
-
REMOVE PARKING BRAKE CONTROL PEDAL ASSEMBLY
-
REMOVE NO. 1 PARKING BRAKE CABLE ASSEMBLY
-
Pull up the parking brake pedal claw.
Note
Do not damage the No. 1 parking brake cable assembly.
-
Remove the adjusting nut.
-
Remove the clip from the No. 1 parking brake cable assembly.
-
Remove the No. 1 parking brake cable assembly from the parking brake pedal assembly.
-
-
REMOVE REAR DOOR SCUFF PLATE LH
-
Disengage the 6 claws and remove the rear door scuff plate LH.
Tech Tips
Disengage the claws from the rear side of the scuff plate.
-
-
DISCONNECT REAR DOOR OPENING TRIM WEATHERSTRIP LH
-
Disconnect the rear door opening trim weatherstrip LH.
-
-
REMOVE LAP BELT OUTER ANCHOR COVER (for LH Side)
-
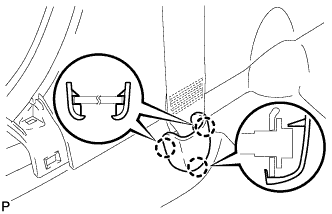
Disengage the 3 claws and remove the lap belt outer anchor cover.
-
-
DISCONNECT FRONT SEAT OUTER BELT ASSEMBLY LH
-
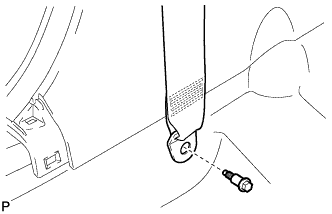
Remove the bolt and disconnect the floor anchor of the front seat outer belt assembly.
-
-
REMOVE CENTER PILLAR LOWER GARNISH LH
-
Disengage the 2 claws and 3 clips, and remove the center pillar lower garnish LH.
-
-
REMOVE REAR DOOR SCUFF PLATE RH
Tech Tips
Use the same procedure as for the LH side.
-
DISCONNECT REAR DOOR OPENING TRIM WEATHERSTRIP RH
Tech Tips
Use the same procedure as for the LH side.
-
REMOVE LAP BELT OUTER ANCHOR COVER (for RH Side)
Tech Tips
Use the same procedure as for the LH side.
-
DISCONNECT FRONT SEAT OUTER BELT ASSEMBLY RH
Tech Tips
Use the same procedure as for the LH side.
-
REMOVE CENTER PILLAR LOWER GARNISH RH
Tech Tips
Use the same procedure as for the LH side.
-
REMOVE FRONT SEAT ASSEMBLY LH
-
for TMMK Made Manual Seat: Click here
-
for TMMK Made Power Seat: Click here
-
for SIA Made Manual Seat: Click here
-
for SIA Made Power Seat: Click here
-
-
REMOVE FRONT SEAT ASSEMBLY RH
Tech Tips
Use the same procedure as for the LH side.
-
REMOVE AUDIO AMPLIFIER COVER (for 10 Speakers)
-
Using a clip remover, remove the 2 clips and audio amplifier cover.
-
-
REMOVE STEREO COMPONENT AMPLIFIER ASSEMBLY WITH BRACKET (for 10 Speakers)
-
Remove the bolt and disconnect the ground wire.
-
Disconnect each connector and disengage the clamp.
-
Remove the bolt.
-
Disengage the 2 guides and remove the stereo component amplifier assembly with bracket.
-
-
REMOVE AUDIO AMPLIFIER COVER (w/ Manual (SOS) Switch)
-
Using a clip remover, remove the 2 clips and audio amplifier cover.
-
-
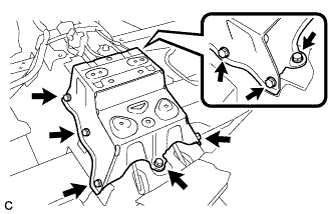
REMOVE DCM (TELEMATICS TRANSCEIVER) WITH BACK-UP BATTERY (w/ Manual (SOS) Switch)
-
Disconnect each connector.
-
Disengage the 3 clamps.
-
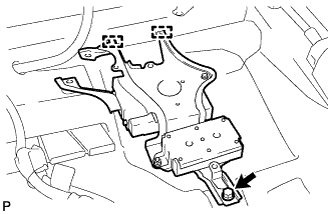
Remove the bolt.
-
Disengage the 2 guides and remove the DCM (telematics transceiver) with back-up battery.
-
-
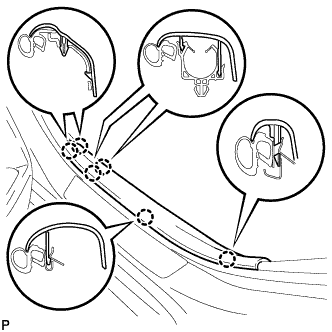
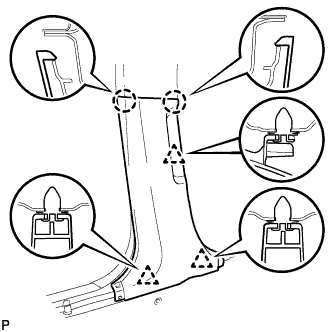
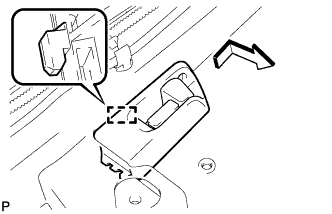
REMOVE FLOOR CARPET HOOK
-
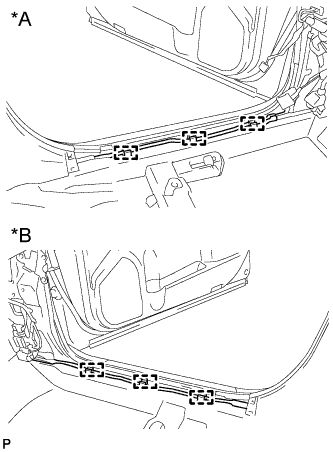
Text in Illustration *A for LH Side *B for RH Side Disengage the 6 guides.
-
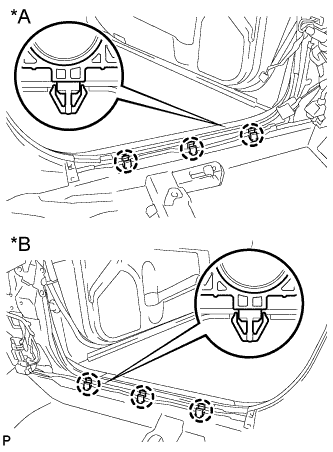
Text in Illustration *A for LH Side *B for RH Side Disengage the 6 claws and remove the 6 floor carpet hooks.
-
-
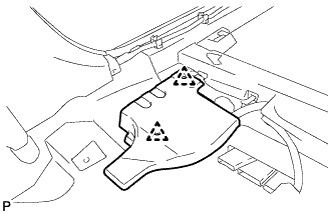
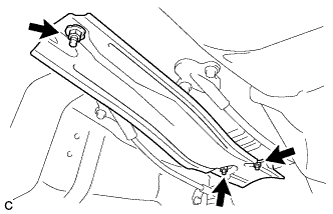
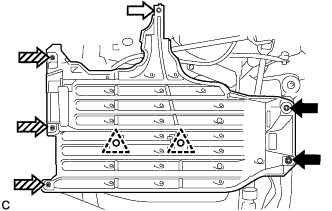
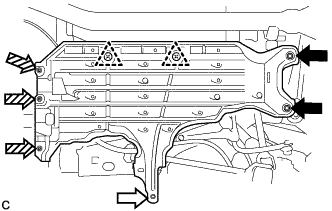
REMOVE NO. 4 CROSS MEMBER FLOOR REINFORCEMENT SUB-ASSEMBLY
-
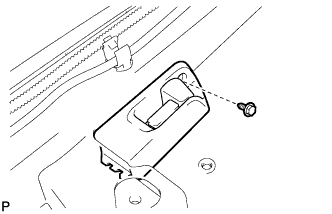
Remove the screw.
-
Disengage the guide to disconnect the fuel lid lock open lever sub-assembly as shown in the illustration.
-
Turn back the floor carpet to a position where the No. 4 cross member floor reinforcement sub-assembly can be removed.
-
Remove the 8 bolts and No. 4 cross member floor reinforcement sub-assembly.
-
-
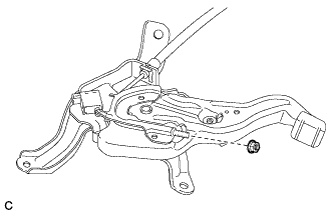
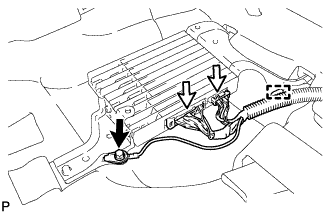
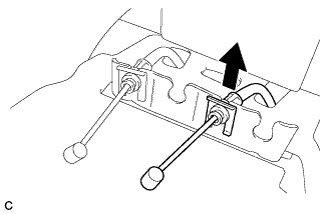
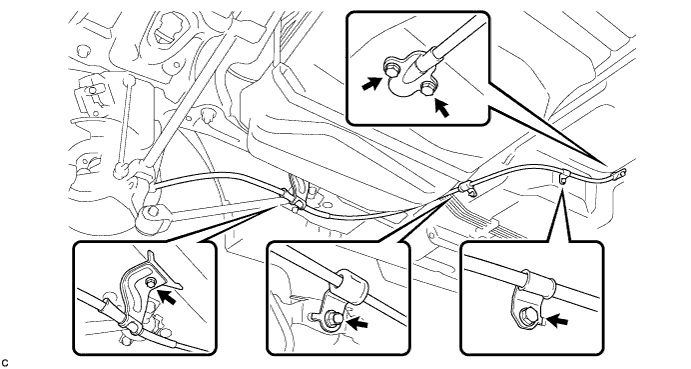
REMOVE NO. 4 PARKING BRAKE CABLE ASSEMBLY
-
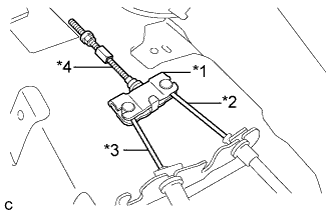
Text in Illustration *1 Parking Brake Equalizer *2 No. 2 Parking Brake Cable Assembly *3 No. 3 Parking Brake Cable Assembly *4 No. 4 Parking Brake Cable Assembly Separate the No. 3 parking brake cable assembly from the parking brake equalizer.
-
Separate the No. 2 parking brake cable assembly to remove the parking brake equalizer.
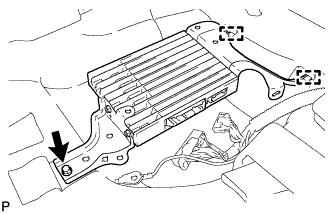
-
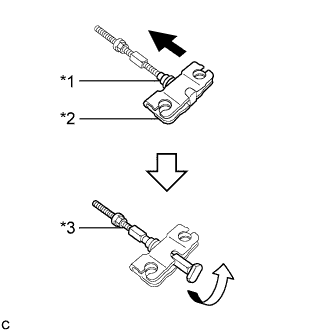
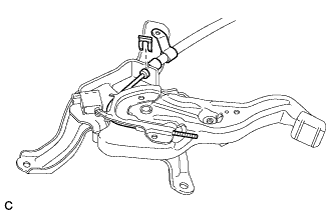
Text in Illustration *1 Rubber Boot *2 Parking Brake Equalizer *3 No. 4 Parking Brake Cable Assembly Slide the parking brake equalizer and rubber boot.
-
Remove the No. 4 parking brake cable assembly from the parking brake equalizer.
-
-
REMOVE FRONT EXHAUST PIPE ASSEMBLY (for 2AR-FE)
-
REMOVE FRONT NO. 2 FLOOR HEAT INSULATOR (for 2AR-FE)
-
Remove the 3 nuts and front No. 2 floor heat insulator.
-
-
REMOVE PARKING BRAKE SHOE LEVER
-
REMOVE NO. 2 FLOOR UNDER COVER (for LH Side)
-
w/ Floor Under Cover:
-
Remove the 2 bolts, screw and 2 clips.
Text in Illustration 
Bolt 
Screw 
Nut (attached to under cover) -
Disengage the 3 nuts and remove the No. 2 floor under cover.
-
-
-
REMOVE NO. 1 FLOOR UNDER COVER (for RH Side)
-
Remove the 2 bolts and screw.
Text in Illustration Bolt Screw Nut (attached to under cover) -
Disengage the 3 nuts and 2 clips, and remove the No. 1 floor under cover.
-
-
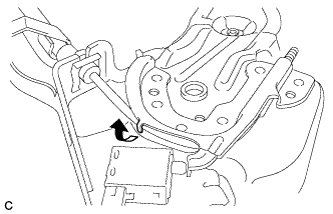
REMOVE NO. 3 PARKING BRAKE CABLE ASSEMBLY
-
Remove the clip from the No. 3 parking brake cable assembly.
-
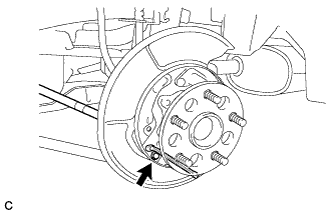
Remove the bolt and separate the No. 3 parking brake cable assembly.
-
Remove the 4 bolts, nut and No. 3 parking brake cable assembly.
-
-
REMOVE NO. 2 PARKING BRAKE CABLE CLAMP
-
Remove the No. 2 parking brake cable clamp.
-