STARTER REMOVAL

-
PRECAUTION
Note
After turning the engine switch off, waiting time may be required before disconnecting the cable from the negative (-) battery terminal. Therefore, make sure to read the disconnecting the cable from the negative (-) battery terminal notices before proceeding with work Click here.
-
REMOVE COOL AIR INTAKE DUCT SEAL
-
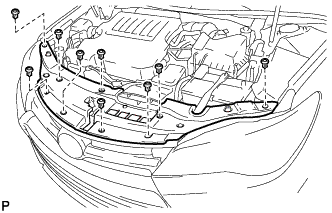
Remove the 9 clips and cool air intake duct seal.
-
-
DISCONNECT CABLE FROM NEGATIVE BATTERY TERMINAL
Note
When disconnecting the cable, some systems need to be initialized after the cable is reconnected Click here.
-
REMOVE V-BANK COVER SUB-ASSEMBLY
-
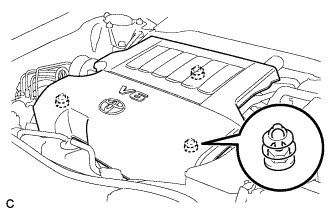
Hold the front of the V-bank cover sub-assembly and raise it to disengage the 2 clips on the front of the V-bank cover sub-assembly. Continue to raise the V-bank cover sub-assembly to disengage the retainer on the rear of the V-bank cover sub-assembly and remove the V-bank cover sub-assembly.
Note
Attempting to disengage both front and rear clips at the same time may cause the V-bank cover sub-assembly to break.
-
-
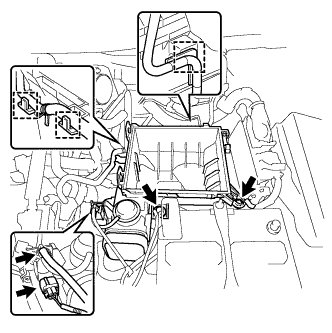
REMOVE INLET NO. 2 AIR CLEANER
-
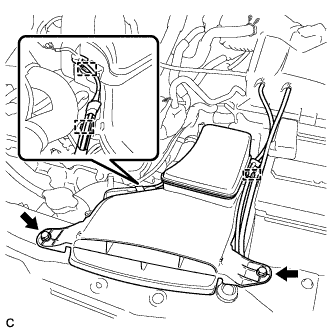
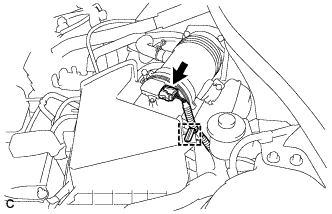
Disconnect the 2 wire harness clamps and vacuum hose clamp.
-
Remove the 2 bolts and inlet No. 2 air cleaner from the air cleaner case sub-assembly.
-
-
REMOVE BATTERY
-
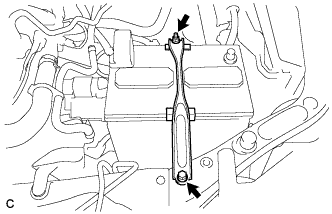
Loosen the nut, and separate the positive (+) battery terminal.
-
Loosen the nut and remove the bolt and battery clamp.
-
Remove the battery and battery tray.
-
-
REMOVE INLET NO. 1 AIR CLEANER
-
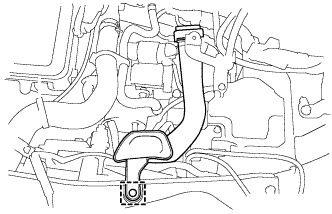
Disengage the pin and remove the inlet No. 1 air cleaner.
-
-
REMOVE AIR CLEANER CAP SUB-ASSEMBLY
-
Disconnect the mass air flow meter connector and wire harness clamp.
-
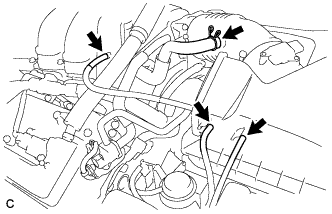
Disconnect the 3 hoses.
-
Separate the ventilation hose.
-
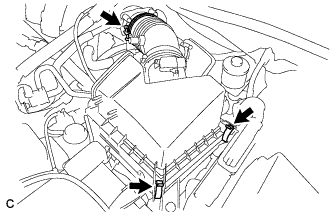
Loosen the hose clamp and separate the air cleaner cap sub-assembly from the throttle with motor body assembly.
-
Release the 2 clamps and remove the air cleaner cap with hose.
-
-
REMOVE AIR CLEANER FILTER ELEMENT SUB-ASSEMBLY
-
REMOVE AIR CLEANER CASE SUB-ASSEMBLY
-
Disconnect the wire harness clamp, connector, vacuum hose and No. 1 fuel vapor feed hose.
-
Remove the 2 bolts and air cleaner case sub-assembly.
-
-
REMOVE STARTER ASSEMBLY
-
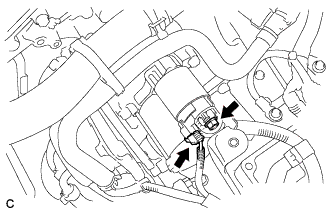
Disconnect the starter connector.
-
Remove the terminal cap.
-
Remove the nut and disconnect the starter wire.
-
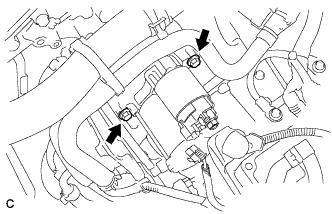
Remove the 2 bolts and starter.
-