REAR CRANKSHAFT OIL SEAL INSTALLATION

-
INSTALL REAR ENGINE OIL SEAL
-
Apply MP grease to the lip of a new oil seal.
Note
-
Do not allow foreign matter to contact the lip of the oil seal.
-
Do not allow MP grease to contact the dust seal.
-
-
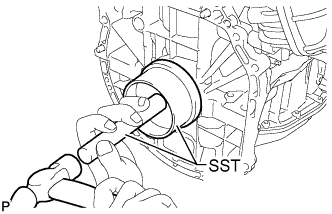
Using SST and a hammer, tap in the oil seal until its surface is flush with the edges of the cylinder block and crankcase.
- SST
- 09223-15030
- 09950-70010 ( 09951-07150 )
Note
-
Keep the lip of the oil seal free from foreign matter.
-
Do not tap in the oil seal at an angle.
-
-
INSTALL DRIVE PLATE AND RING GEAR SUB-ASSEMBLY
-
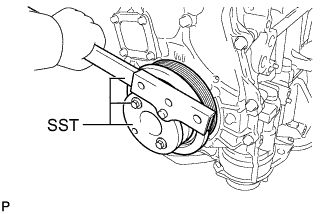
Using SST, hold the crankshaft.
- SST
- 09213-54015
- 09330-00021
Tech Tips
Part number of installation bolt for SST (crankshaft pulley holding tool): 91551-80650 (quantity: 2)
-
Clean the bolts and their installation holes.
-
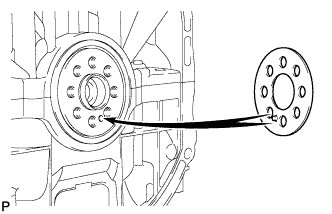
Install the front drive plate spacer.
Tech Tips
Align the pin of the front drive plate spacer with the pin hole of the crankshaft.
-
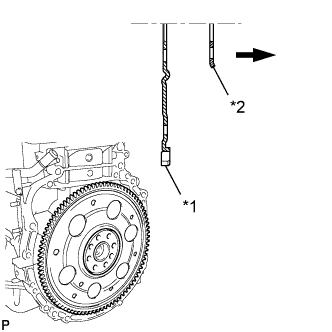
Text in Illustration *1 Drive Plate *2 Rear Drive Plate Spacer 
Transaxle Side Install the drive plate and rear drive plate spacer onto the crankshaft.
-
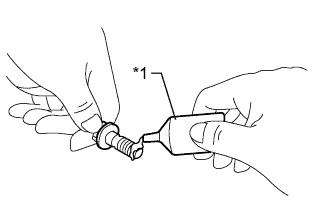
Text in Illustration *1 Adhesive Apply a few drops of adhesive to 2 or 3 threads at the tip of each of the 8 bolts.
Adhesive Toyota Genuine Adhesive 1324, Three Bond 1324 or equivalent -
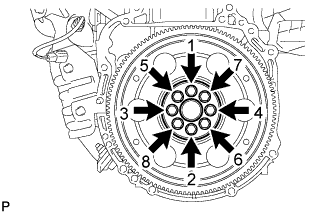
Install and uniformly tighten the 8 bolts in the sequence shown in the illustration.
- Torque:
- 98 N*m { 999 kgf*cm, 72 ft.*lbf }
Note
Do not start the engine for at least an hour after installing the drive plate.
-
-
INSTALL AUTOMATIC TRANSAXLE ASSEMBLY
When Not Using the Engine Support Bridge: Click here
When Using the Engine Support Bridge: Click here