ECM REMOVAL

Note
Perform the Vehicle Identification Number (VIN) registration when replacing the ECM Click here.
Tech Tips
When removing only the ECM, it is not necessary to remove the cool air intake duct seal and battery.
-
DISCONNECT CABLE FROM NEGATIVE BATTERY TERMINAL
Note
When disconnecting the cable, some systems need to be initialized after the cable is reconnected Click here.
-
REMOVE COOL AIR INTAKE DUCT SEAL
-
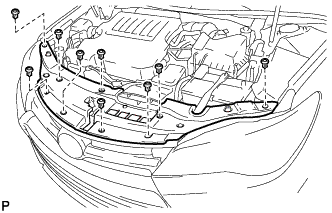
Remove the 9 clips and cool air intake duct seal.
-
-
REMOVE BATTERY
-
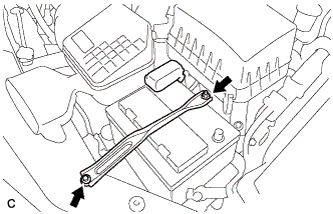
Loosen the nut, and separate the positive (+) battery terminal.
-
Loosen the nut, and remove the bolt and battery clamp.
-
Remove the battery and battery tray.
-
-
REMOVE ECM
-
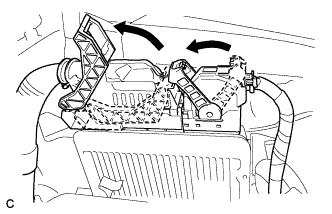
Disconnect the 2 ECM connectors.
-
Push in the locks on the 2 levers, raise the levers, and disconnect the 2 ECM connectors.
Note
After disconnecting the connectors, make sure that dirt, water or other foreign matter does not contact the connecting part of the connectors.
-
-
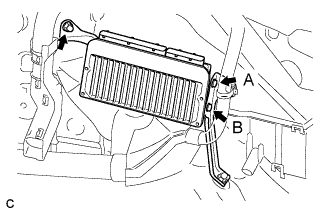
Remove the nut.
-
Remove the screw (A).
-
Loosen the screw (B) and remove the ECM.
-
Remove the screw (B).
-
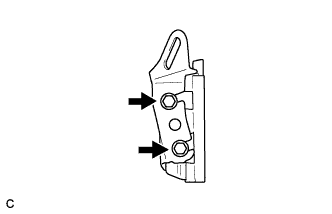
Remove the 2 screws and No. 2 ECM bracket.
-
-
REMOVE NO. 1 ECM BRACKET
-
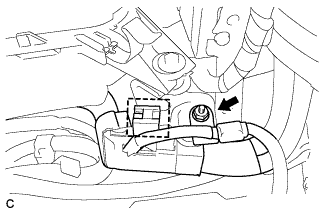
Remove the nut.
-
Disconnect the wire harness clamp.
-

Disconnect the wire harness clamp.
-
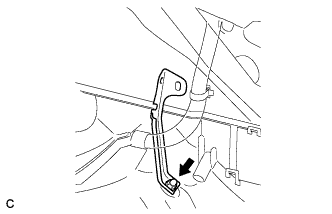
Remove the nut and No. 1 ECM bracket.
-