NAME PLATE(w/ Tire Carrier) INSTALLATION
CAUTION / NOTICE / HINT
Tech Tips
When installing the symbol emblem, rear No. 3 body name plate, No. 5 back door name plate and rear license light cover, heat the vehicle body, symbol emblem, rear No. 3 body name plate, No. 5 back door name plate and rear license light cover using a heat light.
| Standard Heating Temperature | ||||||||||||
|---|---|---|---|---|---|---|---|---|---|---|---|---|
|
Note
Do not heat the vehicle body, symbol emblem, rear No. 3 body name plate, No. 5 back door name plate and rear license light cover excessively.
PROCEDURE
-
INSTALL SYMBOL EMBLEM
-
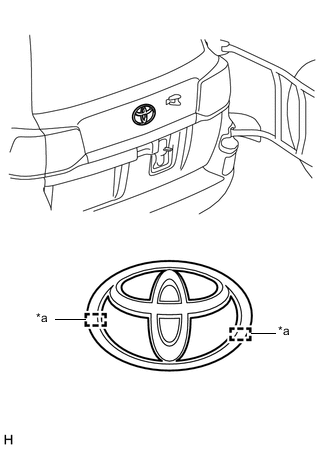
Text in Illustration *a Boss Clean the vehicle body surface.
-
Using a heat light, heat the vehicle body surface.
-
Remove the double-sided tape from the vehicle body.
-
Wipe off any tape adhesive residue with cleaner.
-
-
Install a new symbol emblem.
-
Using a heat light, heat the vehicle body and a new symbol emblem.
-
Remove the peeling paper from the face of the symbol emblem.
Tech Tips
After removing the peeling paper, keep the exposed adhesive free from foreign matter.
-
Align the boss positions and install the symbol emblem.
Tech Tips
Press the symbol emblem firmly to install it.
-
-
-
INSTALL REAR NO. 3 BODY NAME PLATE
-
Clean the vehicle body surface.
-
Using a heat light, heat the vehicle body surface.
-
Remove the double-sided tape from the vehicle body.
-
Wipe off any tape adhesive residue with cleaner.
-
-
Install a new rear No. 3 body name plate.
-
Using a heat light, heat the vehicle body and a new rear No. 3 body name plate.
-
Remove the peeling paper from the face of the rear No. 3 body name plate.
Tech Tips
After removing the peeling paper, keep the exposed adhesive free from foreign matter.
-
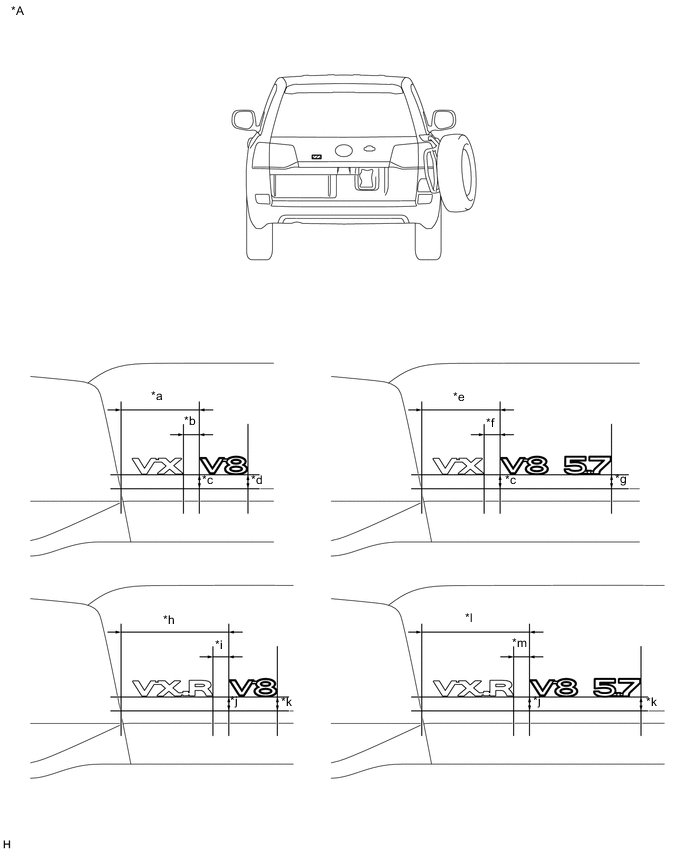
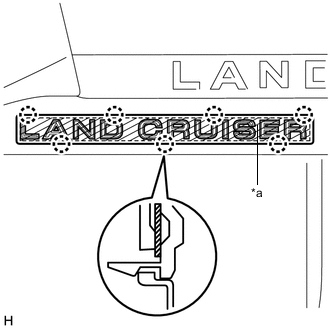
Install the rear No. 3 body name plate in the position shown in the illustration.
Tech Tips
Press the rear No. 3 body name plate firmly to install it.
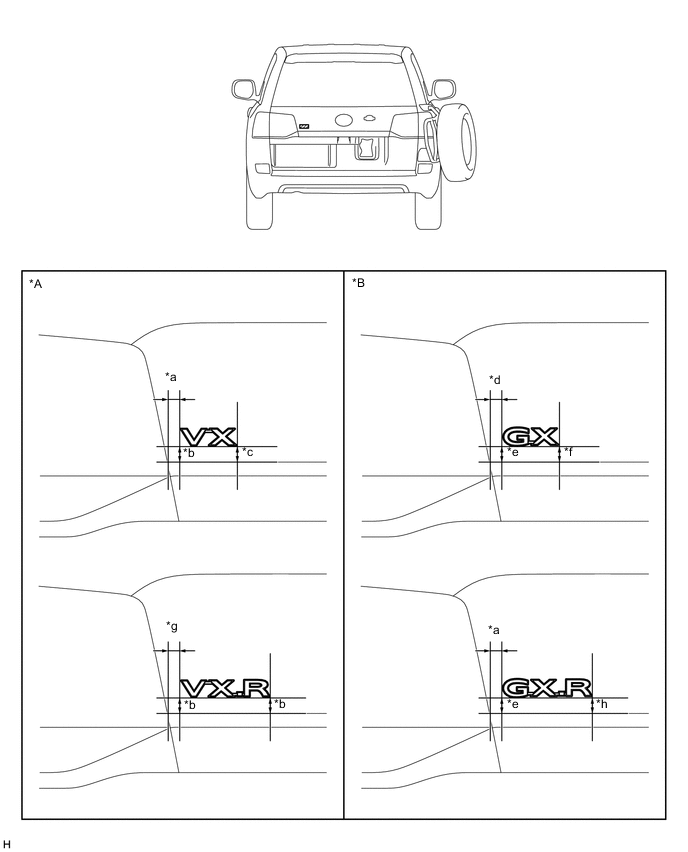
Text in Illustration *A for Type A *B for Type B *a 9.0 mm (0.354 in.) *b 10.4 mm (0.409 in.) *c 10.8 mm (0.425 in.) *d 9.1 mm (0.358 in.) *e 8.7 mm (0.343 in.) *f 8.8 mm (0.346 in.) *g 8.9 mm (0.350 in.) *h 8.6 mm (0.339 in.)
-
-
-
INSTALL NO. 5 BACK DOOR NAME PLATE
-
Clean the vehicle body surface.
-
Using a heat light, heat the vehicle body surface.
-
Remove the double-sided tape from the vehicle body.
-
Wipe off any tape adhesive residue with cleaner.
-
-
Install a new No. 5 back door name plate.
-
Using a heat light, heat the vehicle body and a new No. 5 back door name plate.
-
Remove the peeling paper from the face of the No. 5 back door name plate.
Tech Tips
After removing the peeling paper, keep the exposed adhesive free from foreign matter.
-
Install the No. 5 back door name plate in the position shown in the illustration.
Tech Tips
Press the No. 5 back door name plate firmly to install it.
Text in Illustration *A for Type A - - *a 125.3 mm (4.93 in.) *b 18.1 mm (0.713 in.) *c 9.2 mm (0.362 in.) *d 9.6 mm (0.378 in.) *e 127.3 mm (5.01 in.) *f 20.1 mm (0.791 in.) *g 9.8 mm (0.386 in.) *h 183.4 mm (7.22 in.) *i 16.8 mm (0.66 in.) *j 9.5 mm (0.374 in.) *k 9.7 mm (0.382 in.) *l 185.4 mm (7.30 in.) *m 18.8 mm (0.740 in.) - - 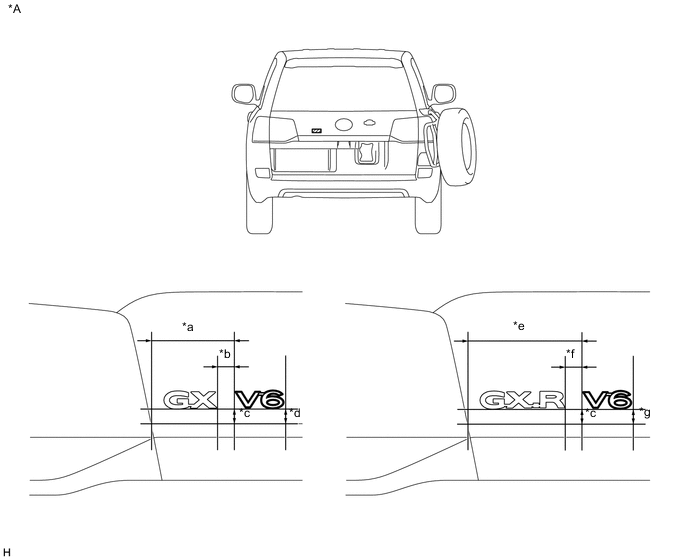
Text in Illustration *A for Type B - - *a 125.3 mm (4.93 in.) *b 18.3 mm (0.720 in.) *c 9.6 mm (0.378 in.) *d 9.7 mm (0.382 in.) *e 183.4 mm (7.22 in.) *f 17.0 mm (0.669 in.) *g 9.8 mm (0.386 in.) - -
-
-
-
INSTALL REAR LICENSE LIGHT COVER
-
Clean the vehicle body surface.
-
Using a heat light, heat the vehicle body surface.
-
Remove the double-sided tape from the vehicle body.
-
Wipe off any tape adhesive residue with cleaner.
-
-
Text in Illustration *a Double-sided Tape Install a new rear license light cover.
-
Using a heat light, heat the vehicle body and a new rear license light cover.
-
Remove the peeling paper from the face of the emblem.
Tech Tips
After removing the peeling paper, keep the exposed adhesive free from foreign matter.
-
Attach the 7 claws to install the rear license light cover.
Tech Tips
Press the rear license light cover firmly to install it.
-
-