FRONT BUMPER(for Standard) REMOVAL
PROCEDURE
-
REMOVE FRONT FENDER SPLASH SHIELD SUB-ASSEMBLY LH
-
Remove the 3 bolts and screw.
-
Turn the clip indicated by the arrow in the illustration to remove the front fender splash shield sub-assembly LH.
-
-
REMOVE FRONT FENDER SPLASH SHIELD SUB-ASSEMBLY RH
-
Remove the 3 bolts and 2 screws.
-
Turn the clip indicated by the arrow in the illustration to remove the front fender splash shield sub-assembly RH.
-
-
REMOVE UPPER RADIATOR SUPPORT SEAL
-
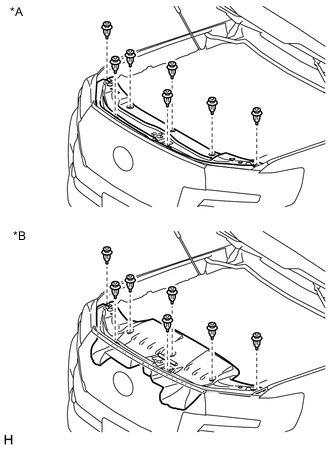
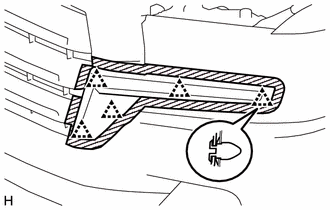
Text in Illustration *A for Gasoline *B for Diesel Remove the 7 clips and upper radiator support seal.
-
-
REMOVE HEADLIGHT COVER LH (w/ Headlight Cover)
-
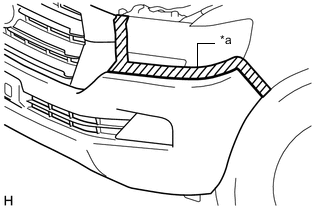
Text in Illustration *a Protective Tape Put protective tape around the headlight cover LH.
-
Detach the 5 claws and remove the headlight cover LH.
-
-
REMOVE HEADLIGHT COVER RH (w/ Headlight Cover)
Tech Tips
Use the same procedure described for the LH side.
-
REMOVE FRONT BUMPER COVER
Tech Tips
For the front bumper cover with garnish, use the procedure described below.
-
Using a T30 "TORX" socket, remove the 3 screws.
Tech Tips
Use the same procedure for the other side.
-
Remove the 2 screws and 4 bolts.
-
Remove the 3 screws.
-

Remove the 3 clips.
-
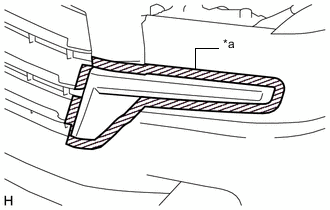
Text in Illustration *a Protective Tape Put protective tape around the front bumper cover.
Tech Tips
Use the same procedure for the other side.
-
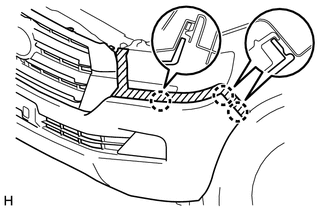
Detach the 3 claws.
Tech Tips
Use the same procedure for the other side.
-
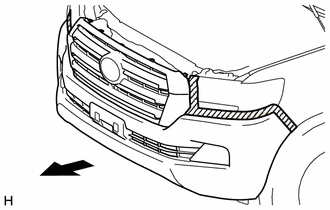
Remove the front bumper cover.
-
w/ TOYOTA Parking Assist-sensor System or w/ Fog Light:
Disconnect the No. 4 engine room wire connector.
-
w/ Headlight Cleaner System:
Disconnect the headlight cleaner hose.
-
w/ Multi-terrain Monitor:
Disconnect the connector.
-
w/ Dynamic Radar Cruise Control System:
Disconnect the connector.
-
-
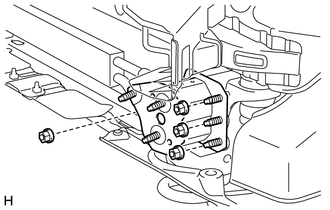
REMOVE FRONT BUMPER ENERGY ABSORBER
-
Remove the front bumper energy absorber.
-
-
REMOVE FRONT BUMPER REINFORCEMENT SUB-ASSEMBLY
-
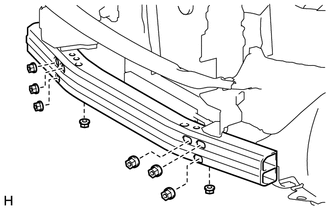
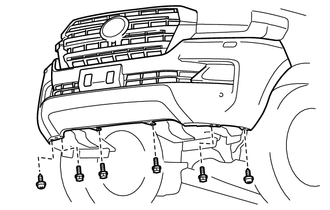
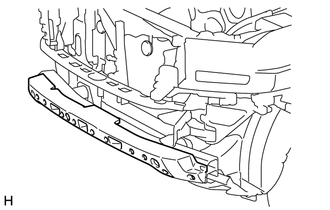
Remove the 8 nuts and front bumper reinforcement sub-assembly.
-
-
REMOVE FRONT BUMPER NO. 2 EXTENSION SUB-ASSEMBLY LH
-
Remove the 4 nuts and front bumper No. 2 extension sub-assembly LH.
-
-
REMOVE FRONT BUMPER NO. 2 EXTENSION SUB-ASSEMBLY RH
Tech Tips
Use the same procedure described for the LH side.
-
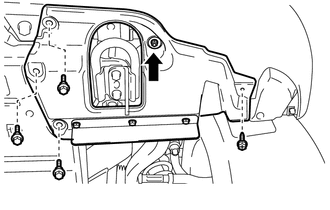
REMOVE FRONT BUMPER SIDE SUPPORT LH
-

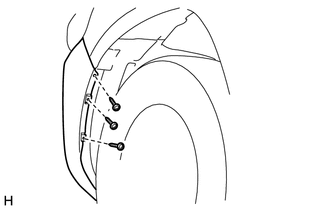
Remove the 2 screws.
-
Detach the 3 claws and remove the front bumper side support LH.
-
-
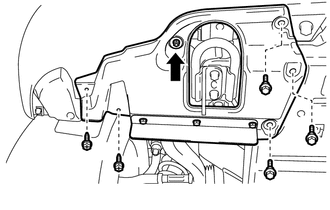
REMOVE FRONT BUMPER SIDE SUPPORT RH
Tech Tips
Use the same procedure described for the LH side.
-
REMOVE HEADLIGHT ASSEMBLY LH
-
for Halogen Headlight:
-
for LED Headlight:
-
for Halogen Headlight and LED Headlight:
-
-
REMOVE HEADLIGHT ASSEMBLY RH
Tech Tips
Use the same procedure described for the LH side.
-
REMOVE FRONT BUMPER UPPER CENTER RETAINER
-
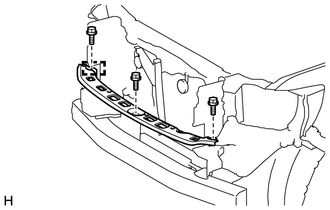
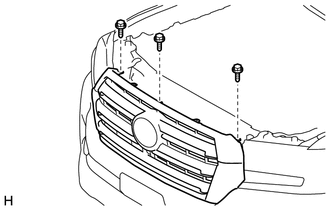
Remove the 3 bolts.
-
Detach the guide and remove the front bumper upper center retainer.
-