FRONT WIPER MOTOR INSTALLATION

CAUTION / NOTICE / HINT
Tech Tips
-
Use the same procedure for LHD and RHD vehicles.
-
The procedure listed below is for LHD vehicles.
PROCEDURE
-
INSTALL WINDSHIELD WIPER MOTOR ASSEMBLY
-
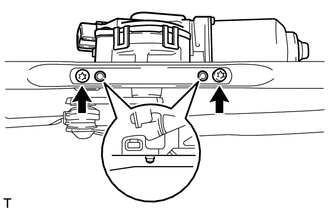
Using a T30 "TORX" socket, install the wiper motor with the 2 "TORX" screws.
- Torque:
- 7.5 N*m { 76 kgf*cm, 66 in.*lbf }
-
Apply MP grease to the crank arm pivot of the windshield wiper motor assembly.
-
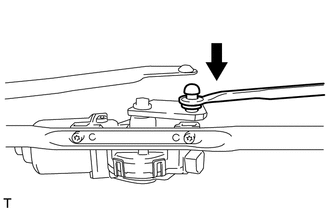
Install the No. 1 windshield wiper link rod to the crank arm pivot of the windshield wiper motor assembly.
-
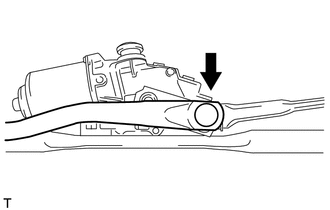
Install the No. 2 windshield wiper link rod to the crank arm pivot of the windshield wiper motor assembly.
-
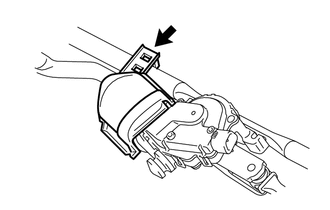
Install the wiper motor cover with the clamp.
-
-
INSTALL WINDSHIELD WIPER MOTOR AND LINK ASSEMBLY
-
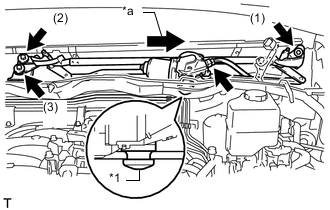
Text in Illustration *1 Motor Grommet *a Slide Slide and attach the motor grommet to temporarily install the windshield wiper motor and link assembly as shown in the illustration.
-
Install the windshield wiper motor and link assembly with the 3 bolts in the order indicated in the illustration.
- Torque:
- 7.0 N*m { 71 kgf*cm, 62 in.*lbf }
-
Connect the connector.
-
-
INSTALL COWL TOP VENTILATOR LOUVER SUB-ASSEMBLY
-
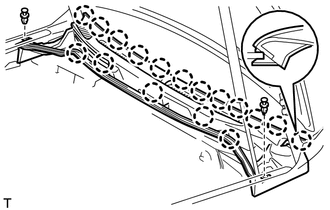
Attach the 17 claws and 2 clips and install the cowl top ventilator louver sub-assembly.
-
-
INSTALL HOOD TO COWL TOP SEAL
-
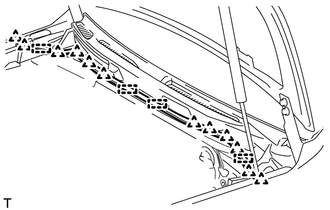
Attach the 12 clips and 4 clamps to install the hood to cowl top seal.
-
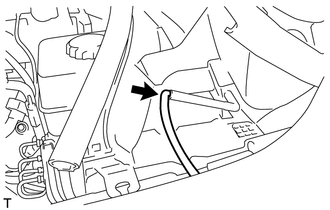
Install the washer hose.
-
-
INSTALL FRONT FENDER MAIN SEAL LH
-
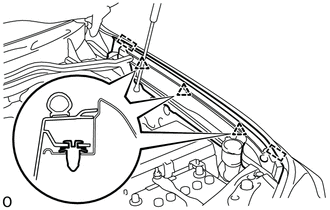
Attach the 3 clips and 2 guides to install the front fender main seal LH.
-
-
INSTALL FRONT FENDER MAIN SEAL RH
Tech Tips
Use the same procedure described for the LH side.
-
INSTALL UPPER RADIATOR SUPPORT SEAL
-
CONNECT CABLE TO NEGATIVE BATTERY TERMINAL
Note
When disconnecting the cable, some systems need to be initialized after the cable is reconnected Click here.
-
INSTALL FRONT WIPER ARM AND BLADE ASSEMBLY LH
-
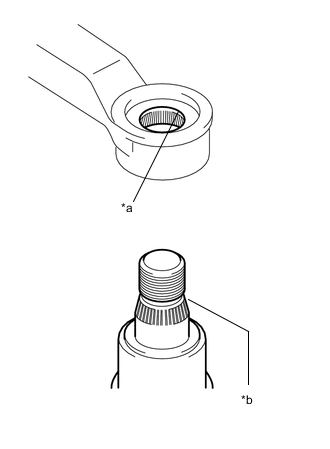
Text in Illustration *a Wiper Arm Serrations *b Wiper Pivot Serrations Stop the wiper motor at the automatic stop position.
-
Clean the wiper arm serration with a round file or equivalent.
-
Clean the wiper pivot serration.
-
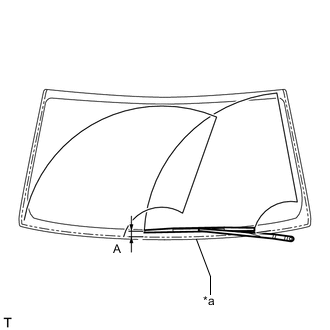
Text in Illustration *a Moulding Edge Install the wiper arm and blade with the nut. Make sure that the wiper arm and blade comes to the position shown in the illustration.
Standard Measurement Position Specified Condition A 16.8 to 36.8 mm (0.661 to 1.45 in.) - Torque:
- 25 N*m { 255 kgf*cm, 18 ft.*lbf }
Tech Tips
Hold down the wiper arm hinge with your hand while tightening the nut.
-
-
INSTALL FRONT WIPER ARM AND BLADE ASSEMBLY RH
-
Text in Illustration *a Wiper Arm Serrations *b Wiper Pivot Serrations Stop the wiper motor at the automatic stop position.
-
Clean the wiper arm serration with a round file or equivalent.
-
Clean the wiper pivot serration.
-
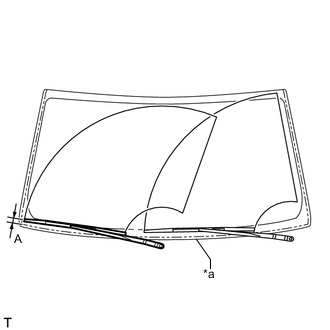
Text in Illustration *a Moulding Edge Install the wiper arm and blade with the nut. Make sure that the wiper arm and blade comes to the position shown in the illustration.
Standard Measurement Position Specified Condition A 20.0 to 40.0 mm (0.787 to 1.57 in.) - Torque:
- 25 N*m { 255 kgf*cm, 18 ft.*lbf }
Tech Tips
Hold down the wiper arm hinge with your hand while tightening the nut.
-
Operate the front wipers while spraying washer fluid on the windshield glass. Make sure that the front wipers function properly and there is no interference with the vehicle body.
-
-
INSTALL FRONT WIPER ARM HEAD CAP
-
Attach the 3 claws and install the front wiper arm head cap.
Tech Tips
Use the same procedure for both front wiper arm head caps.
-