BACK DOOR(for Double Swing Out Type) DISASSEMBLY
PROCEDURE
-
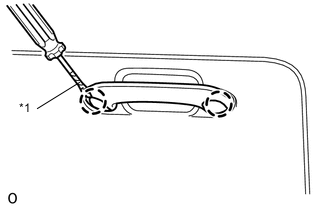
REMOVE ASSIST GRIP LH (for LH Side)
-
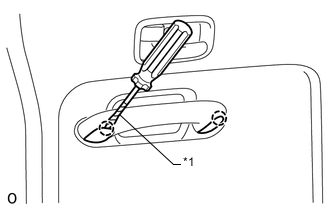
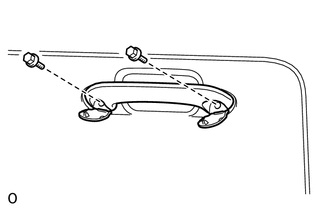
Text in Illustration *1 Protective Tape Using a screwdriver, detach the 2 claws and open the 2 covers.
Tech Tips
Tape the screwdriver tip before use.
-
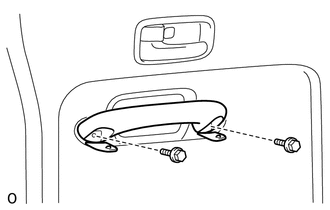
Remove the 2 bolts and assist grip.
-
-
REMOVE DOOR INSIDE HANDLE BEZEL LH (for LH Side)
-

Detach the claw and open the cover.
-
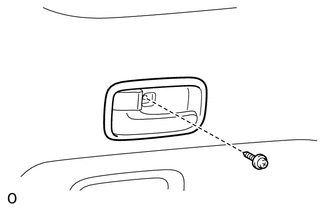
Remove the screw.
-
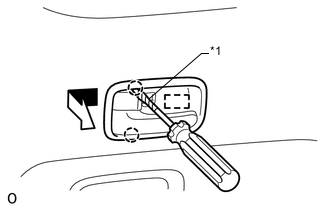
Text in Illustration *1 Protective Tape Using a screwdriver, detach the 2 claws.
Tech Tips
Tape the screwdriver tip before use.
-
Detach the guide and remove the door inside handle bezel in the direction indicated by the arrow in the illustration.
-
-
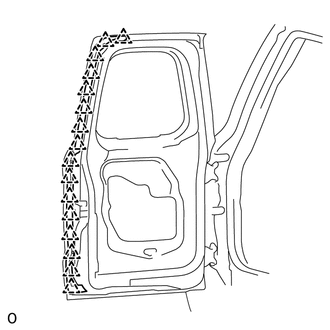
REMOVE BACK DOOR TRIM PANEL ASSEMBLY LH (for LH Side)
-
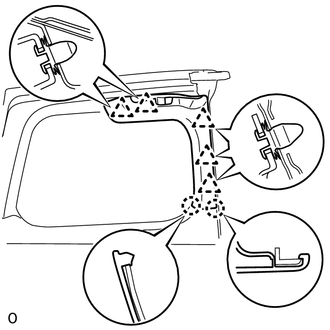
Detach the 10 clips and remove the back door trim panel.
-
-
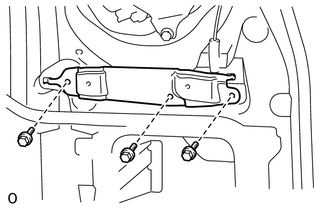
REMOVE REAR ASSIST GRIP REINFORCEMENT LH (for LH Side)
-
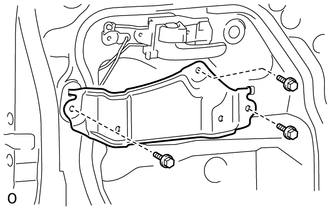
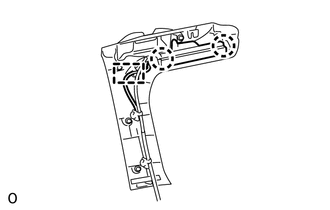
Remove the 3 bolts and rear assist grip reinforcement.
-
-
REMOVE BACK DOOR INSIDE HANDLE ASSEMBLY LH (for LH Side)
-
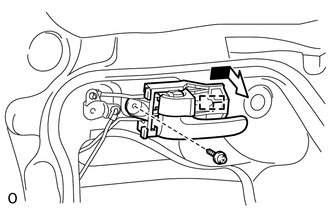
Remove the screw.
-
Detach the guide and remove the back door inside handle in the direction indicated by the arrow in the illustration.
-
Disconnect the 2 links from the back door inside handle.
-
-
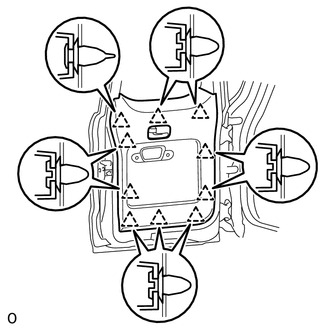
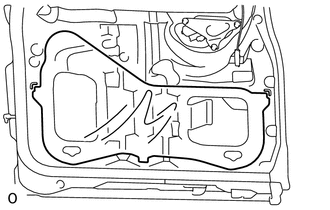
REMOVE BACK DOOR SERVICE HOLE COVER LH (for LH Side)
-
Disconnect the 2 connectors and detach the 3 clamps.
-
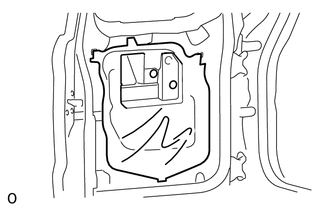
Pull out the 2 links and wire harness from the back door service hole cover, and then remove the back door service hole cover.
Tech Tips
Remove any remaining butyl tape from the back door panel.
-
-
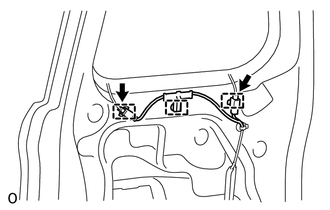
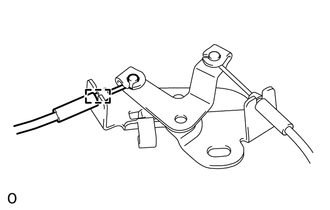
REMOVE BACK DOOR LOCK CONTROL ASSEMBLY (for LH Side)
-
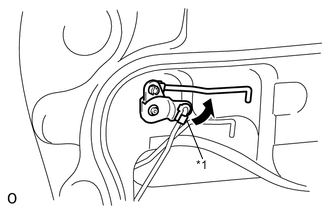
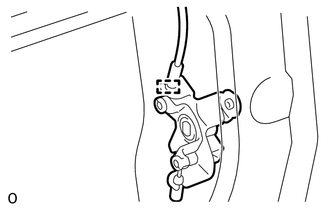
Text in Illustration *1 Snap Rotate the snap in the direction indicated by the arrow in the illustration to detach the snap from the link.
-
Disconnect the link from the back door lock control.
-

Using a clip remover, detach the clip and remove the back door lock control.
-
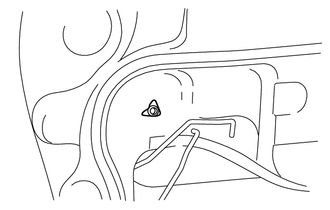
Detach the clip from the back door panel.
-
-
REMOVE BACK DOOR REMOTE CONTROL ASSEMBLY (for LH Side)
-
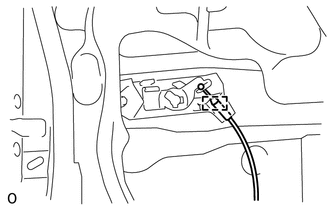
Detach the guide and disconnect the cable.
-
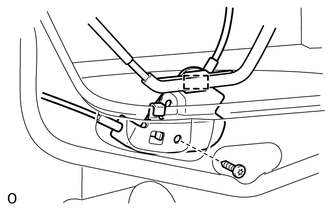
Detach the clamp.
-
Using a T30 "TORX" socket wrench, remove the bolt and back door remote control.
-
Detach the guide and disconnect the cable from the back door remote control.
-
-
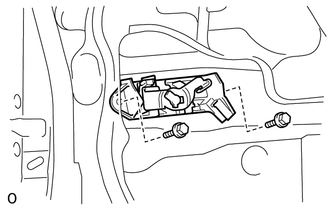
REMOVE BACK DOOR LOCK ASSEMBLY (for LH Side)
-

Disconnect the 2 connectors.
-
Using a T30 "TORX" socket wrench, remove the 4 bolts and back door lock.
-
-
REMOVE BACK DOOR OUTSIDE HANDLE (for LH Side)
-
Remove the 2 bolts and back door outside handle.
-
-
REMOVE BACK DOOR OUTSIDE GARNISH SUB-ASSEMBLY (for LH Side)
-
REMOVE REAR DOOR CHILD LOCK PROTECTION COVER (for LH Side)
-
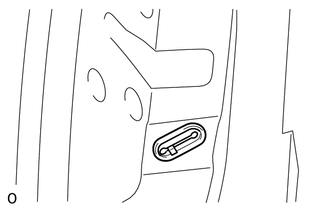
Remove the rear door child lock protection cover.
-
-
REMOVE BACK DOOR NO. 3 WEATHERSTRIP (for LH Side)
-
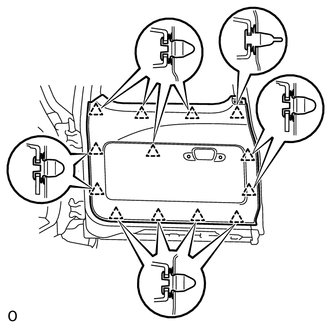
Detach the 16 clips and remove the back door No. 3 weatherstrip.
-
-
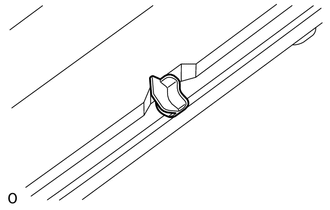
REMOVE BACK DOOR NO. 2 STOPPER CUSHION (for LH Side)
-
Remove the back door No. 2 stopper cushion.
-
-
REMOVE DOOR DUST PROOF SEAL LH (for LH Side)

Tech Tips
Use the same procedure for both door dust proof seals.
-
Remove the door dust proof seal.
-
-
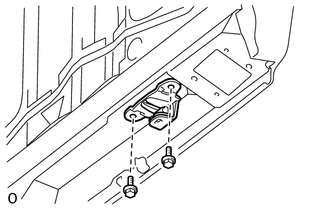
REMOVE BACK DOOR CHECK ASSEMBLY LH (for LH Side)
-
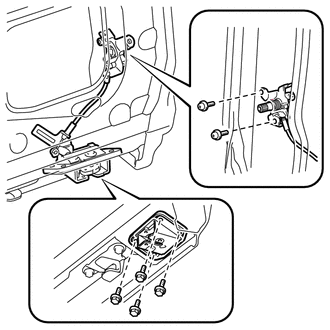
Detach the clamp of the wire harness.
-
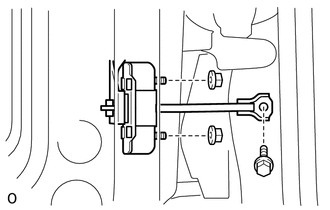
Remove the bolt, 2 nuts and back door check.
-
-
REMOVE ASSIST GRIP RH (for RH Side)
-
Text in Illustration *1 Protective Tape Using a screwdriver, detach the 2 claws and open the 2 covers.
Tech Tips
Tape the screwdriver tip before use.
-
Remove the 2 bolts and assist grip.
-
-
REMOVE BACK DOOR TRIM COVER RH (for RH Side)
-
Detach the 5 clips and 2 claws.
-
Detach the clamp and 2 claws and remove the back door trim cover.
-
-
REMOVE CENTER STOP LIGHT ASSEMBLY (for RH Side)
-
REMOVE BACK DOOR TRIM PANEL ASSEMBLY RH (for RH Side)
-
Detach the 13 clips and remove the back door trim panel.
-
-
REMOVE REAR WIPER ARM AND BLADE ASSEMBLY (w/ Rear Wiper)
-
REMOVE REAR WIPER MOTOR ASSEMBLY (w/ Rear Wiper)
-
REMOVE REAR WIPER MOTOR GROMMET (w/ Rear Wiper)
-
REMOVE REAR WASHER NOZZLE (w/ Rear Wiper)
-
REMOVE REAR ASSIST GRIP REINFORCEMENT RH (for RH Side)
-
Remove the 3 bolts and rear assist grip reinforcement.
-
-
REMOVE BACK DOOR SERVICE HOLE COVER RH (for RH Side)
-
Remove the back door service hole cover.
Tech Tips
Remove any remaining butyl tape from the back door panel.
-
-
REMOVE BACK DOOR INSIDE HANDLE ASSEMBLY RH (for RH Side)
-
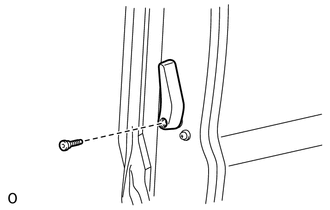
Using a T30 "TORX" socket wrench, remove the bolt and back door inside handle.
-
-
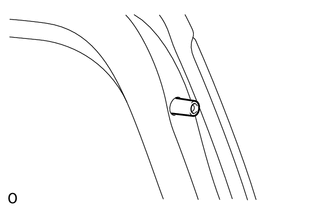
REMOVE BACK DOOR HANDLE GROMMET (for RH Side)
-
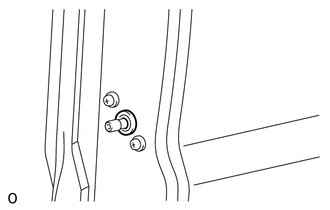
Remove the back door handle grommet.
-
-
REMOVE LOWER BACK DOOR LOCK ASSEMBLY (for RH Side)
-
Detach the clamp and disconnect the cable.
-
Remove the 4 bolts, 2 screws and lower back door lock.
-
-
REMOVE UPPER BACK DOOR LOCK ASSEMBLY (for RH Side)
-
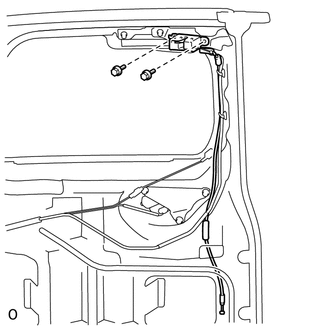
Remove the 2 bolts.
-
Pull out the cable from the back door panel, and then remove the upper back door lock.
-
-
REMOVE BACK DOOR CENTER WEATHERSTRIP (for RH Side)
-
Detach the 5 clips and remove the back door center weatherstrip.
-
-
REMOVE BACK DOOR NO. 2 STOPPER SUB-ASSEMBLY (for RH Side)
-
Remove the 2 bolts and back door No. 2 stopper.
-
-
REMOVE DOOR DUST PROOF SEAL RH (for RH Side)
Tech Tips
Use the same procedure for both door dust proof seals.
-
Remove the door dust proof seal.
-
-
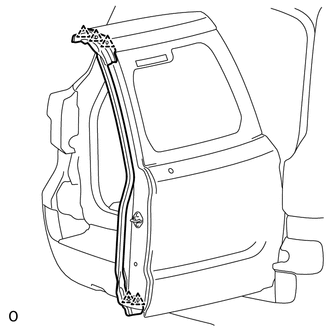
REMOVE BACK DOOR LOCK STRIKER PLATE ASSEMBLY (for RH Side)
-
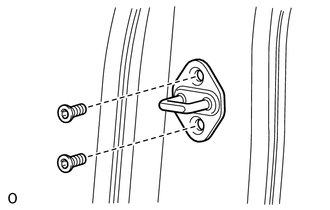
Using a T40 "TORX" socket wrench, remove the 2 bolts and back door lock striker plate.
-
-
REMOVE BACK DOOR CHECK ASSEMBLY RH (for RH Side)
-
Detach the clamp of the wire harness.
-

Remove the bolt, 2 nuts and back door check.
-