FRONT CONSOLE BOX(w/o Cool Box) REASSEMBLY
CAUTION / NOTICE / HINT
Tech Tips
-
Use the same procedure for RHD and LHD vehicles.
-
The procedure listed below is for LHD vehicles.
-
A bolt without a torque specification is shown in the standard bolt chart Click here.
PROCEDURE
-
INSTALL CONSOLE COMPARTMENT DOOR CUSHION
-
Install 2 new console compartment door cushions.
-
-
INSTALL NO. 1 INSTRUMENT PANEL CUP HOLDER SUPPORT
-
Install the No. 1 instrument panel cup holder support.
-
-
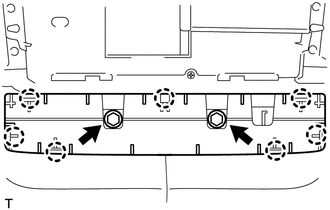
INSTALL LOWER INSTRUMENT COVER SUB-ASSEMBLY
-
Install the lower instrument cover sub-assembly with the 5 screws.
-
-
INSTALL CONSOLE COMPARTMENT DOOR LOCK
-
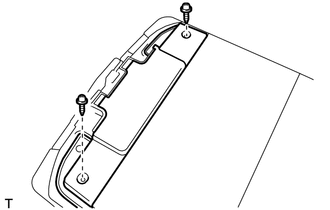
Install the console compartment door lock with the 2 screws.
-
-
INSTALL CONSOLE COMPARTMENT DOOR HINGE SUB-ASSEMBLY
-
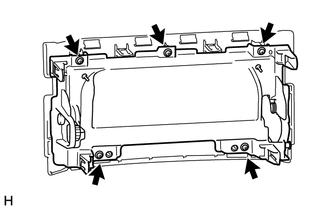
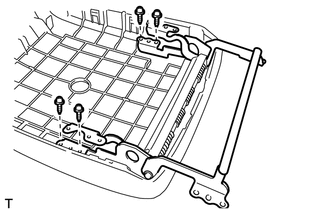
Install the console compartment door hinge sub-assembly with the 4 screws.
-

Attach the 12 claws to install the inner console door.
-
Install the upper console box with the 4 screws.
-
-
INSTALL CONSOLE COMPARTMENT DOOR LOCK SUB-ASSEMBLY
-
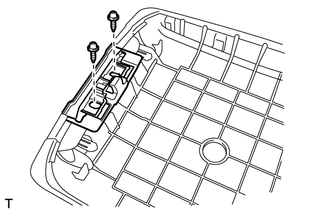
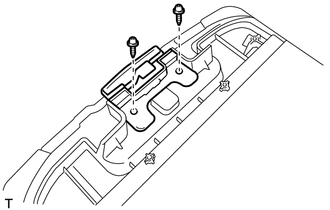
Install the console compartment door lock sub-assembly with the 2 screws.
-
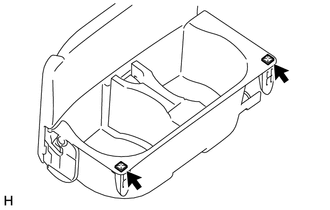
Install the lower console box with the 2 screws.
-
-
INSTALL CONSOLE COMPARTMENT DOOR SUB-ASSEMBLY
-
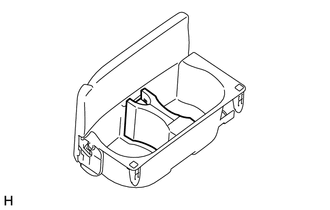
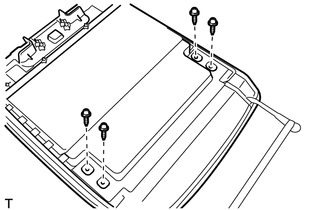
Install the console compartment door sub-assembly with the 4 screws.
-
-
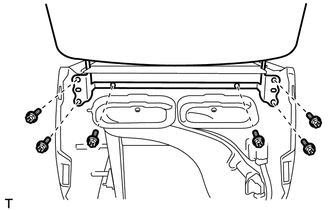
INSTALL REAR CONSOLE BOX MOUNTING BRACKET
-
Install the rear console box mounting bracket with the 4 bolts.
- Torque:
- 8.5 N*m { 87 kgf*cm, 75 in.*lbf }
-
-
INSTALL CONSOLE BOX POCKET
-
all the console box pocket.
-
-
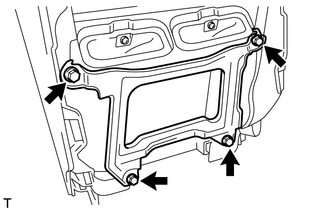
INSTALL INSTRUMENT PANEL HOLE COVER
-
Attach the 7 claws to install the instrument panel hole cover.
-
Install the 2 screws.
-
-
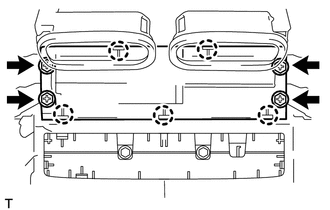
INSTALL REAR COOLER SWITCH HOLE COVER (w/o Rear Cooler)
-
Attach the 5 claws to install the rear cooler switch hole cover.
-
Install the 4 screws.
-
-
INSTALL AIR CONDITIONING CONTROL ASSEMBLY (w/ Rear Cooler)
-
INSTALL NO. 2 AIR CONDITIONING CONTROL ASSEMBLY (w/ Rear Air Conditioning System)