CAUTION / NOTICE / HINT
-
Use the same procedures for LHD and RHD vehicles.
-
The procedures listed below are for LHD vehicles.
PROCEDURE
- Click here
REMOVE NO. 2 AIR CONDITIONING CONTROL ASSEMBLY (w/ Rear Air Conditioning System)
- Click here
REMOVE AIR CONDITIONING CONTROL ASSEMBLY (w/ Rear Cooler)
- Click here
REMOVE REAR COOLER SWITCH HOLE COVER (w/o Rear Cooler)
-
Remove the 4 screws.
-
Detach the 5 claws and remove the hole cover.
-
- Click here
REMOVE INSTRUMENT PANEL HOLE COVER
-
Remove the 2 screws.
-
Detach the 7 claws and remove the hole cover.
-
- Click here
REMOVE REAR CONSOLE BOX MOUNTING BRACKET (w/o Telematics Transceiver)
-
Remove the 4 screws and bracket.
-
- Click here
REMOVE CONSOLE COMPARTMENT DOOR SUB-ASSEMBLY
-
Remove the 6 screws and door.
-
- Click here
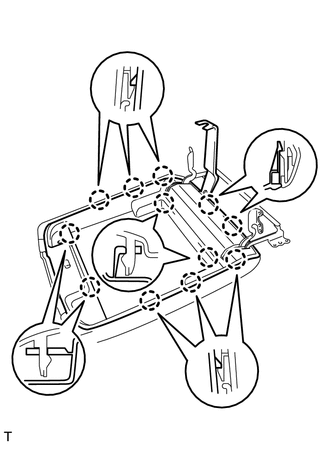
REMOVE CONSOLE COMPARTMENT DOOR LOCK SUB-ASSEMBLY
-
Remove the 12 screws, lower box and door lock.
-
- Click here
REMOVE CONSOLE COMPARTMENT DOOR HINGE SUB-ASSEMBLY
-
Using a moulding remover, detach the 12 claws and remove the inner door.
-
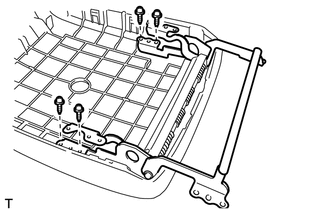
Remove the 4 screws and door hinge.
-
- Click here
REMOVE CONSOLE COMPARTMENT DOOR LOCK
-
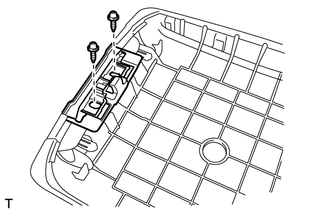
Remove the 2 screws and door lock.
-
- Click here
REMOVE COOLING BOX ASSEMBLY
-

Remove the 4 screws.
-
Detach the 10 claws and remove the cooling box.
-
- Click here
REMOVE AIR CONDITIONING AMPLIFIER ASSEMBLY
-
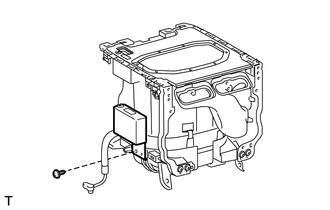
Disconnect the connector.
-
Remove the screw and amplifier.
-
- Click here
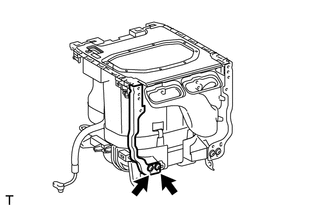
REMOVE COOLER CONTROL SWITCH SUB-ASSEMBLY
-
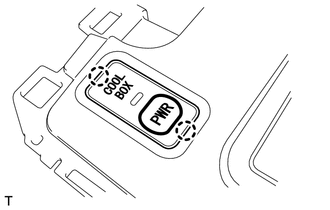
Detach the 2 claws.
-
Disconnect the connector and remove the switch.
-
- Click here
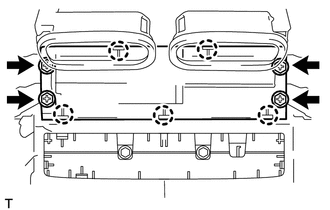
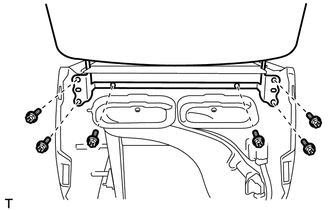
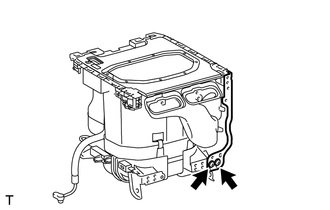
REMOVE NO. 2 COOLING BOX BRACKET
-
Remove the 2 screws and mounting bracket.
-
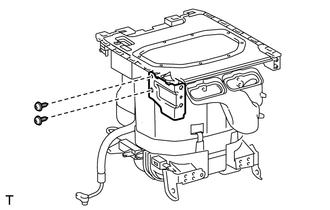
Remove the 2 screws and bracket.
-
- Click here
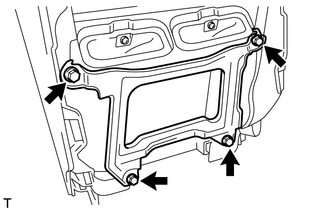
REMOVE COOLING BOX BRACKET
-
Remove the 2 screws and mounting bracket.
-
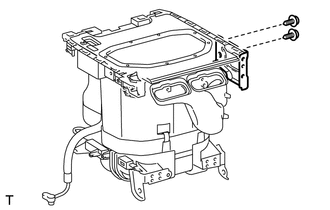
Remove the 2 screws and bracket.
-
- Click here
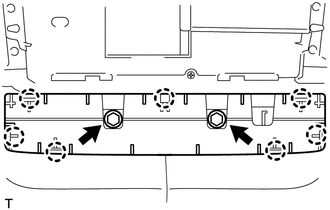
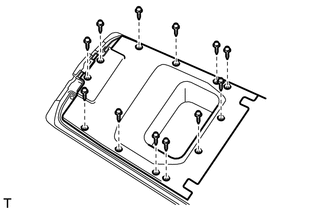
REMOVE COOLING BOX BASE
-
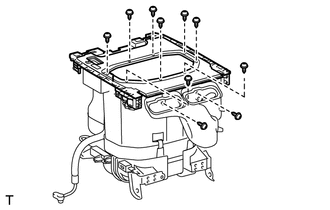
Remove the 10 screws and cooling box base.
-
- Click here
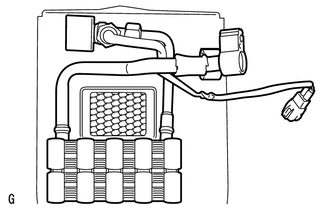
REMOVE COOLING UNIT CASE SUB-ASSEMBLY
-
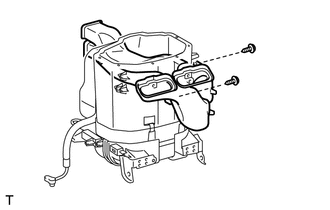
Remove the 2 screws and air duct from the case.
-
- Click here
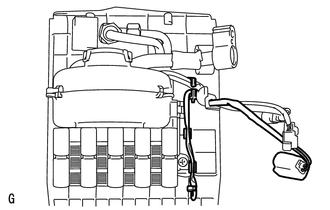
REMOVE LIQUID HOSE
-
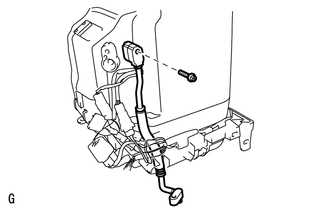
Remove the bolt and liquid hose.
-
Remove the O-ring from the liquid hose.
-
-
Click here
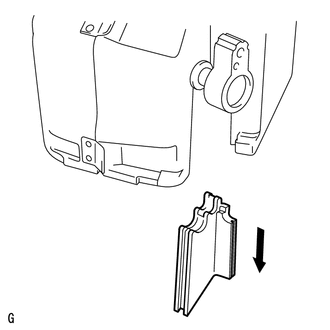
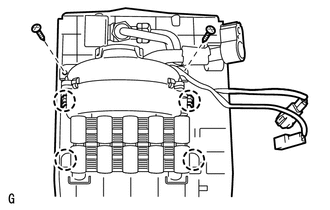
REMOVE LOWER COOLING UNIT CASE SUB-ASSEMBLY
-
Remove the screw.
-
Disconnect the 3 connectors.
-
Remove the 4 holding springs and lower cooling unit case.
-
- Click here
REMOVE UPPER COOLING UNIT CASE
-
Remove the cooling unit case.
-
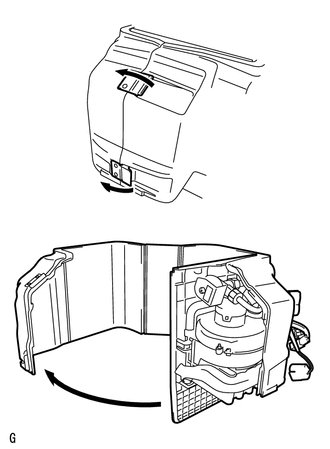
Detach the 2 hooks and open the case, as shown in the illustration.
-
- Click here
REMOVE NO. 3 COOLER THERMISTOR
-
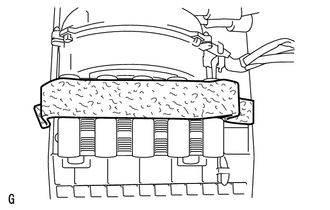
Remove the cool box insulator.
-
Remove the thermistor.
-
- Click here
REMOVE NO. 1 COOLER BLOWER MOTOR SUB-ASSEMBLY
-
Remove the 2 screws.
-
Detach the 4 claws and remove the blower motor.
-
- Click here
REMOVE NO. 2 COOLER EVAPORATOR SUB-ASSEMBLY
-
Remove the evaporator.
-