FRONT SEAT OUTER BELT ASSEMBLY(for Bench Seat Type) REMOVAL
CAUTION / NOTICE / HINT
Tech Tips
-
Use the same procedure for RHD and LHD vehicles.
-
The procedure listed below is for LHD vehicles.
-
Use the same procedure for the RH and LH sides.
-
The procedure listed below is for the LH side.
PROCEDURE
-
REMOVE FRONT SEAT ASSEMBLY RH
-
REMOVE FRONT DOOR SCUFF PLATE LH
-
REMOVE REAR STEP COVER
-
REMOVE REAR DOOR SCUFF PLATE LH
-
REMOVE CENTER PILLAR GARNISH COVER LH
-
REMOVE CENTER LOWER PILLAR GARNISH LH
Tech Tips
-
When installing the center lower pillar garnish, move the front seat and seatback to the foremost upright position.
-
After moving the front seat, disconnect the cable from the negative (-) battery terminal.
-
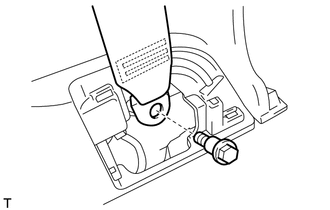
Remove the bolt and seat belt anchor.
-
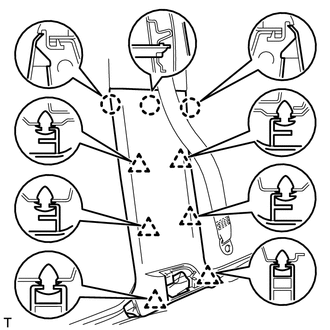
Detach the 3 claws and 6 clips, and remove the center lower pillar garnish LH.
-
-
REMOVE REAR ASSIST GRIP ASSEMBLY
-
REMOVE CENTER PILLAR GARNISH LH
-
REMOVE FRONT SEAT OUTER BELT ASSEMBLY LH
-
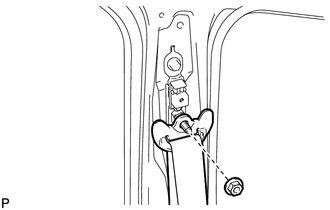
Remove the nut and shoulder anchor.
-
Remove the bolt and front seat outer belt assembly LH.
-
-
REMOVE FRONT SHOULDER BELT ANCHOR ADJUSTER ASSEMBLY
-
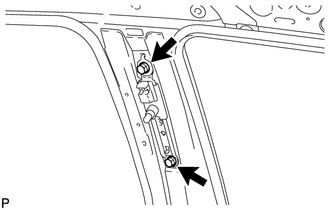
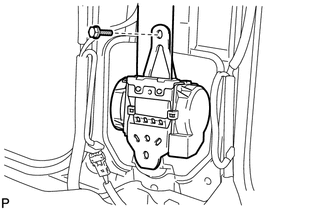
Remove the 2 bolts and front shoulder belt anchor adjuster assembly.
-
-
REMOVE FRONT SEAT OUTER LAP BELT SUB-ASSEMBLY
-

Remove the bolt and front seat outer lap belt sub-assembly.
-