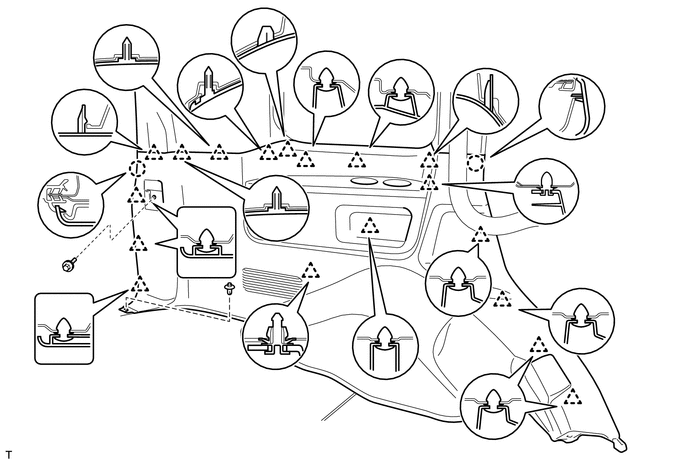
REAR NO. 1 SEAT OUTER BELT ASSEMBLY INSTALLATION

CAUTION / NOTICE / HINT
Tech Tips
-
Use the same procedure for the RH and LH sides.
-
The procedure listed below is for the LH side.
-
A bolt without a torque specification is shown in the standard bolt chart Click here.
PROCEDURE
-
INSTALL REAR SHOULDER BELT ANCHOR PLATE SUB-ASSEMBLY LH

-
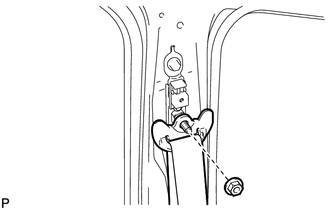
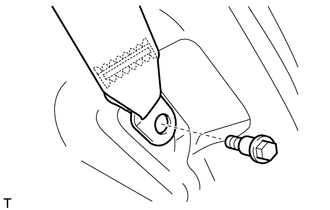
Align the anchor plate positioning hole with the claw, and install the anchor plate with the 2 bolts.
Tech Tips
First install the upper bolt, and then install the lower bolt.
- Torque:
- 42 N*m { 428 kgf*cm, 31 ft.*lbf }
-
-
INSTALL REAR NO. 1 SEAT OUTER BELT ASSEMBLY LH
Note
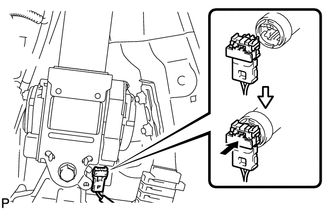
w/ Pretensioner:
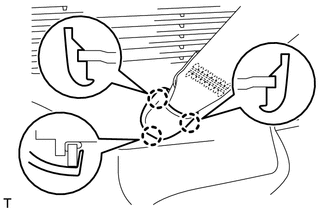
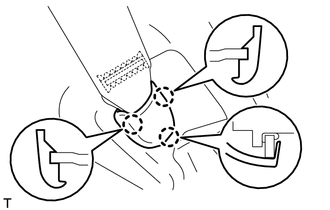
When installing the retractor, make sure the claws of the vehicle (labeled "a" in the illustration) only contact the installation areas of the retractor.
-
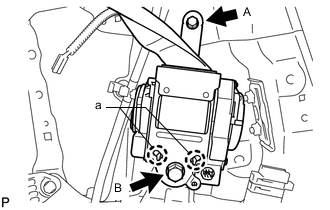
Align the claws with the seat belt positioning holes and install the retractor of the seat belt as shown in the illustration.
-
Install the seat belt with the 2 bolts.
Tech Tips
First install bolt A, and then install bolt B.
- Torque:
- for bolt A
- 8.5 N*m { 87 kgf*cm, 75 in.*lbf }
- for bolt B
- 42 N*m { 428 kgf*cm, 31 ft.*lbf }
-
w/ Pretensioner:
Connect the pretensioner connector as shown in the illustration.
-
Install the seat belt shoulder anchor with the nut.
- Torque:
- 42 N*m { 428 kgf*cm, 31 ft.*lbf }
-
-
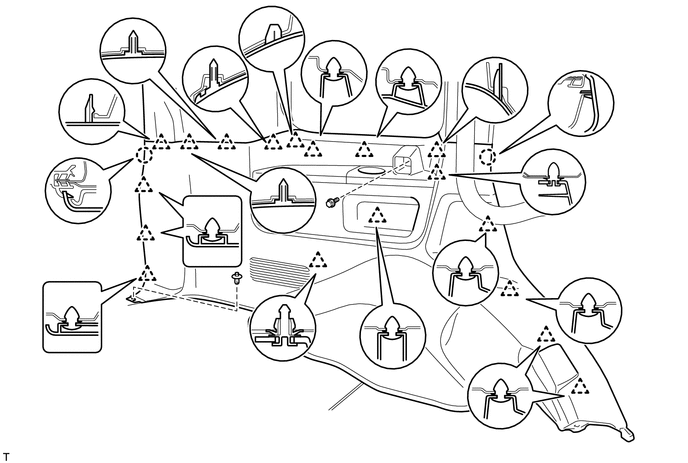
INSTALL REAR FRONT QUARTER TRIM PANEL ASSEMBLY LH
-
INSTALL FRONT QUARTER TRIM PANEL ASSEMBLY LH
Tech Tips
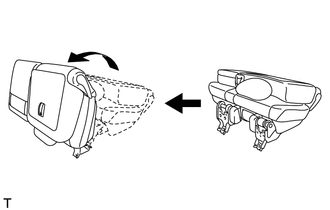
When installing the front quarter trim panel, operate the reclining adjuster release handle and move the No. 1 rear seat to the position shown in the illustration.
-
w/o Tonneau Cover:
-
w/o Rear Air Conditioning System:
Connect the rear seat lock control lever cable.
-
w/ Rear Air Conditioning System:
Connect the thermistor connector and rear seat lock control lever cable.
-
Attach the 18 clips and 2 claws to install the quarter trim panel.
-
Install the clip and bolt.
- Torque:
- 12 N*m { 122 kgf*cm, 9 ft.*lbf }
-
-
w/ Tonneau Cover:
-
Attach the 18 clips and 2 claws to install the quarter trim panel.
-
Install the screw and clip.
-
-
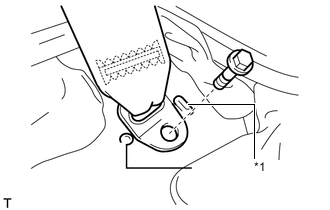
*1 Protruding Part w/ Rear No. 2 Seat, for LH side:
-
Install the rear No. 2 seat belt anchor LH with the bolt.
- Torque:
- 42 N*m { 428 kgf*cm, 31 ft.*lbf }
Note
Do not overlap the anchor part of the seat belt and protruding parts of the vehicle body.
-
-
w/ Rear No. 2 Seat, for RH side:
-
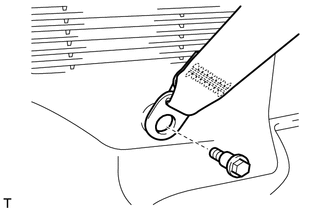
Install the rear No. 2 seat belt anchor with the bolt.
- Torque:
- 42 N*m { 428 kgf*cm, 31 ft.*lbf }
-
Attach the 3 claws to install the cover.
-
-
Install the rear No. 1 seat belt anchor with the bolt.
- Torque:
- 42 N*m { 428 kgf*cm, 31 ft.*lbf }
-
Attach the 3 claws to install the cover.
-
-
INSTALL REAR NO. 2 SEAT COVER BEZEL
-
INSTALL NO. 1 TONNEAU COVER HOLDER CAP (w/ Tonneau Cover)
-
INSTALL REAR DOOR SCUFF PLATE LH
-
INSTALL REAR STEP COVER
-
INSTALL REAR FLOOR MAT REAR SUPPORT PLATE
-
INSTALL REAR NO. 2 SEAT ASSEMBLY (w/ Rear No. 2 Seat)
-
Install the rear No. 2 seat assembly Click here.
-
-
INSTALL TONNEAU COVER ASSEMBLY
-
CONNECT CABLE TO NEGATIVE BATTERY TERMINAL
Note
When disconnecting the cable, some systems need to be initialized after the cable is reconnected Click here.
-
CHECK SRS WARNING LIGHT
-
Check the SRS warning light Click here.
-