WINCH UNIT DISASSEMBLY

PROCEDURE
-
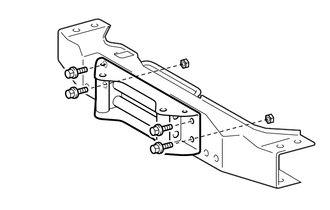
REMOVE WINCH MOTOR ASSEMBLY
-
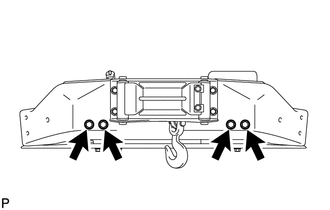
Remove the 4 bolts and member.
-
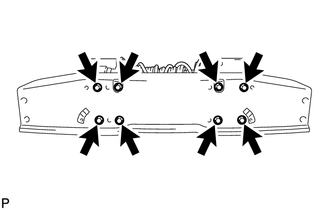
Remove the 8 bolts and winch base.
-
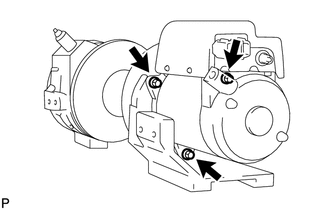
Remove the 3 bolts and winch motor.
-
-
REMOVE NO. 2 WINCH EARTH WIRE
-
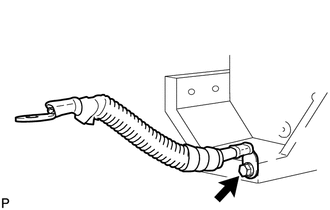
Remove the bolt and winch earth wire.
-
-
REMOVE WINCH ROLLER BRACKET ASSEMBLY
-
Remove the 2 nuts, 4 bolts and winch roller bracket.
-
-
REMOVE MAGNET SWITCH WINCH COVER
-
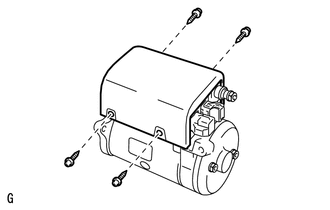
Remove the 4 screws and cover.
-
-
REMOVE WINCH MOTOR MAGNET SWITCH ASSEMBLY
-
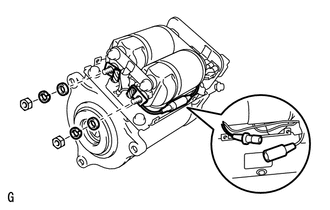
Disconnect the connector.
-
Remove the 2 nuts, 2 spring washers, 2 washers and wire harness.
-
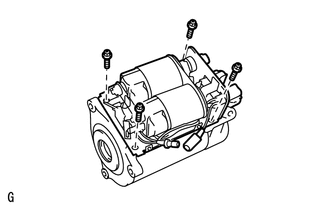
Remove the 4 bolts and magnet switch from the motor.
-
-
REMOVE WINCH MOTOR COMMUTATOR END FRAME
-
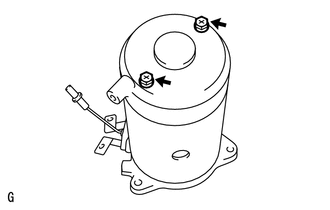
Remove the 2 bolts and commutator end frame.
-
-
REMOVE WINCH MOTOR O-RING
-
Remove the O-ring.
-
-
REMOVE WINCH MOTOR BRUSH
-
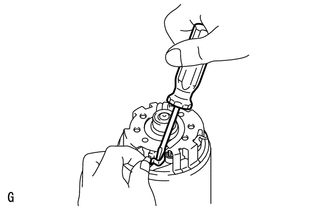
Using a screwdriver, pry the bush spring forward and pull the brush out of the holder.
-
Remove the bolt and brush from the brush holder.
Tech Tips
Use the same procedures to remove the 3 remaining brushes.
-
-
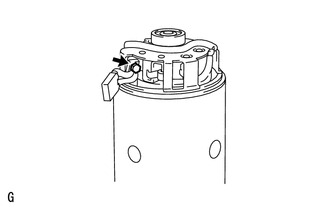
REMOVE WINCH MOTOR BRUSH HOLDER ASSEMBLY
-
Remove the brush holder in the direction of the arrow shown in the illustration.
-
-
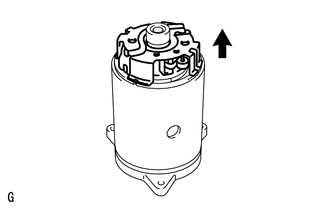
REMOVE WINCH MOTOR YOKE SUB-ASSEMBLY
-
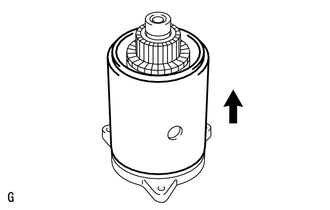
Remove the yoke in the direction of the arrow shown in the illustration.
-
-
REMOVE WINCH MOTOR ARMATURE SUB-ASSEMBLY
-
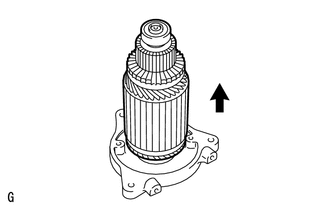
Remove the armature in the direction of the arrow shown in the illustration.
-
-
REMOVE NO. 1 WINCH MOTOR ARMATURE BEARING
-
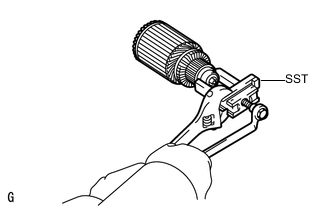
Using SST, remove the bearing.
- SST
- 09286-46011
-
-
REMOVE NO. 2 WINCH MOTOR ARMATURE BEARING
-
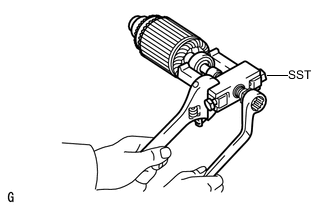
Using SST, remove the bearing.
- SST
- 09628-62011
-
-
REMOVE WINCH MOTOR BRUSH SPRING
-
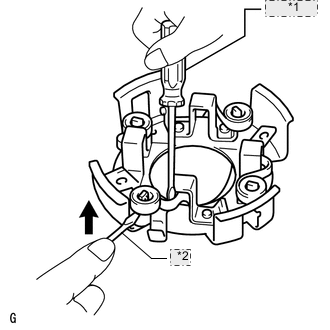
*1 Screwdriver A *2 Screwdriver B Insert a screwdriver, labeled A, as shown in the illustration and pry the spring forward, then move the spring in the direction of the arrow shown in the illustration with a screwdriver, labeled B, to remove it from the holder.
-