WINCH SYSTEM ON-VEHICLE INSPECTION
PROCEDURE
-
INSPECT REMOTE CONTROL SWITCH ASSEMBLY
-
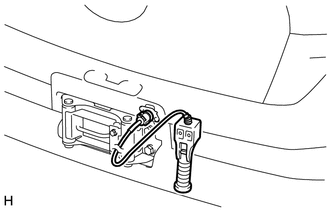
Connect the remote control switch connector.
-
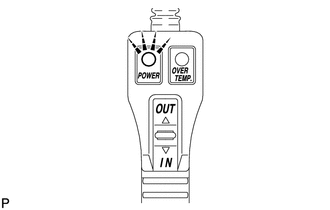
Turn the ignition switch on (IG) and check that the power indicator light illuminates.
-
Press the winch control switch, and check that the winch operates.
Note
Be careful not to tighten or strain the winch wire.
-
Turn the ignition switch off.
-
-
REMOVE FRONT BUMPER COVER
-
INSPECT OVERHEAT TEMPERATURE INDICATOR
-
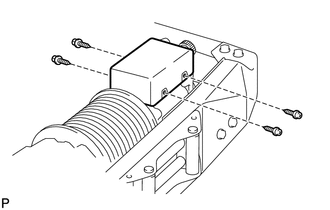
Remove the 4 screws and cover.
-
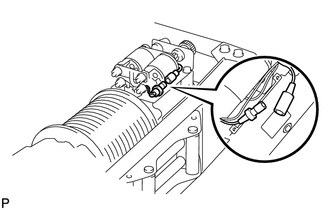
Disconnect the motor relay connector.
-
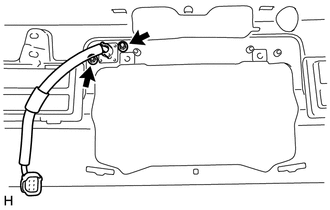
Remove the 2 nuts.
-
Pull the bumper side winch control wire out of the bumper.
-
Connect the bumper side winch control wire connector to the vehicle side winch control wire connector.
-
Connect the bumper side winch control wire connector to the winch control switch connector.
-
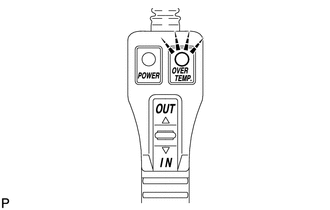
Turn the ignition switch on (IG) and check that the overheat temperature indicator light illuminates and the buzzer sounds.
-
Turn the ignition switch off.
-
Disconnect the bumper side winch control wire connector from the winch control switch connector.
-
Disconnect the bumper side winch control wire connector from the vehicle side winch control wire connector.
-
Pass the bumper side winch control wire through the bumper.
-
Install the 2 nuts.
-
Connect the motor relay connector.
-
Install the cover with the 4 screws.
-
-
INSTALL FRONT BUMPER COVER