REAR BRAKE INSTALLATION
CAUTION / NOTICE / HINT
Tech Tips
-
Use the same procedures for the LH side and RH side.
-
The procedures listed below are for the LH side.
PROCEDURE
-
INSTALL REAR DISC
-
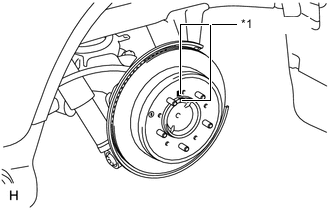
*1 Matchmark Align the matchmarks, and then install the rear disc.
Tech Tips
When replacing the rear disc with a new one, select the installation position where the rear disc has the minimum runout.
-
-
INSTALL PARKING BRAKE SHOE ADJUSTING HOLE PLUG
-
INSTALL REAR DISC BRAKE CYLINDER MOUNTING LH
-
Install a new boot and a new cylinder slide bush to the rear disc brake cylinder mounting.
Note
Install the boot securely to the grooves of the rear disc brake cylinder mounting.
-
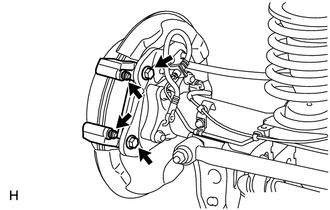
Install the rear disc brake cylinder mounting with 2 new bolts.
- Torque:
- 95 N*m { 969 kgf*cm, 70 ft.*lbf }
-
-
INSTALL REAR NO. 1 DISC BRAKE PAD SUPPORT PLATE
Note
-
The pad support plates can be reused if they are securely attached to the cylinder mounting. Therefore, do not remove the pad support plates from the cylinder mounting.
-
If a pad support plate is removed, replace it with a new one that is supplied with double-sided tape already attached.
-
Make sure to clean the cylinder mounting contact surface before attaching the pad support plates.
-
Clean the cylinder mounting surface where the pad support plates will be attached.
-
Remove the peeling paper from the double-sided tape, and install 2 new pad support plates to the cylinder mounting.
-
-
INSTALL REAR NO. 2 DISK BRAKE PAD SUPPORT PLATE
Note
-
The pad support plates can be reused if they are securely attached to the cylinder mounting. Therefore, do not remove the pad support plates from the cylinder mounting.
-
If a pad support plate is removed, replace it with a new one that is supplied with double-sided tape already attached.
-
Make sure to clean the cylinder mounting contact surface before attaching the pad support plates.
-
Clean the cylinder mounting surface where the pad support plates will be attached.
-
Remove the peeling paper from the double-sided tape, and install 2 new pad support plates to the cylinder mounting.
-
-
INSTALL REAR DISC BRAKE PAD WEAR INDICATOR PLATE
-
Install the pad wear indicator plate to the inner side disc brake pad.
-
-
INSTALL REAR DISC BRAKE ANTI-SQUEAL SHIM KIT
-
Install the anti-squeal shims to each brake pad.
Note
There should be no oil or grease on the friction surfaces of the brake pads and the rear disc.
-
-
INSTALL REAR DISC BRAKE PAD
Note
-
When installing the pads, make sure that the No. 1 and No. 2 disc brake pad support plates are securely attached to the cylinder mounting. The pad support plates are attached to the cylinder mounting with double-sided tape.
-
If a pad support plate is not securely attached to the cylinder mounting, replace it with a new one.
-
Install the 2 disc brake pads to the disc brake cylinder mounting.
-
-
INSTALL REAR DISC BRAKE CYLINDER ASSEMBLY LH
-
Apply lithium soap base glycol grease to the sliding part of the 2 cylinder slide pins.
-
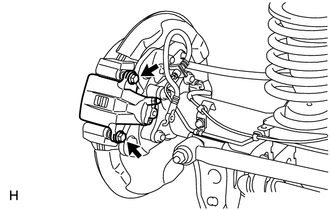
Install the cylinder with the 2 cylinder slide pins.
- Torque:
- 88 N*m { 897 kgf*cm, 65 ft.*lbf }
-
-
CONNECT REAR FLEXIBLE HOSE LH
-
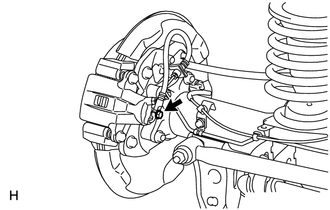
Install a new gasket and connect the flexible hose with the new union bolt.
- Torque:
- 30 N*m { 306 kgf*cm, 22 ft.*lbf }
-
-
BLEED BRAKE LINE
-
ADJUST PARKING BRAKE LEVER TRAVEL
-
INSTALL PARKING BRAKE SHOE ADJUSTING HOLE PLUG
-
INSTALL REAR WHEEL
- Torque:
- for Aluminum Wheel
- 131 N*m { 1336 kgf*cm, 97 ft.*lbf }
- for Steel Wheel
- 209 N*m { 2131 kgf*cm, 154 ft.*lbf }