FRONT UPPER SUSPENSION ARM REMOVAL

CAUTION / NOTICE / HINT
Tech Tips
-
Use the same procedures for the RH side and LH side.
-
The procedures listed below are for the LH side.
PROCEDURE
-
REMOVE STABILIZER CONTROL VALVE PROTECTOR (w/ KDSS)
-
OPEN STABILIZER CONTROL WITH ACCUMULATOR HOUSING SHUTTER VALVE (w/ KDSS)
-
REMOVE FRONT WHEEL
-
REMOVE FRONT HEIGHT CONTROL SENSOR SUB-ASSEMBLY LH (w/ Active Height Control)
-
DISCONNECT SKID CONTROL SENSOR WIRE
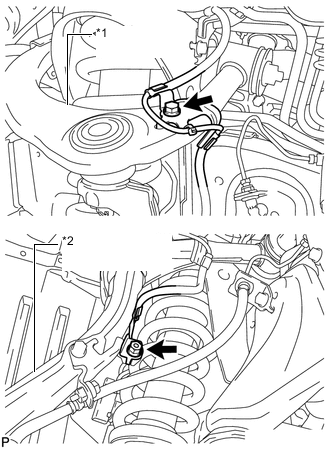
*1 Upper Arm *2 Steering Knuckle
-
Remove the bolt and nut, and disconnect the sensor wire from the steering knuckle and suspension upper arm.
-
-
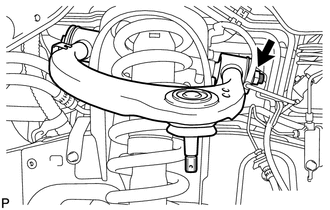
DISCONNECT STEERING KNUCKLE LH
-
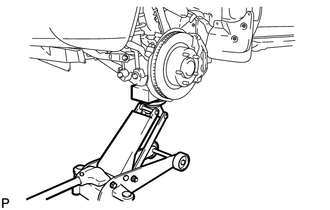
Support the front suspension lower arm LH with a jack.
-
Remove the clip and the nut.
-
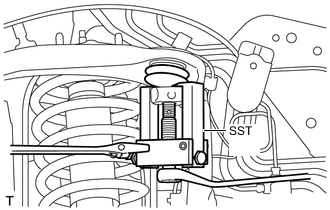
Using SST, disconnect the upper ball joint from the steering knuckle.
- SST
- 09628-62011
Note
Do not damage the ball joint dust cover.
-
-
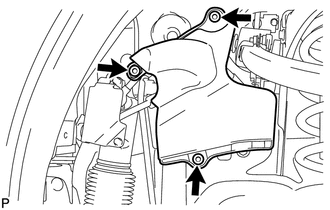
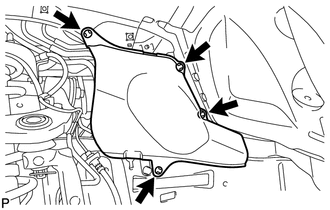
REMOVE FRONT FENDER APRON TRIM PACKING B (w/ KDSS)
-
Using a clip remover, remove the 3 clips and apron trim packing.
-
-
REMOVE FRONT FENDER APRON TRIM PACKING B (w/o KDSS)
-
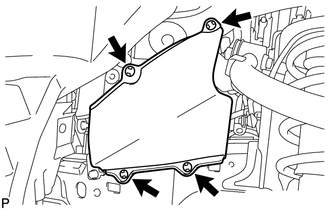
Using a clip remover, remove the 4 clips and apron trim packing.
-
-
REMOVE FRONT FENDER APRON TRIM PACKING D
-
Using a clip remover, remove the 4 clips and apron trim packing.
-
-
REMOVE FRONT SUSPENSION UPPER ARM ASSEMBLY
-
Remove the nut, bolt, 2 washers and suspension upper arm.
-