MANUAL TRANSMISSION UNIT DISASSEMBLY

PROCEDURE
-
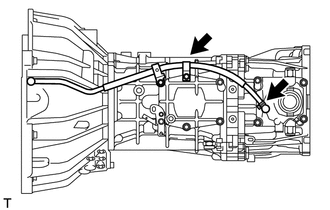
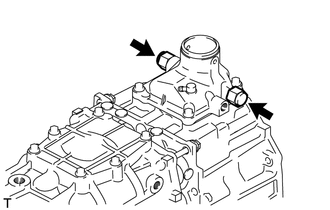
REMOVE TRANSMISSION BREATHER SUB-ASSEMBLY (for 1GR-FE)
-
Loosen the hose clamp, and remove the breather hose.
-
-
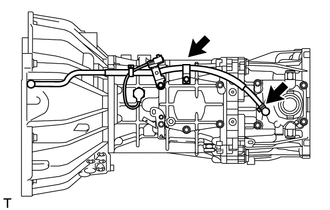
REMOVE TRANSMISSION BREATHER SUB-ASSEMBLY (for 1VD-FTV)
-
Remove the wire harness clamp.
-
Loosen the hose clamp, and remove the breather hose.
-
-
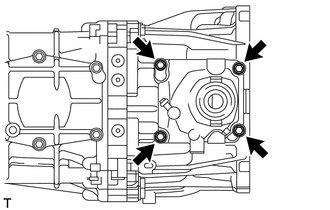
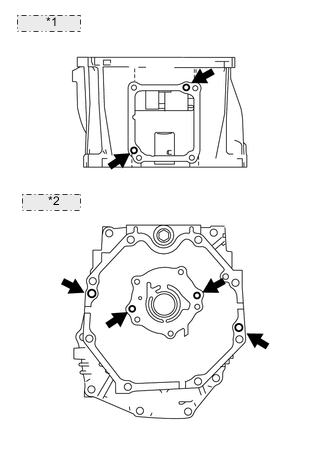
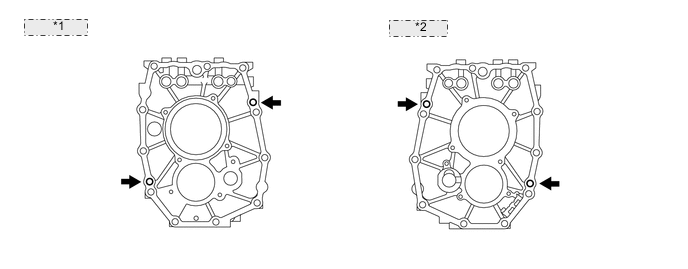
REMOVE CLUTCH HOUSING
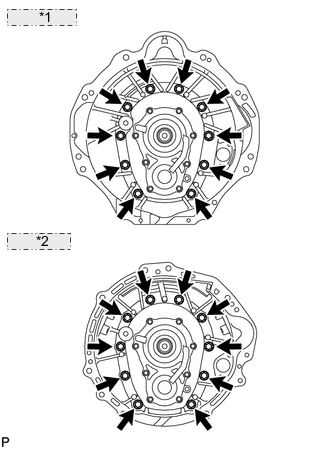
*1 for 1VD-FTV: *2 for 1GR-FE:
-
Remove the 10 bolts and clutch housing.
-
-
REMOVE FILLER PLUG
-
Remove the filler plug.
-
Remove the gasket from the filler plug.
-
-
REMOVE DRAIN PLUG
-
Remove the drain plug.
-
Remove the gasket from the drain plug.
-
-
REMOVE MANUAL TRANSMISSION CASE PLUG
-
Using a T55 "TORX" socket wrench, remove the transmission case plug.
-
Remove the gasket from the transmission case plug.
-
-
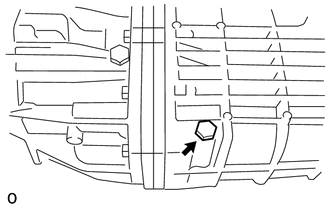
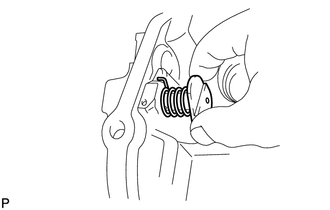
REMOVE BACK-UP LIGHT SWITCH ASSEMBLY
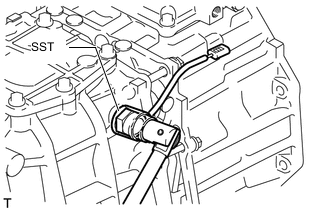
-
Disconnect the wire harness clamp.
-
Using SST, remove the back-up light switch and gasket.
- SST
- 09817-16011
-
-
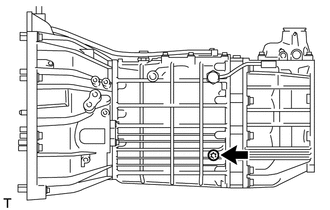
REMOVE SHIFT POSITION SWITCH (for 1VD-FTV)

-
Disconnect the wire harness clamp.
-
Using SST, remove the shift position switch and gasket.
- SST
- 09817-16011
-
-
REMOVE CONTROL SHAFT COVER
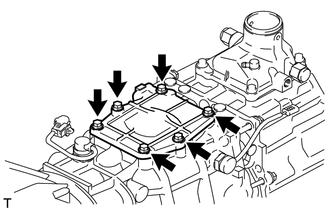
-
Remove the 6 bolts and control shaft cover.
-
-
REMOVE REVERSE RESTRICT PIN ASSEMBLY
-
Remove the 2 restrict pins.
-
-
REMOVE FLOOR SHIFT CONTROL SHIFT LEVER RETAINER SUB-ASSEMBLY
-
Remove the 4 bolts.
-
Using a plastic-faced hammer, remove the floor shift control shift lever retainer.
-
-
REMOVE NO. 1 REVERSE RESTRICT PIN
-
Remove the slotted pin.
-
Remove the No. 1 reverse restrict pin and spring.
-
-
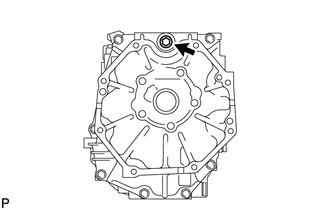
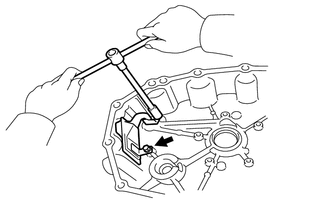
REMOVE TRANSMISSION OIL PUMP COVER
-
Remove the 5 bolts and oil pump cover.
-
Using a magnet hand, remove the 2 pins.
-
Remove the oil pump cover O-ring from the oil pump cover.
-
-
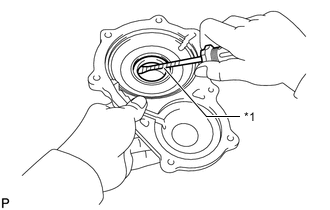
REMOVE TRANSMISSION OIL PUMP COVER OIL SEAL

*1 Protective Tape
-
Using a screwdriver, pry out the oil pump cover oil seal.
Note
Be careful not to damage the oil seal and oil pump cover contact surfaces.
Tech Tips
Tape the screwdriver tip before use.
-
-
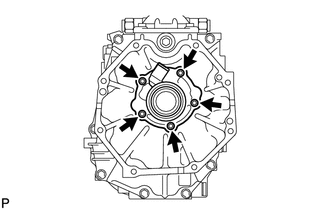
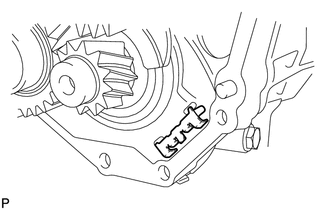
REMOVE FRONT BEARING RETAINER (MTM)
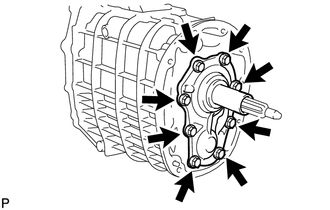
-
Remove the 8 bolts and front bearing retainer.
-
-
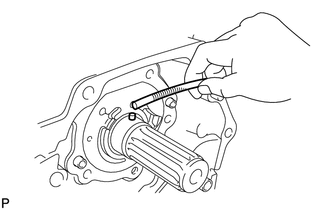
REMOVE TRANSMISSION FRONT BEARING RETAINER OIL SEAL
*1 Protective Tape
-
Using a screwdriver, pry out the oil seal.
Note
Be careful not to damage the oil seal and front bearing retainer contact surfaces.
Tech Tips
Tape the screwdriver tip before use.
-
-
REMOVE SHIFT AND SELECT LEVER SHAFT
-
Using a 14 mm hexagon wrench, remove the interlock hole plug.
-
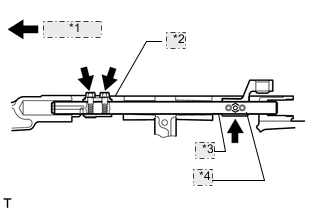
*1 Front Side *2 Shift And Select Lever *3 Shift And Select Lever Shaft *4 Shift Lever Housing Remove the 3 bolts, shift and select lever shaft, shift and select lever and shift lever housing.
-
-
REMOVE TRANSFER ADAPTER SUB-ASSEMBLY
-
Remove the 11 bolts and transfer adapter.
-
-
REMOVE TRANSFER ADAPTER STRAIGHT PIN AND RING PIN
*1 Upper Side: *2 Rear Side:
-
Remove the 4 straight pins from the transfer adapter.
-
Remove the 2 ring pins from the transfer adapter.
-
-
REMOVE TRANSFER ADAPTER PLUG

-
Using a T40 "TORX" socket wrench, remove the transfer adapter plug.
-
-
REMOVE MANUAL TRANSMISSION OIL STRAINER SUB-ASSEMBLY
-
Remove the 2 bolts and oil strainer.
-
Remove the O-ring from the oil strainer.
-
-
REMOVE TRANSMISSION MAGNET
-
Remove the transmission magnet.
-
-
REMOVE NO. 2 REVERSE IDLER THRUST WASHER
-
Remove the thrust washer.
-
-
REMOVE REVERSE IDLER GEAR
-
Remove the reverse idler gear.
-
-
REMOVE REVERSE IDLER GEAR BUSH OR BEARING
-
Remove the bearing.
-
-
REMOVE REVERSE IDLER THRUST WASHER
-
Remove the thrust washer.
-
-
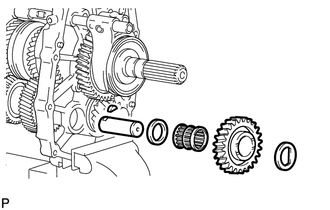
REMOVE REVERSE IDLER GEAR SHAFT
-
Remove the reverse idler gear shaft.
-
-
REMOVE REVERSE IDLER GEAR SHAFT WOODRUFF KEY
-
Remove the woodruff key from the reverse idler gear shaft.
-
-
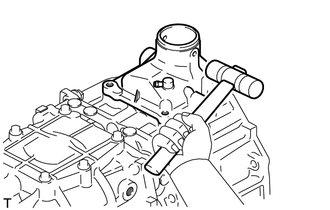
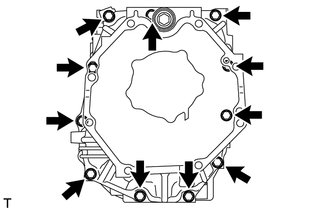
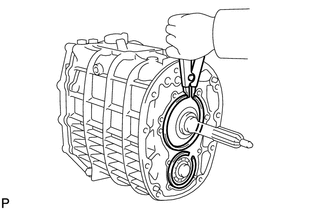
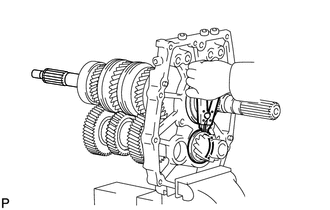
REMOVE MANUAL TRANSMISSION CASE SUB-ASSEMBLY
-
Using a snap ring expander, remove the 2 snap rings from the input shaft and counter gear.
-
Using a brass bar and hammer, carefully tap the transmission case.
-
Remove the transmission case from the intermediate plate.
-
-
REMOVE NO. 1 OIL RECEIVER PIPE (MTM)
-
Remove the 2 bolts and oil receiver pipe from the transmission case.
-
-
REMOVE TRANSFER ADAPTER STRAIGHT PIN
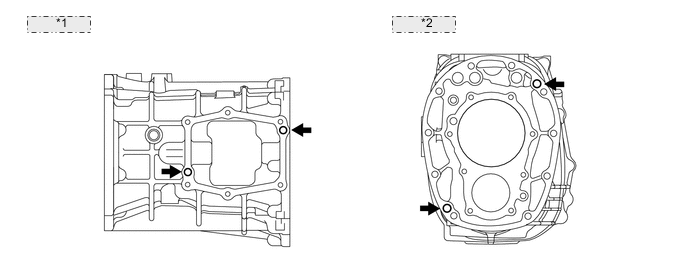
*1 Upper Side: *2 Front Side:
-
Remove the 4 straight pins from the transmission case.
-
-
REMOVE INTERMEDIATE PLATE STRAIGHT PIN
*1 Front Side: *2 Rear Side:
-
Remove the 4 straight pins from the intermediate plate.
-
-
REMOVE MANUAL TRANSMISSION CASE RECEIVER
-
Remove the 3 bolts and oil receiver from the intermediate plate.
-
-
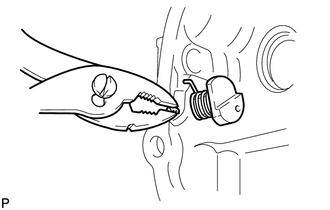
REMOVE SHIFT DETENT BALL PLUG

-
Using a T40 "TORX" socket wrench, remove the 4 ball plugs.
-
Using a magnet hand, remove the 4 springs and 4 balls.
-
-
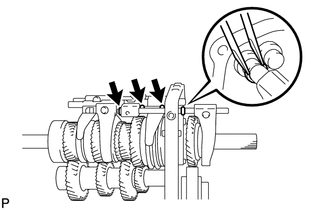
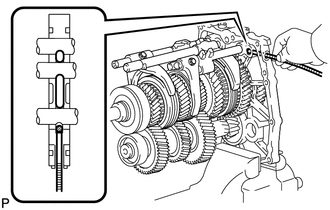
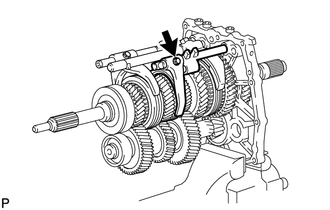
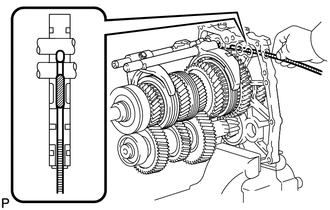
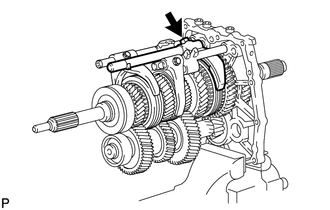
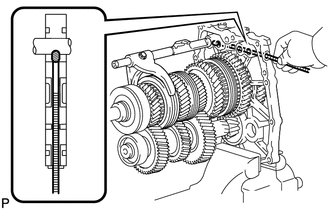
REMOVE SHIFT FORK SHAFT SNAP RING
-
Using 2 screwdrivers and a hammer, tap out the 4 snap rings.
Tech Tips
Use a piece of cloth to prevent the snap ring from flying off.
-
-
REMOVE NO. 4 GEAR SHIFT FORK SHAFT

-
Remove the No. 4 gear shift fork set bolt.
-
Remove the No. 4 gear shift fork shaft and 2 balls.
-
-
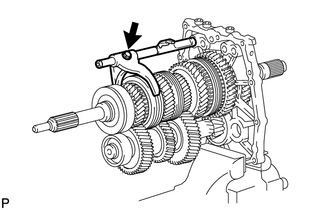
REMOVE REVERSE SHIFT FORK
-
Remove the reverse shift fork.
-
-
REMOVE NO. 3 GEAR SHIFT FORK SHAFT
-
Using a magnet hand, remove the ball.
-
Remove the No. 3 gear shift fork set bolt.
-
Remove the No. 3 shift gear fork shaft and reverse shift head.
-

Using a magnet hand, remove the interlock pin from the No. 3 gear shift fork shaft.
-
-
REMOVE NO. 3 GEAR SHIFT FORK
-
Remove the No. 3 gear shift fork.
-
-
REMOVE NO. 1 GEAR SHIFT FORK SHAFT
-
Using a magnet hand, remove the interlock pin.
-
Remove the No. 1 gear shift fork set bolt.
-
Remove the No. 1 gear shift fork shaft.
-
Using a magnet hand, remove the interlock pin from the No. 1 gear shift fork shaft.
-
-
REMOVE NO. 1 GEAR SHIFT FORK
-
Remove the No. 1 gear shift fork.
-
-
REMOVE NO. 2 GEAR SHIFT FORK SHAFT
-
Using a magnet hand, remove the interlock pin.
-
Remove the No. 2 gear shift fork set bolt.
-
Remove the No. 2 gear shift fork shaft.
-
-
REMOVE NO. 2 GEAR SHIFT FORK
-
Remove the No. 2 gear shift fork.
-
-
REMOVE NO. 3 TRANSMISSION CLUTCH HUB SHAFT SNAP RING
-

*a Protective Tape Using 2 screwdrivers and a hammer, tap out the snap ring.
Note
-
Do not damage the output shaft.
-
Use a piece of cloth to prevent the snap ring from flying off.
Tech Tips
Tape the screwdriver tip before use.
-
-
-
REMOVE NO. 1 TRANSMISSION HUB SLEEVE
-
Remove the No. 1 transmission hub sleeve from the No. 4 transmission clutch hub.
-
-
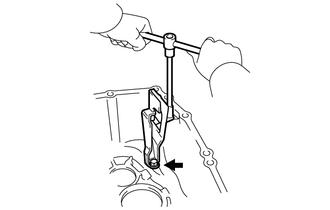
REMOVE REVERSE GEAR
-
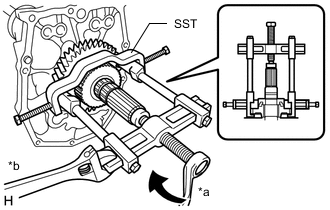
*a Turn *b Hold Using SST, remove the reverse gear, reverse synchronizer ring set and No. 4 transmission clutch hub from the output shaft.
- SST
- 09950-40011 ( 09951-04020, 09952-04010, 09953-04010, 09954-04020, 09955-04021, 09957-04010, 09958-04011 )
- 09950-60010 ( 09951-00300 )
-
-
REMOVE NO. 4 TRANSMISSION CLUTCH HUB
-
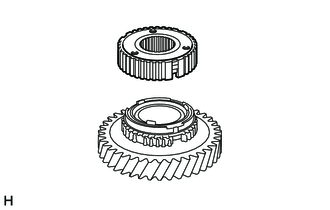
Remove the transmission clutch hub from the reverse gear.
-
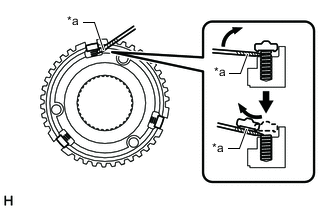
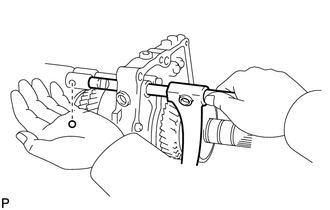
*a Protective Tape Using a screwdriver, remove the 3 shifting keys and 3 springs from the No. 4 transmission clutch hub.
Note
-
Do not drop the shifting key.
-
Do not damage the No. 4 transmission clutch hub and spring.
Tech Tips
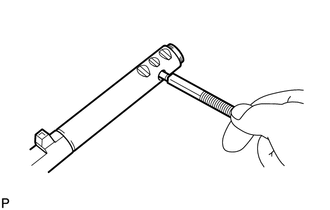
Push down the spring as shown in the illustration and remove the shifting key.
-
-
-
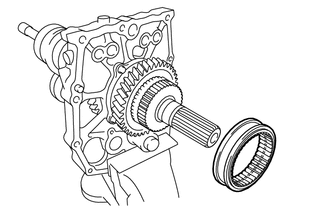
REMOVE REVERSE SYNCHRONIZER RING SET
-
Remove the reverse synchronizer ring set from the reverse gear.
-
-
REMOVE REVERSE GEAR BEARING
-
Remove the reverse gear bearing.
-
-
REMOVE OUTPUT SHAFT REAR BEARING(MTM) RETAINER
-
Remove the 4 bolts and rear bearing retainer.
-
-
REMOVE COUNTER GEAR
-
Using a snap ring expander, remove the snap ring.
-

Using SST, remove the outer race.
- SST
- 09950-40011 ( 09951-04020, 09952-04010, 09953-04030, 09954-04020, 09955-04011, 09957-04010, 09958-04011 )
Note
Do not drop the counter gear. Hold the front side of the counter gear when removing the bearing outer race.
-
Using a screwdriver, remove the center bearing and counter gear.
-
-
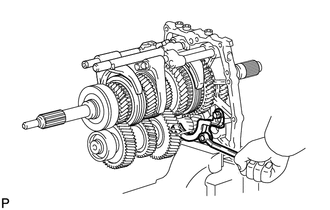
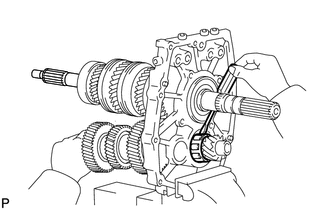
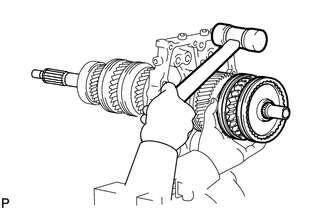
REMOVE INPUT SHAFT ASSEMBLY
-
Remove the input shaft from the output shaft.
Note
Do not drop the input shaft bearing.
-
-
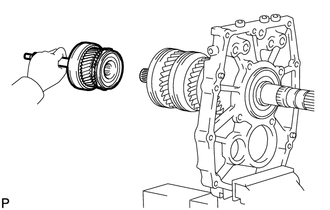
REMOVE NO. 2 SYNCHRONIZER RING
-
Remove the No. 2 synchronizer ring from the input shaft.
-
-
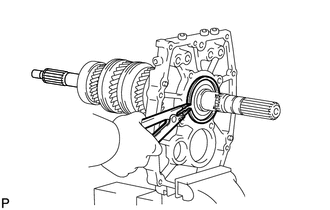
REMOVE OUTPUT SHAFT BEARING SHAFT SNAP RING
-
Using a snap ring expander, remove the snap ring.
-
-
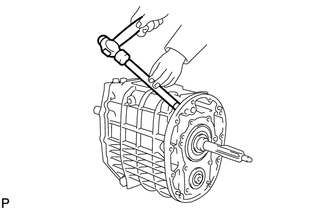
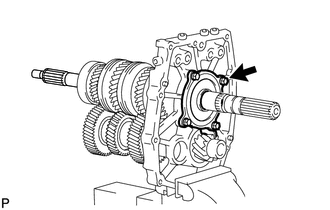
REMOVE OUTPUT SHAFT ASSEMBLY
-
Remove the output shaft from the intermediate plate by pulling on the output shaft and tapping on the intermediate plate with a plastic-faced hammer.
-