CLEARANCE WARNING BUZZER REMOVAL
CAUTION / NOTICE / HINT
Tech Tips
-
Use the same procedure for RHD and LHD vehicles.
-
The procedure listed below is for LHD vehicles.
PROCEDURE
-
REMOVE INSTRUMENT SIDE PANEL LH
-
REMOVE NO. 1 INSTRUMENT CLUSTER FINISH PANEL GARNISH
-
REMOVE NO. 2 INSTRUMENT PANEL FINISH PANEL CUSHION
-
REMOVE LOWER INSTRUMENT PANEL PAD SUB-ASSEMBLY LH
-
REMOVE NO. 2 INSTRUMENT CLUSTER FINISH PANEL GARNISH
-
REMOVE NO. 1 INSTRUMENT PANEL UNDER COVER SUB-ASSEMBLY (w/ Floor Under Cover)
-
REMOVE NO. 1 LOWER INSTRUMENT PANEL FINISH PANEL
-
REMOVE NO. 1 SWITCH HOLE BASE
-
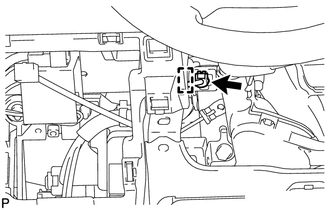
REMOVE NO. 1 CLEARANCE WARNING BUZZER
-
Disconnect the connector.
-
Using a clip remover, detach the clip and remove the No. 1 clearance warning buzzer.
-