RADIATOR REMOVAL
PROCEDURE
-
REMOVE UPPER RADIATOR SUPPORT SEAL
-
REMOVE RADIATOR GRILLE
-
REMOVE FRONT BUMPER COVER
-
REMOVE TRANSMISSION OIL COOLER AIR DUCT
-
Remove the 4 bolts and oil cooler air duct.
-
-
DISCONNECT RADIATOR SIDE DEFLECTOR LH
-
Using a clip remover, remove the 4 clips and disconnect the side deflector.
-
-
REMOVE FRONT FENDER SPLASH SHIELD SUB-ASSEMBLY LH
-
REMOVE FRONT FENDER SPLASH SHIELD SUB-ASSEMBLY RH
-
REMOVE NO. 1 ENGINE UNDER COVER SUB-ASSEMBLY
-
DRAIN ENGINE COOLANT
-
REMOVE V-BANK COVER SUB-ASSEMBLY
-
REMOVE AIR CLEANER HOSE ASSEMBLY
-
REMOVE NO. 1 RADIATOR HOSE
-
REMOVE NO. 2 RADIATOR HOSE
-
REMOVE FAN SHROUD
-
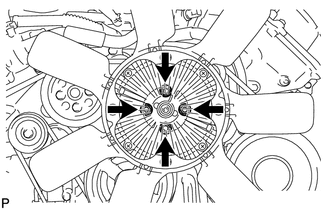
Loosen the 4 nuts holding the fluid coupling fan.
-
Remove the fan and generator V-belt Click here.
-
Disconnect the reservoir hose from the upper radiator tank.
-
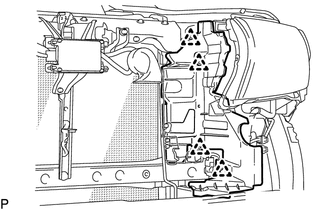
Detach the claw to open the flexible hose clamp.
-
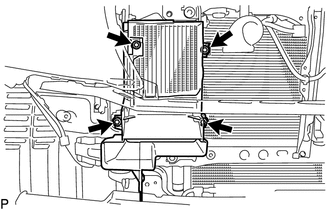
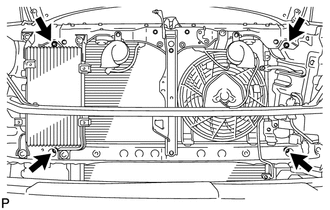
Remove the 2 bolts and disconnect the oil cooler tube from the fan shroud.
-
Remove the 2 bolts holding the fan shroud.
-
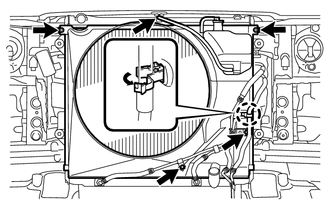
Remove the 4 nuts of the fluid coupling fan, and then remove the shroud together with the coupling fan.
Note
Be careful not to damage the radiator core.
-
Remove the fan pulley.
-
-
REMOVE RADIATOR ASSEMBLY
-
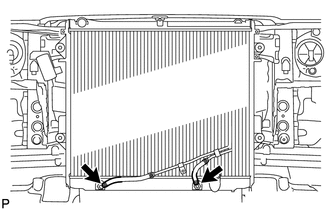
Disconnect the 2 oil cooler hoses.
-
Remove the 4 bolts and radiator.
-