EXHAUST PIPE(w/ DPF) REMOVAL
CAUTION / NOTICE / HINT
CAUTION:
-
Wear protective gloves and protective glasses when removing the exhaust pipe.
-
The exhaust pipe is extremely hot immediately after the engine has stopped.
-
Confirm that the exhaust pipe has cooled down before removing it.
PROCEDURE
-
REMOVE AIR FUEL RATIO SENSOR
-
REMOVE FRONT FENDER APRON SEAL REAR RH
-
REMOVE FRONT FENDER APRON SEAL REAR LH
-
REMOVE NO. 2 ENGINE UNDER COVER
-
Remove the 6 bolts and No. 2 engine under cover.
-
-
REMOVE TAILPIPE ASSEMBLY
-
Remove the bolt, clamp and gasket.
-
Disconnect the tailpipe from the 2 exhaust pipe supports.
-
-
REMOVE CENTER EXHAUST PIPE ASSEMBLY
-
Remove the 4 bolts and 2 compression springs.
-
Disconnect the center exhaust pipe from the 3 exhaust pipe supports.
-
Remove the gasket from the No. 5 exhaust pipe and front exhaust pipe.
-
-
REMOVE FRONT EXHAUST PIPE ASSEMBLY
-
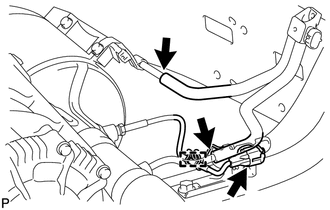
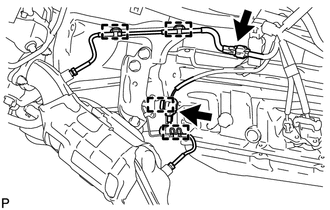
Disconnect the 2 air hoses.
-
Disconnect the exhaust gas temperature sensor connector and detach the clamp.
-
Remove the 3 nuts and front exhaust pipe.
-
Remove the gasket.
-
-
REMOVE NO. 5 EXHAUST PIPE ASSEMBLY
-
Remove the 2 nuts and No. 5 exhaust pipe.
-
Remove the gasket.
-
-
REMOVE FRONT NO. 2 EXHAUST PIPE ASSEMBLY
-
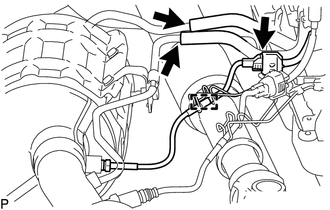
Disconnect the 2 air hoses.
-
Disconnect the exhaust gas temperature sensor connector and detach the clamp.
-
Remove the 3 nuts and front No. 2 exhaust pipe.
-
Remove the gasket.
-
-
REMOVE NO. 4 EXHAUST GAS TEMPERATURE SENSOR
-
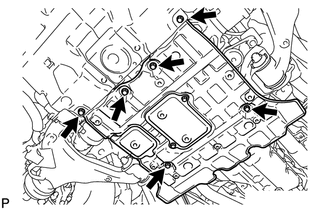
REMOVE MONOLITHIC CONVERTER ASSEMBLY RH
-
Disconnect the 2 exhaust gas temperature sensor connectors and detach the 4 clamps.
-
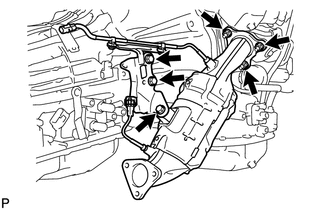
Remove the 3 bolts and manifold stay.
-
Remove the 3 nuts and monolithic converter RH.
-
Remove the gasket from the turbocharger.
-
-
REMOVE FRONT PROPELLER SHAFT ASSEMBLY
-
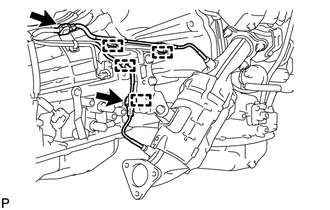
REMOVE MONOLITHIC CONVERTER ASSEMBLY LH
-
Disconnect the 2 exhaust gas temperature sensor connectors and detach the 4 clamps.
-
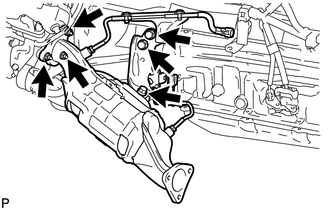
Remove the 3 bolts and No. 2 manifold stay.
-
Remove the 3 nuts and monolithic converter LH.
-
Remove the gasket from the turbocharger.
-
-
REMOVE NO. 3 EXHAUST GAS TEMPERATURE SENSOR
-
REMOVE NO. 2 EXHAUST GAS TEMPERATURE SENSOR
-
REMOVE EXHAUST GAS TEMPERATURE SENSOR