NAME PLATE REMOVAL
CAUTION / NOTICE / HINT
Tech Tips
When removing the name plates or emblem, heat the vehicle body and name plates or emblem using a heat light.
| Item | Temperature |
|---|---|
| Vehicle Body | 40 to 60°C (104 to 140°F) |
| Name Plate or Emblem | 20 to 30°C (68 to 86°F) |
Note
Do not heat the vehicle body, name plates or emblem excessively.
PROCEDURE
-
REMOVE SYMBOL EMBLEM
-
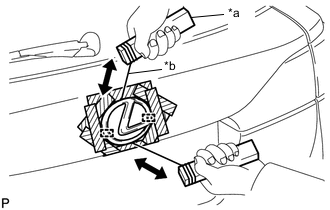
Text in Illustration *a Wooden Block *b Piano Wire 
Protective Tape Apply protective tape around the symbol emblem as shown in the illustration.
-
Insert a piano wire between the vehicle body and symbol emblem.
-
Tie objects that can serve as handles (for example, wooden blocks) to both wire ends.
-
Pull the piano wire to separate the double-sided tape that holds the symbol emblem to the vehicle body.
Note
Be careful not to damage the vehicle body.
-
Disengage the 2 pins to remove the symbol emblem.
-
-
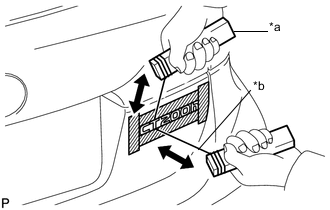
REMOVE NO. 1 BACK DOOR NAME PLATE
-

Text in Illustration *a Wooden Block *b Piano Wire Protective Tape Apply protective tape around the No. 1 back door name plate as shown in the illustration.
-
Insert a piano wire between the vehicle body and No. 1 back door name plate.
-
Tie objects that can serve as handles (for example, wooden blocks) to both wire ends.
-
Pull the piano wire to separate the double-sided tape that holds the No. 1 back door name plate to the vehicle body.
Note
Be careful not to damage the vehicle body.
-
Remove the No. 1 back door name plate.
-
-
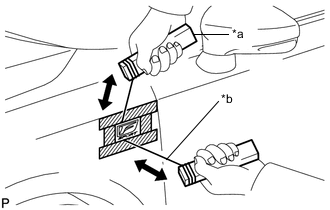
REMOVE NO. 2 BACK DOOR NAME PLATE
-
Text in Illustration *a Wooden Block *b Piano Wire Protective Tape Apply protective tape around the No. 2 back door name plate as shown in the illustration.
-
Insert a piano wire between the vehicle body and No. 2 back door name plate.
-
Tie objects that can serve as handles (for example, wooden blocks) to both wire ends.
-
Pull the piano wire to separate the double-sided tape that holds the No. 2 back door name plate to the vehicle body.
Note
Be careful not to damage the vehicle body.
-
Remove the No. 2 back door name plate.
-
-
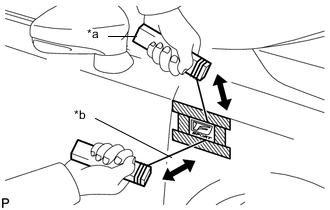
REMOVE BODY SIDE NAME PLATE
Tech Tips
-
Use the same procedure for the RH side and LH side.
-
The following procedure is for the LH side.
-

*a Wooden Block *b Piano Wire Protective Tape Apply protective tape around the body side name plate as shown in the illustration.
-
Insert a piano wire between the vehicle body and body side name plate.
-
Tie objects that can serve as handles (for example, wooden blocks) to both wire ends.
-
Pull the piano wire to separate the double-sided tape that holds the body side name plate to the vehicle body.
Note
Be careful not to damage the vehicle body.
-
Remove the body side name plate.
-
-
REMOVE NO. 2 FRONT FENDER NAME PLATE
-
Text in Illustration *a Wooden Block *b Piano Wire Protective Tape Apply protective tape around the No. 2 front fender name plate as shown in the illustration.
-
Insert a piano wire between the vehicle body and No. 2 front fender name plate.
-
Tie objects that can serve as handles (for example, wooden blocks) to both wire ends.
-
Pull the piano wire to separate the double-sided tape that holds the No. 2 front fender name plate to the vehicle body.
Note
Be careful not to damage the vehicle body.
-
Remove the No. 2 front fender name plate.
-
-
REMOVE NO. 1 FRONT FENDER NAME PLATE
-
Text in Illustration *a Wooden Block *b Piano Wire Protective Tape Apply protective tape around the No. 1 front fender name plate as shown in the illustration.
-
Insert a piano wire between the vehicle body and No. 1 front fender name plate.
-
Tie objects that can serve as handles (for example, wooden blocks) to both wire ends.
-
Pull the piano wire to separate the double-sided tape that holds the No. 1 front fender name plate to the vehicle body.
Note
Be careful not to damage the vehicle body.
-
Remove the No. 1 front fender name plate.
-