BACK DOOR OUTSIDE GARNISH REMOVAL
PROCEDURE
-
REMOVE UPPER BACK DOOR TRIM PANEL ASSEMBLY
-
REMOVE BACK DOOR SIDE GARNISH LH
-
REMOVE BACK DOOR SIDE GARNISH RH
-
REMOVE BACK DOOR TRIM BOARD ASSEMBLY
-
REMOVE REAR LIGHT ASSEMBLY LH
-
REMOVE REAR LIGHT ASSEMBLY RH
Tech Tips
Use the same procedure as for the LH side.
-
REMOVE BACK DOOR OPENER SWITCH ASSEMBLY
-
REMOVE BACK DOOR OUTSIDE GARNISH SUB-ASSEMBLY
-
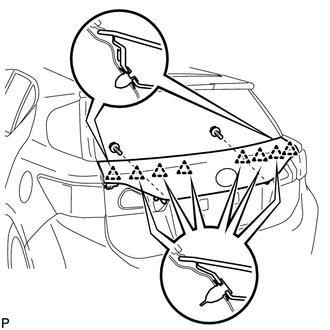
Remove the 2 screws.
-
Disengage the 8 clips and remove the back door outside garnish sub-assembly.
-
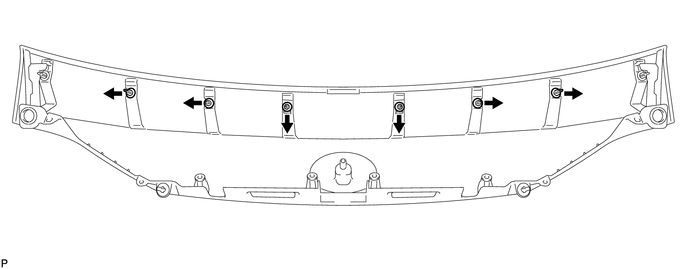
Remove the 6 clips (No. 2 back door outside garnish clips) as shown in the illustration.
-
Remove the 2 clips (back door outside garnish clips) as shown in the illustration.

-
-
REMOVE BACK DOOR UPPER OUTSIDE GARNISH LH
-
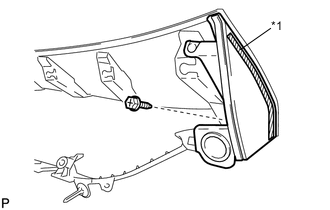
Text in Illustration *1 Double-sided Tape Remove the screw and remove the back door upper outside garnish LH.
-
-
REMOVE BACK DOOR UPPER OUTSIDE GARNISH RH
Tech Tips
Use the same procedure as for the LH side.
-
REMOVE BACK DOOR OUTSIDE GARNISH PROTECTOR
-
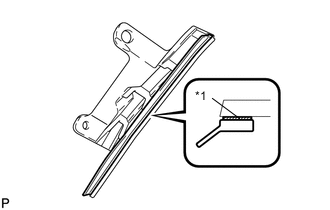
Text in Illustration *1 Double-sided Tape Remove the back door outside garnish protector.
Tech Tips
Use the same procedure for the RH side and LH side.
-
-
REMOVE SYMBOL EMBLEM