FRONT CONSOLE BOX(w/ Disc Player) REMOVAL
CAUTION / NOTICE / HINT
Tech Tips
-
Use the same procedure for RHD and LHD vehicles.
-
The procedure listed below is for LHD vehicles.
PROCEDURE
-
REMOVE INSTRUMENT PANEL FINISH PANEL END LH
-
REMOVE INSTRUMENT PANEL FINISH PANEL END RH
-
REMOVE SHIFT LEVER KNOB SUB-ASSEMBLY
-
REMOVE NO. 3 BOX PANEL
-
REMOVE UPPER REAR CONSOLE PANEL SUB-ASSEMBLY
-
REMOVE UPPER INSTRUMENT CLUSTER FINISH PANEL
-
REMOVE UPPER CONSOLE PANEL SUB-ASSEMBLY
-
REMOVE LOWER NO. 1 INSTRUMENT PANEL FINISH PANEL
-
REMOVE LOWER NO. 2 INSTRUMENT PANEL FINISH PANEL
-
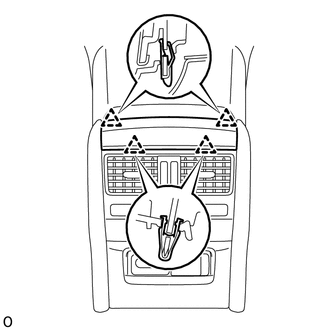
REMOVE UPPER NO. 1 CONSOLE PANEL GARNISH
-
Detach the 4 clips and remove the upper No. 1 console panel garnish.
-
-
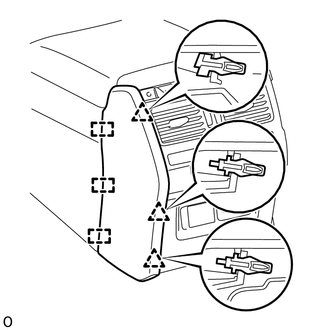
REMOVE REAR NO. 1 CONSOLE END PANEL GARNISH
-
Detach the 3 clips and 3 guides and remove the rear No. 1 console end panel garnish.
-
-
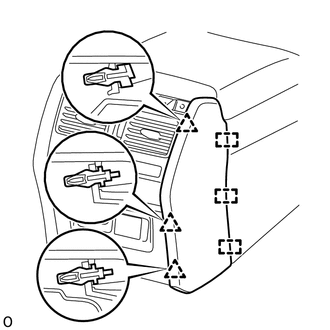
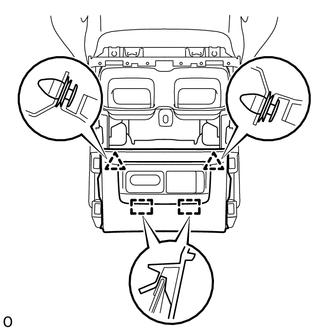
REMOVE REAR NO. 2 CONSOLE END PANEL GARNISH
-
Detach the 3 clips and 3 guides and remove the rear No. 2 console end panel garnish.
-
-
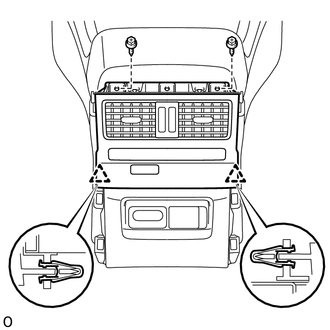
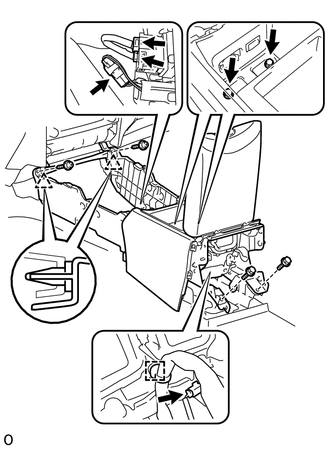
REMOVE REAR CONSOLE END PANEL SUB-ASSEMBLY
-
Remove the 2 screws.
-
Detach the 2 clips and remove the rear console end panel sub-assembly.
-
-
REMOVE REAR CONSOLE END PANEL
-
Detach the 2 clips and 2 hooks and remove the rear console end panel.
-
Disconnect each connector and detach the wire harness clamp.
-
-
REMOVE DISC PLAYER WITH BRACKET

-
Remove the 4 bolts.
-
Move the disc player with bracket upward to detach the 2 hooks.
-
Disconnect each connector.
-
-
REMOVE LOWER CONSOLE COVER
-
Remove the lower console cover.
-
-
REMOVE CONSOLE BOX ASSEMBLY
-
Disconnect each connector and detach the wire harness clamp.
-
Remove the 2 screws and 4 bolts.
-
Detach the 2 clips and remove the console box assembly.
-