HEADLIGHT ASSEMBLY(for LED Headlight) DISASSEMBLY
CAUTION / NOTICE / HINT
Tech Tips
-
Use the same procedure for the RH side and LH side.
-
The procedure listed below is for the LH side.
PROCEDURE
-
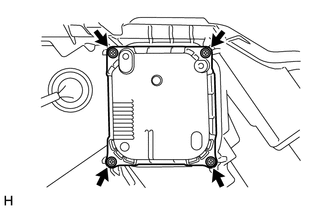
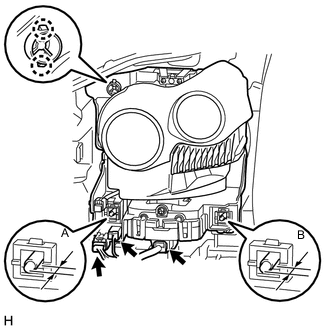
REMOVE HEADLIGHT LIGHT CONTROL ECU SUB-ASSEMBLY
-
Remove the 4 screws.
-
Disconnect the connectors and remove the headlight light control ECU sub-assembly.
-
-
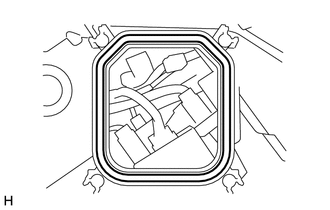
REMOVE HEADLIGHT GASKET
-
Remove the headlight gasket from the headlight unit LH.
-
-
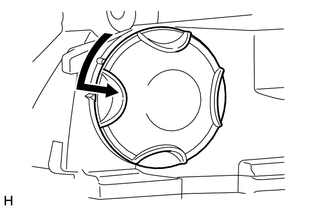
REMOVE HEADLIGHT SOCKET COVER (w/ Driver Monitor Camera)
-
Turn the headlight socket cover in the direction indicated by the arrow and remove it.
-
-
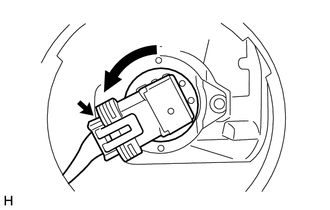
REMOVE NO. 1 HEADLIGHT BULB (w/ Driver Monitor Camera)
-
Disconnect the connector.
-
Turn the No. 1 headlight bulb in the direction indicated by the arrow and remove it.
Note
Do not touch the glass part of the bulb.
-
-
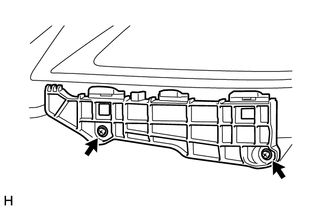
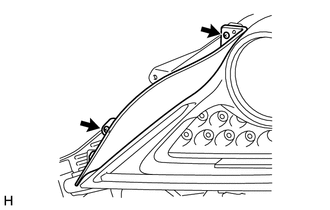
REMOVE FRONT BUMPER BAR REINFORCEMENT LH
-
Remove the 2 screws and front bumper bar reinforcement LH.
-
-
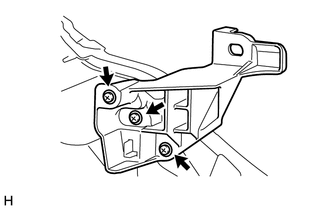
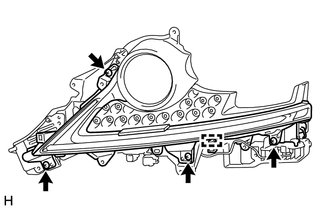
REMOVE HEADLIGHT BRACKET LH
-
Remove the 3 screws and headlight bracket LH.
-
-
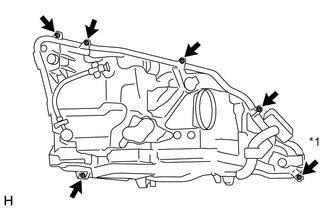
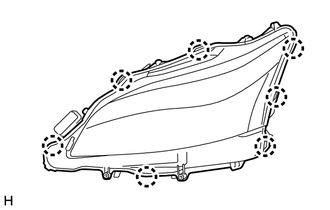
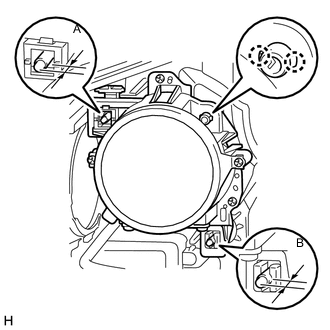
REMOVE HEADLIGHT LENS LH
-
Using a T20H "TORX" driver, remove the "TORX" screw.
Text in Illustration *1 "TORX" Screw -
Remove the 5 screws.
-
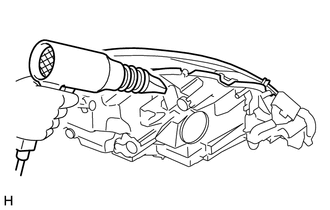
Using a dryer, heat the backside of the headlight unit LH.
Note
If the headlight is heated unevenly, it will deform or melt.
-
Detach the 7 claws to remove the headlight lens LH from the headlight unit LH.
Note
-
Wear rubber gloves when removing the fog light lens LH in order to protect your hands, prevent fingerprints and to keep the lens free from foreign matter. Do not use cotton gloves.
-
Do not touch the rear side of the fog light lens LH or the aluminum surfaces of the LED unit with bare hands.
-
If there are fingerprints on the aluminum surfaces of the LED unit, etc., wipe them off with a soft cloth.
-
If there are fingerprints on the back of the lens, replace the headlight lens LH.
-
Do not allow dirt or foreign matter on the rear side of the fog light lens LH or aluminum surfaces of the LED unit.
Tech Tips
If the lens cannot be removed even after heating, using a screwdriver with its tip wrapped in protective tape, lift the lens. Be careful not to damage the headlight unit and headlight lens LH.
-
-
-
REMOVE HEADLIGHT LENS GASKET
-
Remove the headlight lens gasket from the headlight unit LH.
-
-
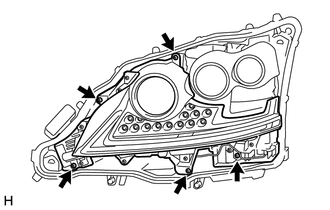
REMOVE HEADLIGHT LED UNIT ASSEMBLY LH
-
Remove the 5 screws.
-
Disconnect the connectors to remove the light unit.
Note
-
Wear rubber gloves when removing the light unit in order to protect your hands, prevent fingerprints and to keep the lens free from foreign matter. Do not use cotton gloves.
-
Do not touch the light unit with bare hands.
-
If there are fingerprints on the light unit, wipe them off with a soft cloth.
-
Do not allow dirt or foreign matter on the light unit.
-
-
Remove the 4 screws and connected gears from the aiming screw.
-
Detach the claw and remove the plate.
-
Before removing the headlight LED unit assembly LH, measure dimensions A and B in the diagram and take a note.
-
Disconnect the 2 connectors.
-
Detach the 2 claws.
-
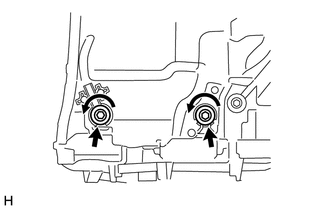
Rotate the 2 aiming screws counterclockwise and remove the headlight LED unit assembly LH.
Note
-
Wear rubber gloves when removing the headlight LED unit assembly LH in order to protect your hands, prevent fingerprints and to keep the lens free from foreign matter. Do not use cotton gloves.
-
Do not touch the headlight LED unit assembly LH with bare hands.
-
If there are fingerprints on the headlight LED unit assembly LH, wipe them off with a soft cloth.
-
Do not allow dirt or foreign matter on the headlight LED unit assembly LH.
-
-
-
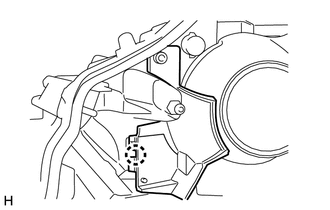
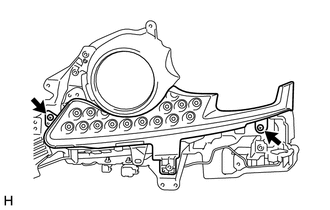
REMOVE HEADLIGHT SWIVEL MOTOR LH
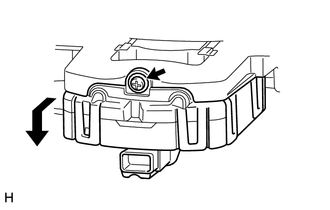
-
Remove the screw.
-
Move the headlight swivel motor LH as shown in the illustration to remove it from the headlight LED unit assembly LH.
-
-
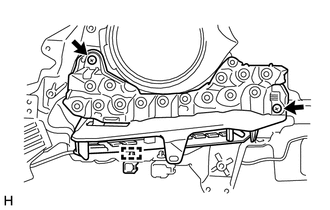
REMOVE HEADLIGHT UNIT ASSEMBLY LH (w/o Driver Monitor Camera)

-
Remove the 3 screws and remove the connected gears from the aiming screw.
-
Before removing the headlight unit assembly LH, measure dimensions A and B in the diagram and take a note.
-
Detach the 2 claws.
-
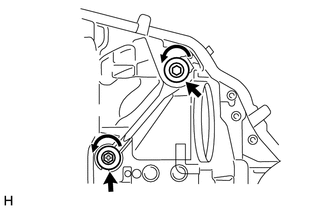
Rotate the 2 aiming screws counterclockwise and remove the headlight unit assembly LH.
Note
-
Wear rubber gloves when removing the headlight unit assembly LH in order to protect your hands, prevent fingerprints and to keep the lens free from foreign matter. Do not use cotton gloves.
-
Do not touch the headlight unit assembly LH with bare hands.
-
If there are fingerprints on the headlight unit assembly LH, wipe them off with a soft cloth.
-
Do not allow dirt or foreign matter on the headlight unit assembly LH.
-
-
-
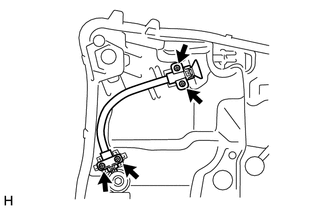
REMOVE HEADLIGHT SHADE ECU (w/ Adaptive High Beam System)
-
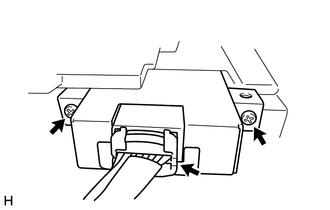
Remove the 2 screws.
-
Disconnect the connector and remove the headlight shade ECU.
-
-
REMOVE LIGHT CONTROL ECU
-
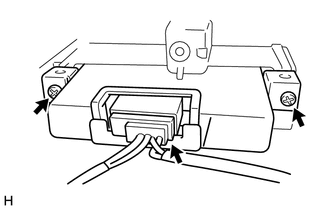
Remove the 2 screws.
-
Disconnect the connector and remove the light control ECU.
-
-
REMOVE LIGHT CONTROL ECU (w/o Driver Monitor Camera)
-
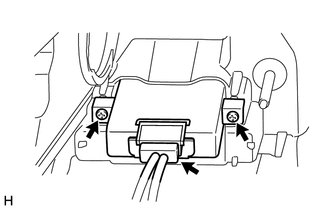
Remove the 2 screws.
-
Disconnect the connector and remove the light control ECU.
-
-
REMOVE FRONT TURN SIGNAL LIGHT UNIT LH
Note
-
Wear rubber gloves when removing the front turn signal light unit LH in order to protect your hands, prevent fingerprints and to keep the lens free from foreign matter. Do not use cotton gloves.
-
Do not touch the front turn signal light unit LH with bare hands.
-
If there are fingerprints on the front turn signal light unit LH, wipe them off with a soft cloth.
-
Do not allow dirt or foreign matter on the front turn signal light unit LH.
-
Remove the 2 screws and plate.
-
Detach the clamp.
-
Remove the 4 screws and light unit.
-
Remove the 2 screws and cover.
-
Detach the clamp.
-
Remove the 2 screws and front turn signal light unit LH.
-
-
REMOVE CLEARANCE LIGHT UNIT LH

-
Remove the 3 screws and clearance light unit LH.
-