LIGHTING SYSTEM Back-up Light does not Illuminate
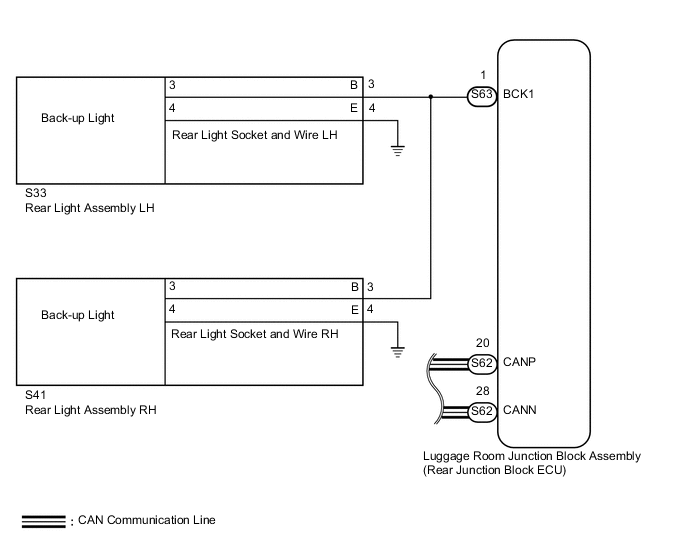
WIRING DIAGRAM
CAUTION / NOTICE / HINT
Note
First perform the communication function inspections in HOW TO PROCEED WITH TROUBLESHOOTING to confirm that there are no CAN communication malfunctions before troubleshooting this symptom.
PROCEDURE
-
PERFORM ACTIVE TEST USING GTS (BACK-UP LIGHT)
-
Using the GTS, perform the Active Test Click here.
Body No. 4 Tester Display Test Part Control Range Backup Light Back-up light operation OFF - ON OK Back-up light condition is switched by Active Test.
OK 
GO TO AUTOMATIC TRANSMISSION SYSTEM Click here
NG 
-
-
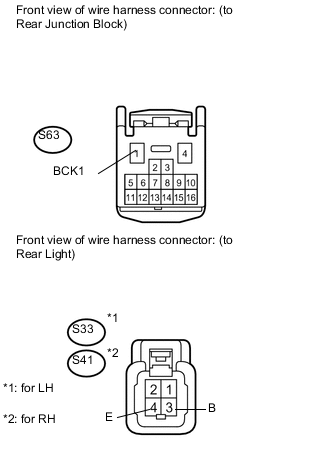
CHECK REAR JUNCTION BLOCK ECU (BCK1 VOLTAGE)

*1 Component without harness connected: (Rear Junction Block ECU)
-
Disconnect the S63 ECU connector.
Measure the voltage according to the value(s) in the table below.
Standard Voltage Tester Connection Switch Condition Specified Condition 1 (BCK1) - Body ground Engine switch on (IG), shift lever in R position 11 to 14 V Note
Do not start the engine.
NG
REPLACE LUGGAGE ROOM JUNCTION BLOCK (REAR JUNCTION BLOCK ECU)
OK
-
-
CHECK HARNESS AND CONNECTOR (REAR JUNCTION BLOCK ECU - REAR LIGHT AND BODY GROUND)
-
Disconnect the S63 rear junction block ECU connector.
-
Disconnect the S33*1 or S41*2 rear light connector.
-
*1: for LH
-
*2: for RH
-
-
Measure the resistance according to the value(s) in the table below.
Standard Resistance for LH Tester Connection Condition Specified Condition S63-1 (BCK1) - S33-3 (B) Always Below 1 Ω S33-4 (E) - Body ground Always Below 1 Ω S63-1 (BCK1) - Body ground Always 10 kΩ or higher for RH Tester Connection Condition Specified Condition S63-1 (BCK1) - S41-3 (B) Always Below 1 Ω S41-4 (E) - Body ground Always Below 1 Ω S63-1 (BCK1) - Body ground Always 10 kΩ or higher
NG
REPAIR OR REPLACE HARNESS OR CONNECTOR
OK
-
-
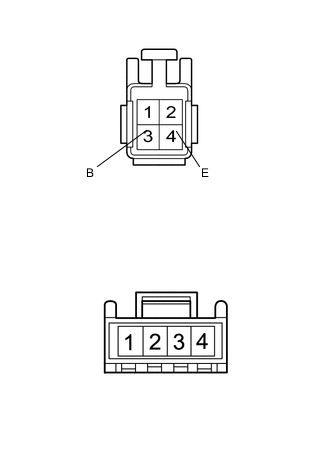
INSPECT REAR LIGHT SOCKET AND WIRE
-
Remove the rear light socket and wire Click here.
-
Measure the resistance according to the value(s) in the table below.
Standard Resistance Tester Connection Condition Specified Condition 3 (B) - 3 Always Below 1 Ω 4 (E) - 4 Always Below 1 Ω 3 (B) - 4 (E) Always 10 kΩ or higher
OK
REPLACE REAR LIGHT ASSEMBLY Click here
NG
REPLACE REAR LIGHT SOCKET AND WIRE Click here
-