RADIATOR(for AWD) REMOVAL
PROCEDURE
-
RECOVER REFRIGERANT FROM REFRIGERATION SYSTEM
-
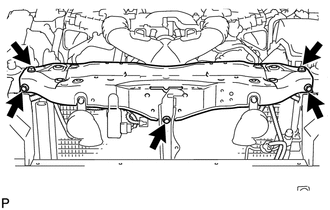
REMOVE FRONT BUMPER REINFORCEMENT
-
REMOVE V-BANK COVER SUB-ASSEMBLY
-
REMOVE NO. 1 AIR CLEANER INLET
-
REMOVE NO. 1 ENGINE UNDER COVER
-
DRAIN ENGINE COOLANT
-
DRAIN AUTOMATIC TRANSMISSION FLUID
-
REMOVE RADIATOR RESERVOIR ASSEMBLY
-
REMOVE NO. 1 RADIATOR HOSE
-
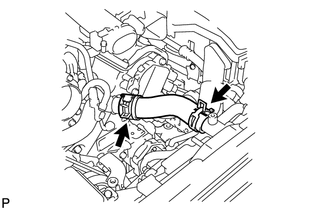
Remove the No. 1 radiator hose.
-
-
REMOVE NO. 2 RADIATOR HOSE
-
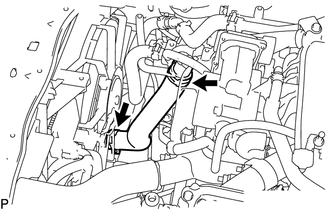
Remove the No. 2 radiator hose.
-
-
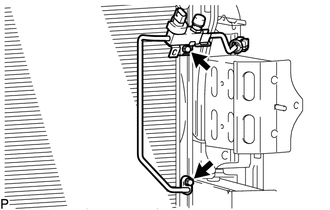
DISCONNECT NO. 1 OIL COOLER INLET HOSE
-
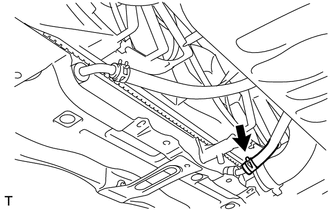
Disconnect the No. 1 oil cooler inlet hose from the radiator.
Note
Place a container under the connection before disconnecting the oil cooler hose because oil in the hose may spill out.
-
-
DISCONNECT NO. 1 OIL COOLER OUTLET HOSE
-
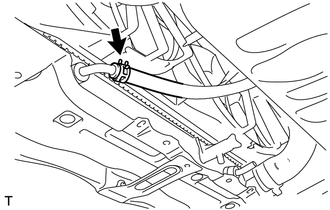
Disconnect the No. 1 oil cooler outlet hose from the radiator.
Note
Place a container under the connection before disconnecting the oil cooler hose because oil in the hose may spill out.
-
-
REMOVE ENGINE ROOM ECU OUTLET DUCT
-
REMOVE MILLIMETER WAVE RADAR SENSOR ASSEMBLY (w/ Dynamic Radar Cruise Control System)
-
DISCONNECT HOOD LOCK CONTROL CABLE COVER
-
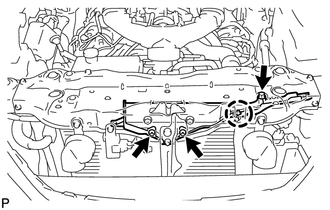
Remove the 3 screws and detach the claw to disconnect the hood lock control cable cover.
-
-
DISCONNECT HOOD LOCK ASSEMBLY
-
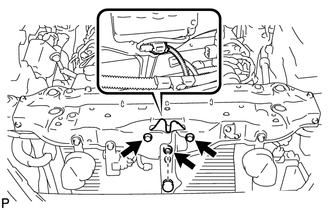
Remove the lock nut cap and lock nut.
-
Remove 2 bolts and disconnect the hood lock assembly.
-
Disconnect the connector.
-
-
REMOVE WIRE HARNESS
-
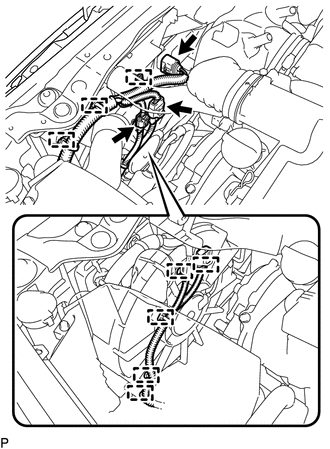
Disconnect the 3 connectors.
-
Detach the 8 wire harness clamps.
-
-
REMOVE RADIATOR UPPER SUPPORT SUB-ASSEMBLY
-
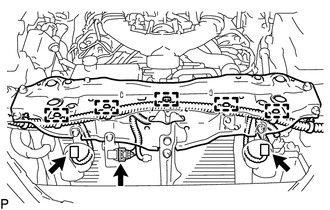
Disconnect the 3 connectors and detach the 5 wire harness clamps to disconnect the wire harness.
-
Remove the 5 bolts and radiator upper support.
-
-
REMOVE HOOD LOCK CONTROL CABLE COVER
-
Disconnect the wire harness clamp.
-
Disconnect the hood lock control cable and remove the hood lock control cable cover.
-
-
REMOVE HOOD LOCK ASSEMBLY
-
Remove the hood lock assembly from the hood lock control cable.
-
-
DISCONNECT DISCHARGE HOSE SUB-ASSEMBLY
-
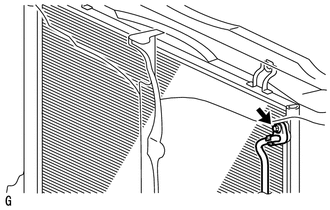
Remove the bolt and disconnect the discharge hose sub-assembly from the cooler condenser assembly.
Note
-
When loosening the bolt, do not allow any tools to contact the hose.
-
When loosening the bolt, hold a part of the hose near the connector.
-
-
Remove the O-ring from the discharge hose sub-assembly.
Note
Seal the openings of the disconnected parts using vinyl tape to prevent moisture and foreign matter from entering them.
-
-
DISCONNECT LIQUID TUBE SUB-ASSEMBLY A
-
Remove the 2 bolts and disconnect the liquid tube sub-assembly from the cooler condenser.
Note
-
When loosening the bolt, do not allow any tools to contact the tube.
-
When loosening the bolt, hold a part of the tube near the connector.
-
-
Remove the O-ring from the liquid tube sub-assembly.
Note
Seal the openings of the disconnected parts using vinyl tape to prevent moisture and foreign matter from entering them.
-
-
REMOVE RADIATOR ASSEMBLY
-
Remove the radiator from the front crossmember together with the fan shroud with fan motor.
Note
Do not allow the radiator to interfere with other parts.
-
-
REMOVE FAN SHROUD WITH FAN AND MOTOR
-
REMOVE COOLER CONDENSER ASSEMBLY
-
REMOVE RADIATOR SUPPORT CUSHION
-
Remove the 2 radiator support cushions.
-
-
REMOVE RADIATOR SUPPORT LOWER
-
Remove the 2 radiator support lowers.
-