FUEL PRESSURE REGULATOR REASSEMBLY
PROCEDURE
-
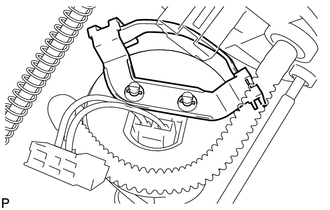
INSTALL BRACKET
-
Install the bracket to the fuel filter.
-
-
INSTALL FUEL PRESSURE REGULATOR ASSEMBLY
-
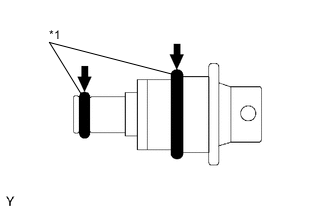
*1 O-Ring Apply a light coat of gasoline to 2 new O-rings, and install them onto the fuel pressure regulator.
-
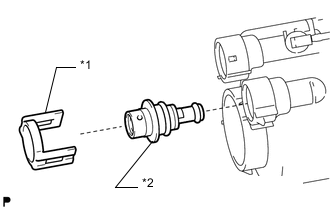
*1 Cap *2 Fuel Pressure Regulator Install the fuel pressure regulator to the fuel filter.
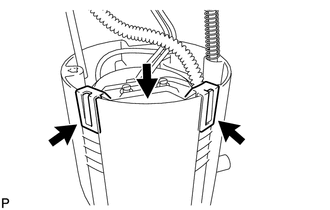
-
Attach the 2 claws of the fuel filter and install the cap.
Note
-
Make sure the O-rings are not cut or pinched during the installation.
-
Attach the claws securely.
-
-
-
INSTALL JET PUMP
-
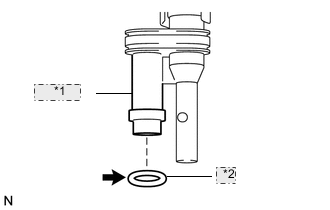
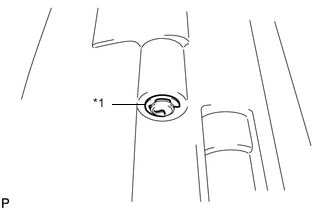
*1 Jet Pump *2 O-Ring Apply gasoline to a new O-ring and install it to the jet pump.
-

Install the jet pump to the sub-tank as shown in the illustration.
-
-
INSTALL FUEL FILTER
-
Install the fuel filter to the sub-tank and attach the 2 claws.
-
-
INSTALL FUEL SUCTION PLATE SUB-ASSEMBLY
-
Install the spring to the fuel suction plate shaft.
-
Install the fuel suction plate to the sub-tank.
-
*1 E-Ring Install a new E-ring.
-
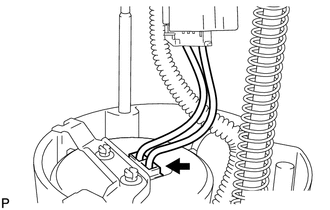
Connect the fuel pump connector to the fuel suction plate.
-
-
INSTALL FUEL SENDER GAUGE ASSEMBLY
-
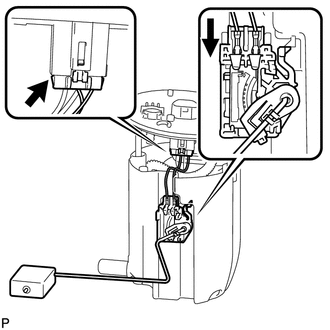
Set the fuel sender gauge to the fuel sub-tank. Then slide the sender gauge downward to install it.
-
Connect the fuel sender gauge connector to the fuel suction plate.
Note
Do not touch the resistance plate or contacts of the fuel sender gauge assembly.
-