МУФТА ПЕРЕДНЕГО ХОДА РАЗБОРКА

-
FIX FORWARD CLUTCH ASSEMBLY
-
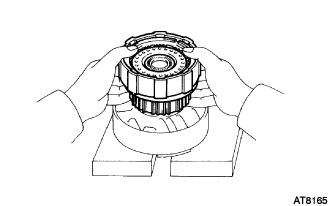
Place wooden blocks or similar objects to prevent forward clutch shaft from touching the work stand, and place the O/D support on them.
-
Place the forward clutch onto the O/D support.
-
-
INSPECT PISTON STROKE OF FORWARD CLUTCH
-
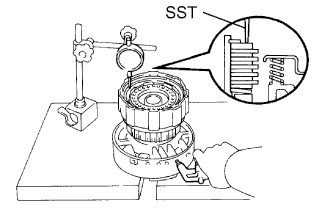
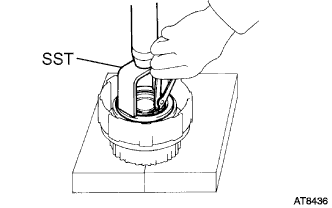
Using SST and a dial indicator, measure the forward clutch piston stroke while applying and releasing compressed air (392 to 785 kPa, 4.0 to 8.0 kgf/cm2, 57 to 114 psi).
- SST
- 09350-30020 ( 09350-06120 )
Piston stroke 0.6 to 1.0 mm (0.023 to 0.039 in.) If the piston stroke is outside the standard, inspect the discs.
-
-
REMOVE DISC
-
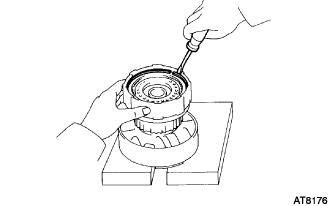
Using a screwdriver, remove the snap ring from the forward clutch drum.
-
Remove the flange, the 5 plates and the 5 discs.
-
Remove the cushion plate.
-
-
INSPECT FORWARD MULTIPLE DISC CLUTCH CLUTCH DISC
-
Check to see if the sliding surfaces of the disc, plate and flange are worn or burnt. If necessary, replace them.
Tech Tips
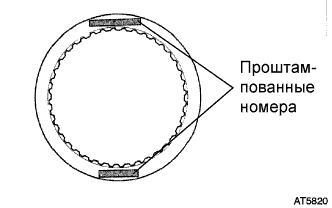
If the lining of the disc is peeling off or discolored, or even if a part of the printed numbers is defaced, replace all discs.
-
-
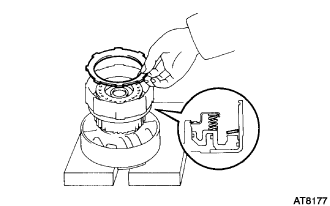
REMOVE FORWARD CLUTCH RETURN SPRING SUB-ASSEMBLY
-
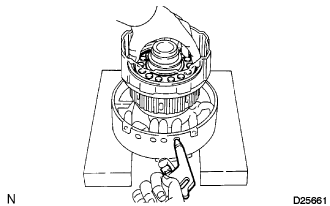
Place SST on the spring retainer and compress the return spring with a press.
- SST
- 09350-30020 ( 09350-07040 )
-
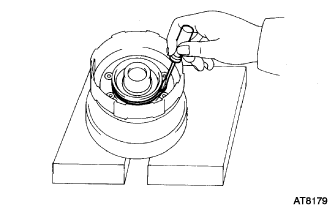
Using SST, remove the snap ring.
- SST
- 09350-30020 ( 09350-07070 )
-

Remove the piston return spring.
-
-
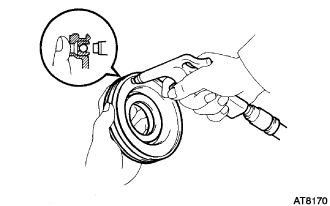
REMOVE FRONT CLUTCH PISTON SUB-ASSEMBLY
-
Place the forward clutch drum onto the O/D support.
-
Hold the forward clutch piston by hand, and apply compressed air (196 kPa, 2.0 kgf/cm2, 28.5 psi) to the O/D support to remove the forward clutch piston.
-
Remove the forward clutch piston.
-
Remove the O-ring from the forward clutch drum.
-
-
REMOVE FORWARD CLUTCH PISTON O-RING
-
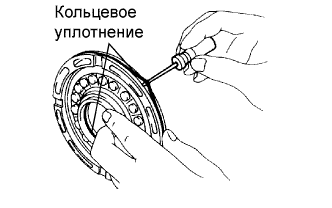
Using a small screwdriver, remove the 2 O-rings.
-
-
INSPECT FRONT CLUTCH PISTON SUB-ASSEMBLY
-
Check that the check ball is free by shaking the piston.
-
Check that the valve does not have leaks by applying low-pressure compressed air.
-
-
REMOVE INPUT SHAFT OIL SEAL RING
-

Remove the 3 oil seal rings from the forward clutch drum groove.
-
-
REMOVE INPUT SHAFT SUB-ASSEMBLY