РАДИАТОР СНЯТИЕ
-
REMOVE CONDENSER WITH RECEIVER ASSEMBLY
-
DRAIN ENGINE COOLANT
CAUTION:
Do not remove the radiator reservoir cap sub-assembly while the engine and radiator are still hot. Pressurized, hot engine coolant and steam may be released and cause serious burns.
Tech Tips
Collect the engine coolant in a container and dispose of it according to the local regulations.
-
Loosen the radiator drain cock plug and drain the engine coolant.
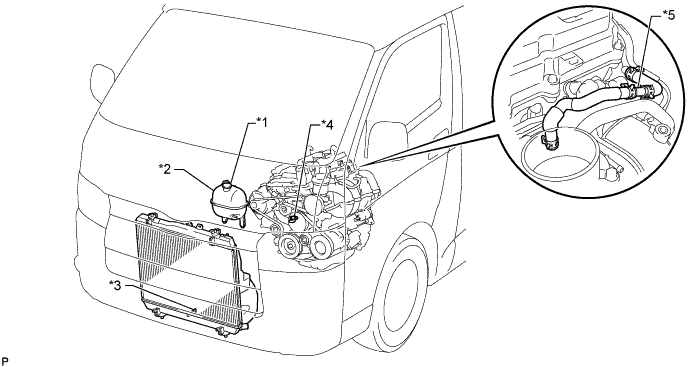
Text in Illustration *1 Radiator Reservoir Cap Sub-assembly *2 Radiator Reservoir Assembly *3 Radiator Drain Cock Plug *4 Cylinder Block Water Drain Cock Plug *5 2-Way - - -
Remove the radiator reservoir cap sub-assembly.
-
Loosen the cylinder block water drain cock plug and drain the engine coolant from the engine.
-
-
REMOVE UPPER RADIATOR SUPPORT SEAL
-
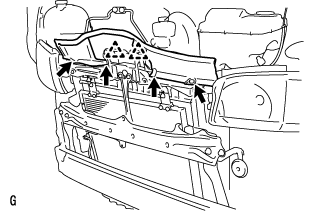
Remove the 2 clips, 4 bolts and upper radiator support seal.
-
-
REMOVE RADIATOR RESERVOIR ASSEMBLY
-
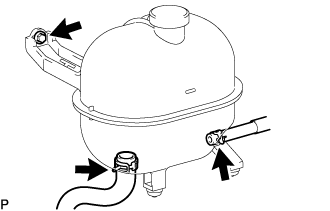
Slide the hose clamp and disconnect the water by-pass hose from the radiator reservoir assembly.
-
Slide the hose clamp and disconnect the No. 2 water by-pass hose from the radiator reservoir assembly.
-
Remove the bolt and radiator reservoir assembly.
-
-
REMOVE WINDSHIELD WASHER MOTOR AND PUMP ASSEMBLY
-
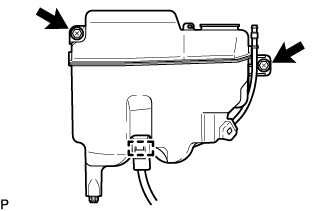
Disconnect the connector from the windshield washer motor and pump assembly.
-
Remove the 2 bolts and windshield washer motor and pump assembly.
-
Detach the hose clamp.
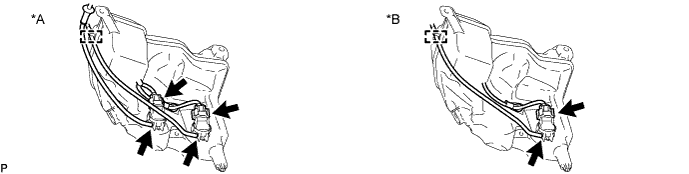
Text in Illustration *A w/ Rear Wiper *B w/o Rear Wiper -
w/ Rear Wiper:
Disconnect the 2 connectors and 2 washer hoses.
-
w/o Rear Wiper:
Disconnect the connector and washer hose.
-
-
REMOVE HOOD LOCK ASSEMBLY
-
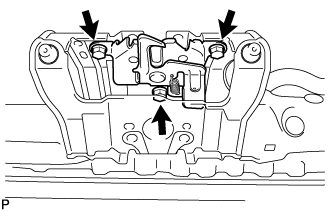
Remove the 3 bolts and disconnect the hood lock assembly.
-
Remove the hood lock assembly from the hood lock control cable assembly.
-
-
REMOVE UPPER RADIATOR SUPPORT SUB-ASSEMBLY
-
Slide the hose clamp and disconnect the water by-pass hose from the radiator assembly.
-
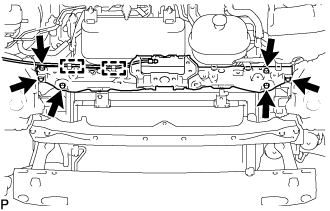
Detach the 2 clamps to disconnect the hood lock control cable assembly from the upper radiator support sub-assembly.
-
Remove the 6 bolts and upper radiator support sub-assembly.
-
-
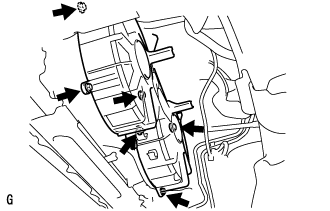
REMOVE FAN BRACKET ASSEMBLY
-
Disconnect the 4 connectors from the No. 1 and No. 2 cooling fan ECUs.
-
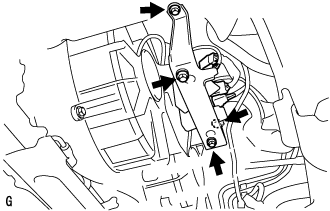
Remove the 2 bolts, 2 nuts, and fan bracket assembly together with the No. 1 and No. 2 cooling fan ECUs.
-
-
DISCONNECT OIL COOLER HOSE
-
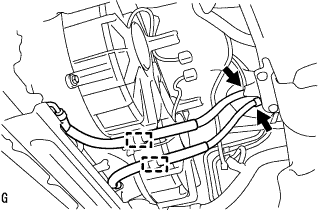
Detach the 2 oil cooler hose clamps.
-
Slide the hose clamp and disconnect the inlet oil cooler hose from the oil cooler tube.
-
Slide the hose clamp and disconnect the outlet oil cooler hose from the oil cooler tube.
-
-
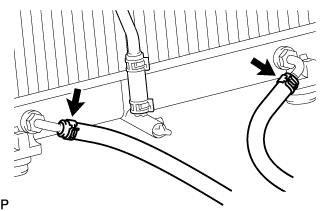
DISCONNECT NO. 2 RADIATOR HOSE
-
Slide the hose clamp and disconnect the No. 2 radiator hose from the radiator assembly.
-
-
DISCONNECT NO. 3 RADIATOR HOSE
-
Slide the hose clamp and disconnect the No. 3 radiator hose from the radiator assembly.
-
-
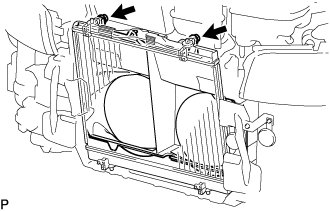
REMOVE FAN SHROUD
-
Remove the 6 bolts and fan shroud from the underside of the vehicle.
-
-
REMOVE NO. 2 FAN SHROUD
-
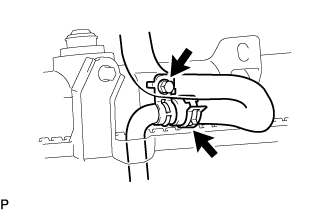
Slide the hose clamp and remove the No. 2 water by-pass hose from the water by-pass pipe sub-assembly.
-
Remove the bolt to disconnect the water by-pass pipe sub-assembly from the radiator assembly.
Tech Tips
This procedure is performed because the bolt of the water by-pass pipe sub-assembly interferes with the removal of the No. 2 fan shroud.
-
Remove the 2 bolts and No. 2 fan shroud from the underside of the vehicle.
Note
Do not damage the radiator assembly when removing the No. 2 fan shroud.
-
-
REMOVE RADIATOR ASSEMBLY
-
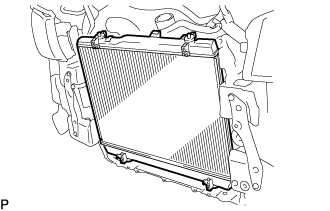
Remove the radiator assembly from the vehicle.
Note
Do not drop the radiator assembly.
-
Remove the 4 grommets from the radiator assembly.
-
-
REMOVE OIL COOLER HOSE
-
Slide the hose clamp and remove the inlet oil cooler hose from the radiator assembly.
-
Slide the hose clamp and remove the outlet oil cooler hose from the radiator assembly.
-
-
REMOVE WATER BY-PASS PIPE SUB-ASSEMBLY
-
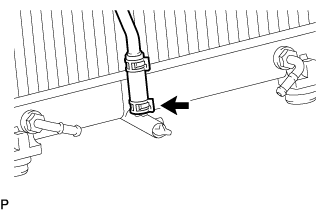
Slide the hose clamp and remove the water by-pass pipe sub-assembly from the radiator assembly.
-