ДАТЧИК ТЕМПЕРАТУРЫ ОТРАБОТАВШИХ ГАЗОВ (передний) СНЯТИЕ
-
REMOVE SEAT TRACK COVER LH
-
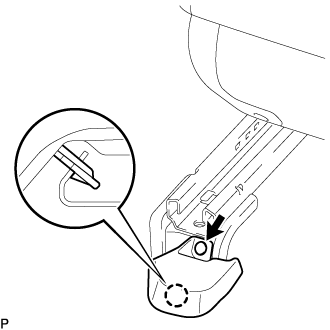
С помощью съемника фиксаторов освободите фиксатор.
-
Расцепите захват и снимите щиток направляющей левого сиденья.
-
-
REMOVE FRONT SEAT ASSEMBLY RH
-
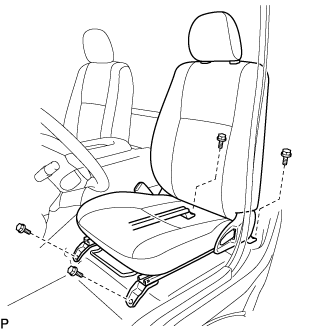
Выдвиньте переднее сиденье в сборе до упора вперед.
-
Выверните 2 болта с задней стороны сиденья.
-
Сдвиньте переднее сиденье в сборе в крайнее заднее положение.
-
Выверните 2 болта с передней стороны сиденья.
-
Сдвиньте переднее сиденье в сборе к середине направляющей сиденья. Установите спинку сиденья в вертикальное положение.
-
Отсоедините разъем замка ремня безопасности переднего сиденья.
-
Снимите переднее сиденье в сборе.
-
-
REMOVE FRONT DOOR SCUFF PLATE RH
-
REMOVE ENGINE SERVICE HOLE SUB COVER SUB-ASSEMBLY
-
Отогните напольный коврик.
-
Выверните 5 болтов и снимите вспомогательную крышку технологического отверстия двигателя.
-
-
REMOVE ENGINE ASSEMBLY
Tech Tips
Perform this procedure only when removal or installation of the No. 3 exhaust gas temperature sensor.
-
REMOVE EXHAUST GAS TEMPERATURE SENSOR
CAUTION:
To prevent burns, do not touch the engine, exhaust manifold or other high temperature components while the engine is hot.
-
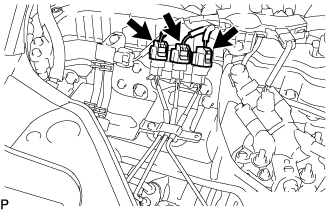
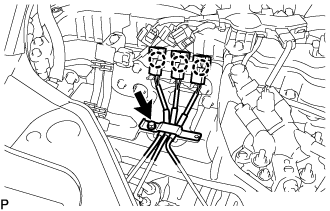
Disconnect the 3 connectors from the 3 exhaust gas temperature sensors.
-
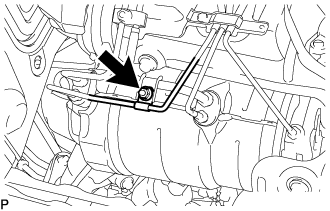
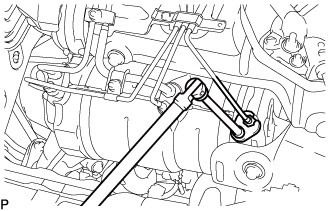
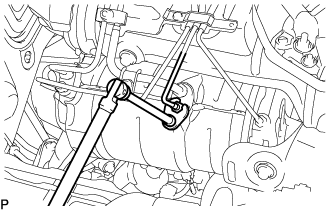
Remove the nut and disconnect the No. 3 exhaust gas temperature sensor from the No. 1 vacuum pipe.
-
Remove the bolt and open the clamp of the pipe clamp.
-
Detach the 3 connectors from the pipe clamp.
-
Using a 14 mm union nut wrench, remove the exhaust gas temperature sensor from the exhaust manifold converter sub-assembly.
-
Using a 14 mm union nut wrench, remove the No. 2 exhaust gas temperature sensor from the exhaust manifold converter sub-assembly.
-
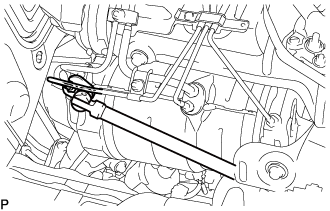
Using a 14 mm union nut wrench, remove the No. 3 exhaust gas temperature sensor from the exhaust manifold converter sub-assembly.
-