ПЕРЕДНИЙ САЛЬНИК КОЛЕНЧАТОГО ВАЛА СНЯТИЕ

-
REMOVE ENGINE UNDER COVER NO.1 (w/ Engine Under Cover No.1)
-
REMOVE FRONT SEAT ASSEMBLY RH (for Hi-back Seat Type)
-
Perform the same procedure as above on the opposite side. Click here
-
-
REMOVE FRONT SEAT ASSEMBLY RH (for Low-back Seat Type)
-
Perform the same procedure as above on the opposite side. Click here
-
-
REMOVE FRONT DOOR SCUFF PLATE RH
-
REMOVE ENGINE SERVICE HOLE SUB COVER SUB-ASSEMBLY
-
Заверните коврик и снимите вспомогательную крышку технологического отверстия двигателя.
-
-
SEPARATE OIL COOLER OUTLET TUBE SUB-ASSEMBLY NO. 2 (for Automatic Transmission)
-
Remove the 2 bolts and oil cooler outlet tube sub-assembly No. 2.
-
-
REMOVE FAN & GENERATOR V BELT
-

Снимите приводной ремень, повернув шкив натяжителя по часовой стрелке с помощью установочного болта шкива, чтобы ослабить натяжение ремня.
-
-
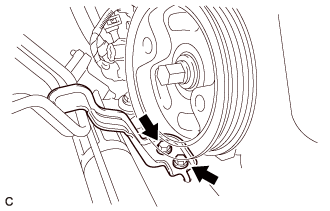
REMOVE CRANKSHAFT PULLEY
-
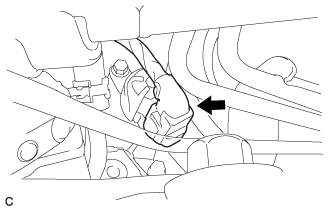
Disconnect the oil pressure switching valve connector.
-
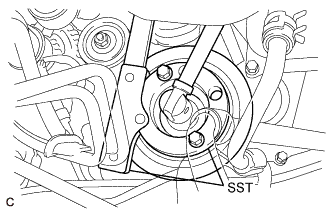
Remove the bolt holding the crankshaft with SST.
- SST
- 09213-58013
- 09330-00021
-
Insert the service bolt.
-
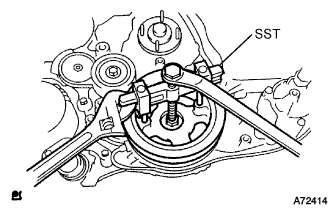
Remove the crankshaft pulley with SST.
- SST
- 09950-50013 ( 09951-05010, 09952-05010, 09953-05020, 09954-05021 )
Note
Apply grease to the thread and tip of the SST (Center bolt) before use.
-
-
REMOVE TIMING GEAR CASE OR TIMING CHAIN CASE OIL SEAL
-
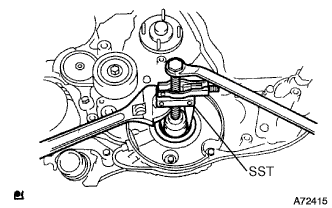
Remove the oil seal with SST.
- SST
- 09308-10010
- 09950-50013 ( 09957-04010 )
- 09950-60010 ( 09951-00350 )
Note
Make sure that there is no damage such as scratch on the inner joint face of the crankshaft after the oil seal removal. If it is found, make the surface smooth by a sandpaper (#400).
-