OUTER REAR VIEW MIRROR DISASSEMBLY
Tech Tips
-
Use the same procedure for RHD and LHD vehicles.
-
The procedure listed below is for LHD vehicles.
-
Use the same procedure for the RH and LH sides.
-
The procedure listed below is for the LH side.
-
REMOVE OUTER MIRROR LH (w/ Retract Mirror)
-

Text in Illustration *1 Protective Tape *2 Moulding Remover D Push in the upper part of the mirror to tilt the mirror surface.
-
Put protective tape on the outer rear view mirror assembly LH.
-
Using moulding remover D, detach the 2 claws.
-
Pull in the direction indicated by the arrow, detach the 2 guides and remove the outer mirror LH.
-
-
REMOVE OUTER MIRROR RETRACTOR LH (w/ Retract Mirror)
-
Remove the clamp.
-
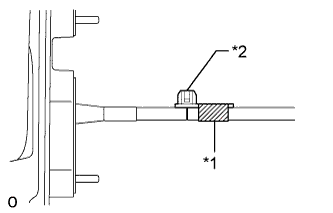
Text in Illustration *1 Tape *2 Clamp Remove the tape and clamp from the wire harness sub-assembly.
-
-
Remove the base sub-assembly.
-
Text in Illustration *1 Tape Remove the tape.
-
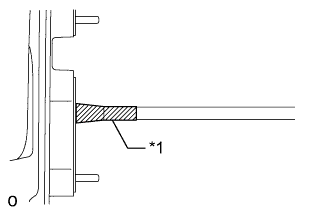
Text in Illustration *a Cut here Cut the wire harness sub-assembly at the location shown in the illustration.
Tech Tips
A new wire harness sub-assembly is used for reassembly.
-
Detach the 5 claws and remove the gasket.
-
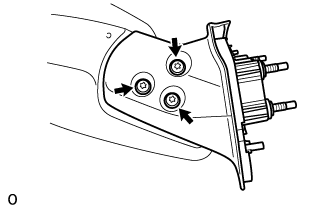
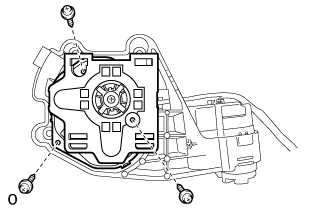
Using a T25 "TORX" socket wrench, remove the 3 "TORX" screws and base sub-assembly.
-
-
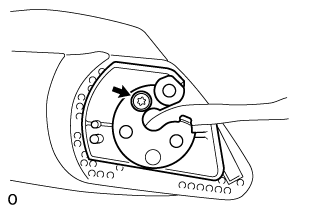
Using a T25 "TORX" socket wrench, remove the "TORX" screw and base plate.
-
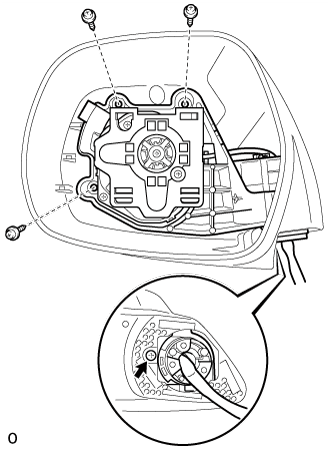
Remove the 4 screws and body sub-assembly.
-
Remove the actuator sub-assembly.
-
Detach the clamp.
-
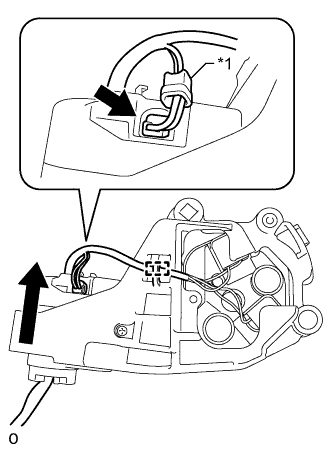
Move the rubber cover to disconnect the connector.
Text in Illustration *1 Rubber Cover -
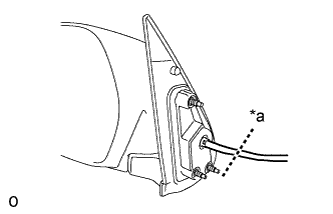
Pull out the wire harness sub-assembly as shown in the illustration.
-
Remove the 3 screws and actuator sub-assembly.
-
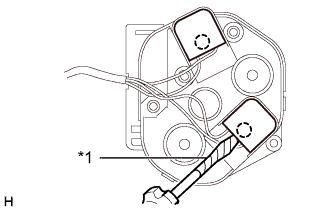
Text in Illustration *1 Protective Tape Using a screwdriver, detach the 2 claws and disconnect the 2 connectors.
Tech Tips
Tape the screwdriver tip before use.
-
-