REAR COOLING UNIT (for Integrated Blower Motor Fan Type) REMOVAL
-
REMOVE ROOF NO. 1 HEADLINING (for Semi-trim)
Tech Tips
Refer to the instruction for removal of the roof headlining. Click here
-
REMOVE ROOF NO. 1 HEADLINING (for Full-trim)
Tech Tips
Refer to the instruction for removal of the roof headlining. Click here
-
DISCONNECT COOLER UNIT NO. 2 DRAIN HOSE
-
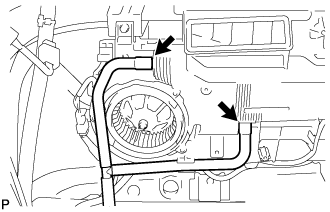
Disconnect the cooler unit No. 2 drain hose.
-
-
DISCONNECT COOLER UNIT NO. 3 DRAIN HOSE
-
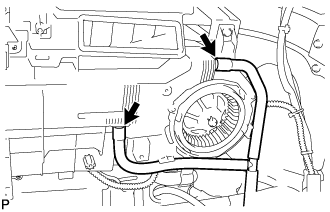
Disconnect the cooler unit No. 3 drain hose.
-
-
REMOVE COOLER REFRIGERANT HOSE NO. 1 INSULATOR
-
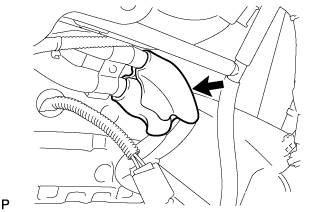
Remove the cooler refrigerant hose No. 1 insulator.
-
-
REMOVE AIR CONDITIONING TUBE AND ACCESSORY ASSEMBLY (except Super Long Wheelbase)
-
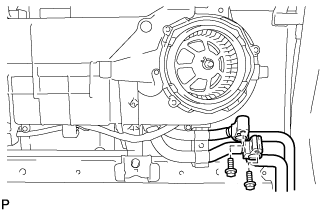
Remove the 2 bolts and disconnect the air conditioning tube and accessory assembly.
-
Remove the O-ring from the air conditioning tube and accessory assembly.
Note
Seal the openings of the disconnected parts using vinyl tape to prevent entry of moisture and foreign matter.
-
-
REMOVE AIR CONDITIONING TUBE AND ACCESSORY ASSEMBLY (for Super Long Wheelbase)
-
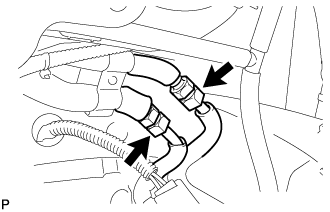
Loosen the 2 union nuts and disconnect the air conditioning tube and accessory assembly.
Note
Do not apply excessive force to the pipes.
-
Remove the O-ring from the air conditioning tube and accessory assembly.
Note
Seal the openings of the disconnected parts using vinyl tape to prevent entry of moisture and foreign matter.
-
-
REMOVE REAR COOLING UNIT
-
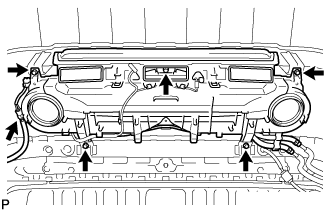
Disconnect the connector.
-
Remove the 5 bolts and rear cooling unit.
-