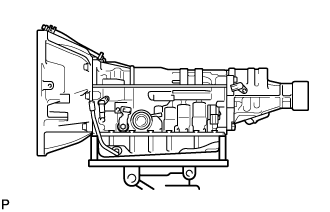
AUTOMATIC TRANSMISSION ASSEMBLY (for 1KD-FTV) REMOVAL

-
DISCONNECT CABLE FROM NEGATIVE BATTERY TERMINAL
Note
When disconnecting the cable, some systems need to be initialized after the cable is reconnected Click here.
-
REMOVE TRANSMISSION OIL LEVEL GAUGE SUB-ASSEMBLY
-
Remove the transmission oil level gauge sub-assembly from the transmission oil filler tube sub-assembly.
-
-
DRAIN AUTOMATIC TRANSMISSION FLUID
-
Remove the drain plug and gasket and drain automatic transmission fluid.
-
Install the drain plug with a new gasket.
- Torque:
- 20 N*m { 204 kgf*cm, 15 ft.*lbf }
-
-
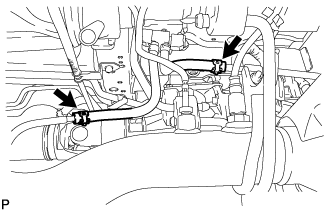
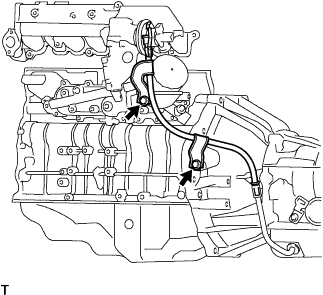
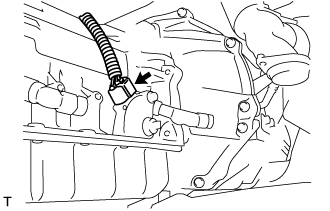
REMOVE TURBINE OUTLET ELBOW STAY (w/ DPF)
-
Remove the 2 bolts, 2 nuts and turbine outlet elbow stay.
-
-
REMOVE PROPELLER SHAFT ASSEMBLY
-
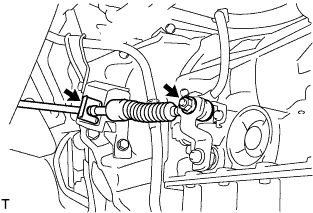
REMOVE FRONT EXHAUST PIPE ASSEMBLY (w/o DPF)
-
Remove the 2 bolts and 2 compression springs.
-
Disconnect the No. 4 exhaust pipe support and front exhaust pipe.
-
Remove the gasket.
-
-
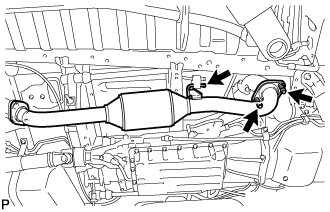
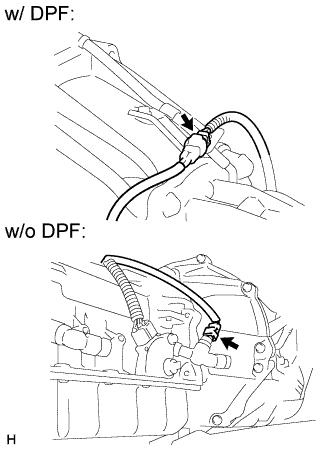
REMOVE FRONT EXHAUST PIPE ASSEMBLY (w/ DPF)
-
Disconnect the exhaust gas temperature sensor connector and detach the clamp.
-
Disconnect the No. 2 exhaust gas temperature sensor connector and detach the 2 clamps.
-
Disconnect the No. 3 exhaust gas temperature sensor connector and detach the 2 clamps.
-
Disconnect the No. 1 exhaust pipe air hose and No. 7 exhaust pipe air hose from the front exhaust pipe.
-
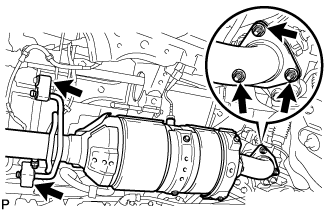
Remove the 2 No. 4 exhaust pipe supports.
-
Remove the 3 nuts and front exhaust pipe.
-
Remove the gasket.
-
-
REMOVE STARTER ASSEMBLY
-
for 2.2 kW Type:
Remove starter assembly Click here.
-
for 2.7 kW Type:
Remove starter assembly Click here.
-
-
REMOVE TRANSMISSION OIL FILLER TUBE SUB-ASSEMBLY
-
Remove the 2 bolts and transmission oil filler tube sub-assembly.
-
Remove the O-ring from the oil filler tube sub-assembly.
-
-
DISCONNECT TRANSMISSION CONTROL CABLE ASSEMBLY
-
Remove the nut and disconnect the transmission control cable assembly from the transmission control shaft lever assembly.
-
Remove the clip and disconnect the transmission control cable assembly from the No. 1 transmission control cable bracket.
-
-
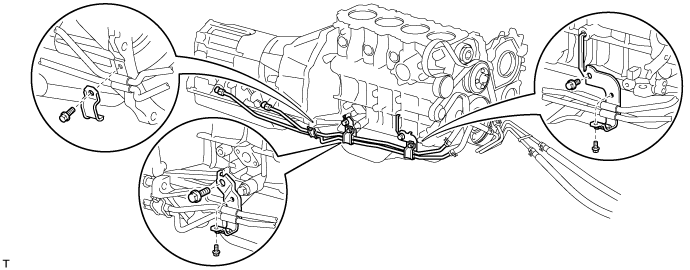
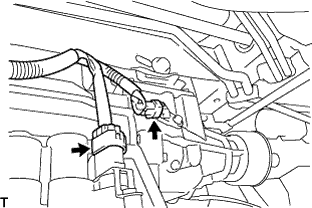
DISCONNECT OIL COOLER TUBE
-
Remove the 5 bolts and disconnect the 3 oil cooler tube clamps.
-
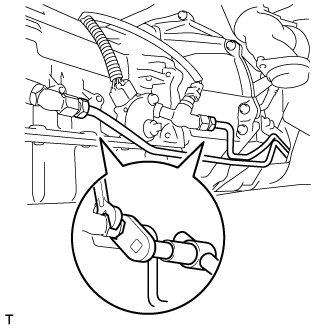
Using a 17 mm union nut wrench, disconnect the 2 oil cooler tubes from each oil cooler tube union.
-
-
DISCONNECT CONNECTOR
-
w/ Speedometer Sensor:
-
Disconnect the speedometer sensor connector.
-
-
Disconnect the temperature sensor connector.
-
Disconnect the park/neutral position switch connector.
-
Disconnect the No. 2 vehicle speed sensor connector and transmission wire connector.
-
Disconnect the overdrive direct clutch speed sensor connector.
-
-
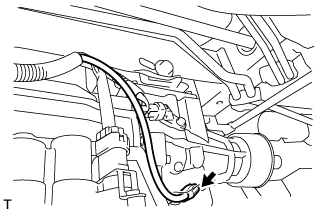
DISCONNECT WIRE HARNESS
-
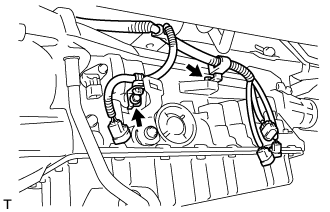
Remove the 2 bolts and disconnect the wire harness from the automatic transmission assembly.
-
-
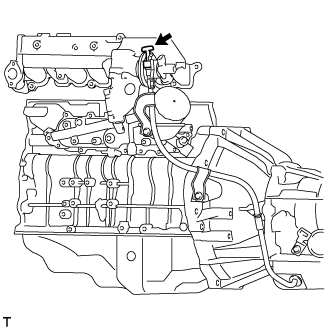
REMOVE NO. 4 CYLINDER BLOCK INSULATOR
-
Remove the No. 4 cylinder block insulator.
-
-
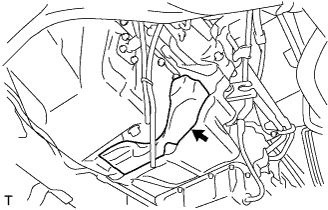
REMOVE STIFFENER PLATE RH(ATM)
-
Remove the 3 bolts and stiffener plate RH.
-
-
REMOVE DRIVE PLATE AND TORQUE CONVERTER CLUTCH SETTING BOLT
-
Remove the bolt and drive plate cover from the automatic transmission assembly.
-
Turn the crankshaft pulley and remove the 6 drive plate and torque converter clutch setting bolts.
-
-
SUPPORT AUTOMATIC TRANSMISSION ASSEMBLY
-
Support the automatic transmission assembly with a transmission jack.
-
-
SEPARATE ENGINE MOUNTING REAR INSULATOR ASSEMBLY
-
Remove the bolt, the nut and the washer and separate the engine mounting rear insulator assembly.
-
-
REMOVE AUTOMATIC TRANSMISSION ASSEMBLY
-

Remove the 5 bolts and automatic transmission assembly.
Note
Do not use excess force to pry off the transmission assembly.
-
-
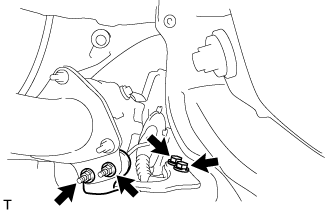
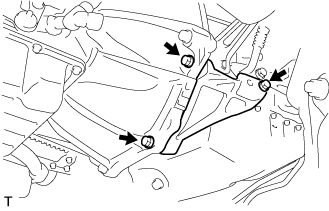
REMOVE NO. 1 TRANSMISSION CONTROL CABLE BRACKET
-
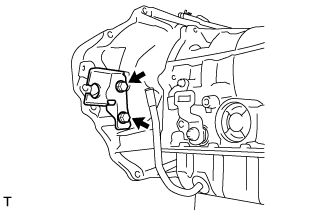
Remove the 2 bolts and the No. 1 transmission control cable bracket from the automatic transmission housing.
-
-
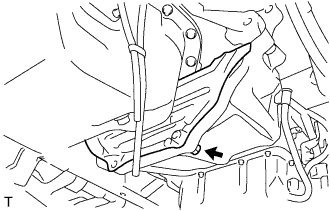
REMOVE ENGINE MOUNTING REAR INSULATOR ASSEMBLY
-
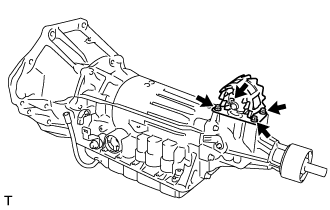
Remove the 4 bolts and engine mounting rear insulator assembly from the extension housing sub-assembly.
-
-
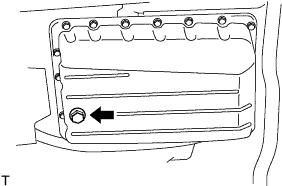
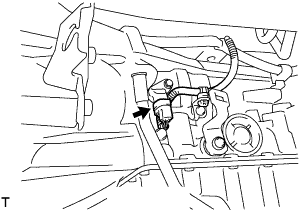
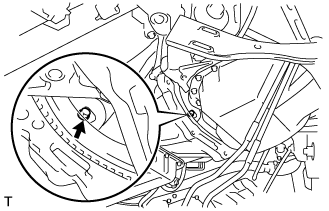
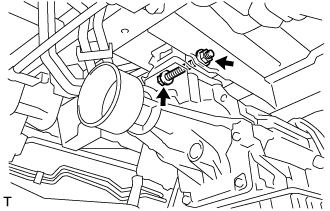
REMOVE BREATHER PLUG HOSE
-
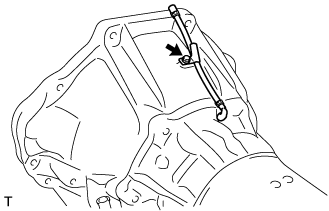
Remove the bolt and breather plug hose from the automatic transmission housing.
-
-
REMOVE TORQUE CONVERTER CLUTCH ASSEMBLY
-
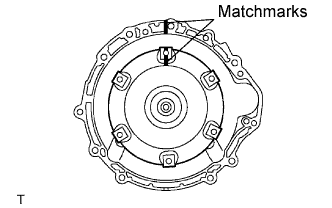
Put a matchmark on the automatic transmission housing and the torque converter clutch assembly.
-
Remove the torque converter clutch assembly from the automatic transmission assembly.
-
-
INSPECT TORQUE CONVERTER CLUTCH ASSEMBLY
-
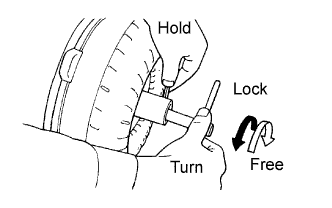
Inspect the one-way clutch.
-
Install the SST so that it fits in the notch of the converter hub and the outer race of the one-way clutch.
- SST
- 09350-32014 ( 09351-32010, 09351-32020 )
-
Install the SST (Stopper) from the sleeve of torque converter assembly and engage serration of stater slight washer.
-
Stand up the torque converter and turn the SST (tool ).
- SST
- 09350-32014 ( 09351-32010, 09351-32020 )
Standard Check if it rotates smoothly when turned clockwise and locks up when turned counter clockwise.
-
-
Determine the condition of the torque converter clutch assembly.
-
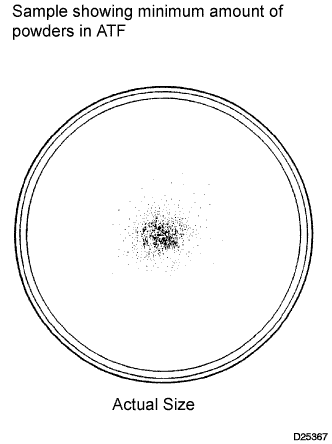
If the inspection result of the torque converter clutch assembly meets the following item, replace the torque converter clutch.
Malfunction item Any metallic sound is heard from the torque converter clutch during stall test or when the shift lever is in the N position. The one-way clutch is free or locked in both directions. Fine powder exceeding the sample limit is identified in ATF. (See the sample.) Tech Tips
-
The sample shows the auto fluid of approximately 0.25 liters (0.26 US qts, 0.22 Imp, qts) that is taken out from the removed torque converter clutch.
-
-
-
Replace the ATF in the torque converter clutch.
-
If the ATF is discolored and/or has a foul odor, completely stir the ATF in the torque converter clutch and drain it with the installation face up.
-
-

Clean and check the oil cooler and oil pipe line.
-
If the torque converter clutch is inspected or exchange the ATF, is exchanged, clean the oil cooler and oil pipe line.
Tech Tips
-
Spray compressed air of 196 kPa (2kgf/cm2, 28 psi) from the inlet hose.
-
If plenty of fine powders are identified in the ATF, add a new ATF using a bucket pump and clean it again.
-
-
If the ATF is cloudy, inspect the oil cooler.
-
-