OVERDRIVE BRAKE (for 2KD-FTV) DISASSEMBLY

-
INSPECT PISTON OPERATION OF OVERDRIVE BRAKE
-
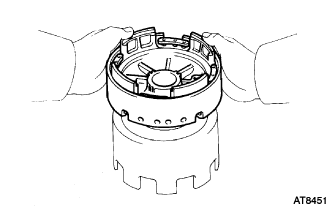
Place the O/D support assembly onto the direct clutch assembly.
-
Apply compressed air (392 kPa, 4 kgf/cm2, 57 psi) into the oil passage, and check that the O/D brake piston moves smoothly.
-
-
REMOVE OVERDRIVE BRAKE RETURN SPRING SUB-ASSEMBLY
-
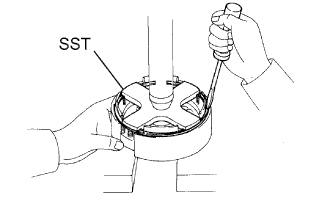
Place SST on the spring retainer, and compress the return spring with a press.
- SST
- 09350-30020 ( 09350-07030 )
-
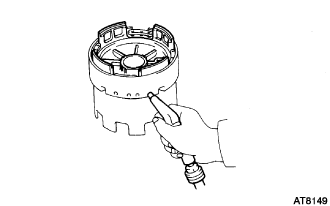
Remove the snap ring with a screwdriver.
-
Remove the piston return spring.
-
-
INSPECT OVERDRIVE BRAKE RETURN SPRING SUB-ASSEMBLY
-
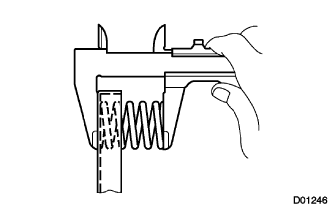
Measure the free length of the spring together with the spring seat.
Standard free length 17.03 mm (0.671 in.)
-
-
REMOVE OVERDRIVE BRAKE PISTON
-

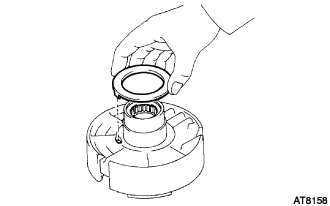
Place the O/D support onto the direct clutch assembly.
-
Hold the O/D brake piston so that it does not slant, and apply compressed air (392 kPa, 4 kgf/cm2, 57 psi) into the passage to remove the O/D brake piston.
-
Remove the O/D brake piston.
-
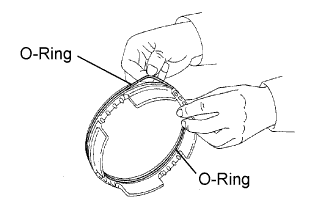
Remove the 2 O-rings.
-
-
REMOVE OVERDRIVE CLUTCH DRUM OIL SEAL RING
-

Remove the 2 oil seal rings.
-
Remove the thrust washer from O/D support.
-
-
INSPECT OVERDRIVE BRAKE CLUTCH DISC
-
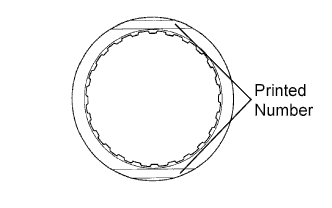
Check if the sliding surface of the disc, the plate and the flange are worn or burnt. If necessary, replace them.
Tech Tips
-
If the lining of the disc is peeled off or discolored, or even if only a part of the printed numbers is corroded, replace all discs.
-
Before assembling new discs, soak them in ATF for at least 15 minutes.
-
-