ECM REMOVAL
-
PRECAUTION
Note
After turning the ignition switch off, waiting time may be required before disconnecting the cable from the battery terminal. Therefore, make sure to read the disconnecting the cable from the battery terminal notice before proceeding with work Click here.
-
DISCONNECT CABLE FROM NEGATIVE BATTERY TERMINAL
Note
When disconnecting the cable, some systems need to be initialized after the cable is reconnected Click here.
-
REMOVE FRONT DOOR SCUFF PLATE RH
Tech Tips
Use the same procedures described for the LH side.
-
REMOVE SEAT TRACK COVER LH
-
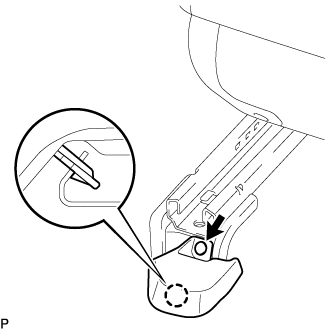
Using a clip remover, remove the clip.
-
Detach the claw and remove the seat track cover LH.
-
-
REMOVE FRONT SEAT ASSEMBLY RH
-
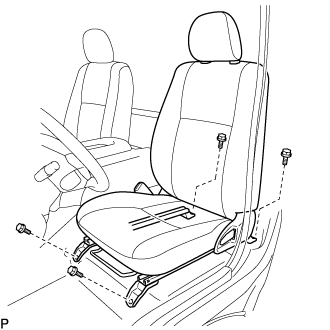
Move the front seat assembly fully forward.
-
Remove the 2 bolts on the rear side of the seat.
-
Move the front seat assembly to the rearmost position.
-
Remove the 2 bolts on the front side of the seat.
-
Move the front seat assembly to the center of the seat slide rail. Set the seatback in the upright position.
-
Disconnect the front seat inner belt assembly connector.
-
Remove the front seat assembly.
-
-
REMOVE ECM
-
Fold back the floor carpet.
-
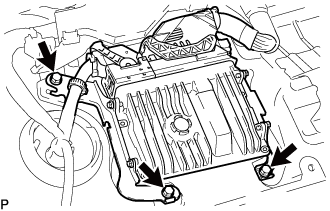
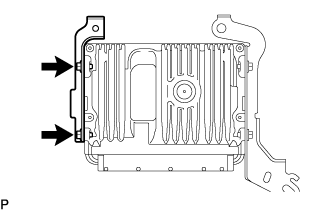
Remove the 3 bolts from the ECM.
-
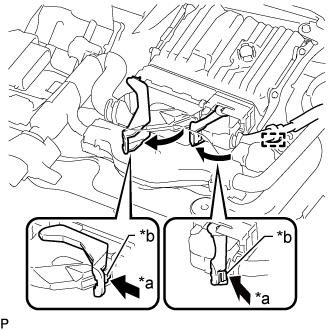
Text in Illustration *a Push *b Lock Raise the 2 levers while pushing the locks on the 2 levers, disconnect the 2 ECM connectors and remove the ECM.
Note
After disconnecting the ECM connector, make sure that dirt, water and other foreign matter does not contact the ECM connector.
-
Detach the clamp.
-
-
REMOVE NO. 1 ECM BRACKET
-
Remove the 2 screws and No. 1 ECM bracket.
-
-
REMOVE NO. 2 ECM BRACKET
-

Remove the 2 screws and No. 2 ECM bracket.
-