ECM REMOVAL
-
CHECK INJECTOR COMPENSATION CODE
Note
When the ECM is replaced, all of the existing injector compensation codes must be input into the new ECM and the learning value of the fuel supply pump assembly must be initialized.
-
Check that the injection compensation codes of the fuel injectors installed on the cylinders match the ones registered in the ECM.
-
w/ DPF: Click here
-
w/o DPF: Click here
If they do not match, correct the registered data.
-
w/ DPF: Click here
-
w/o DPF: Click here
-
-
-
DISCONNECT CABLE FROM NEGATIVE BATTERY TERMINAL
-
REMOVE FRONT DOOR SCUFF PLATE RH
-
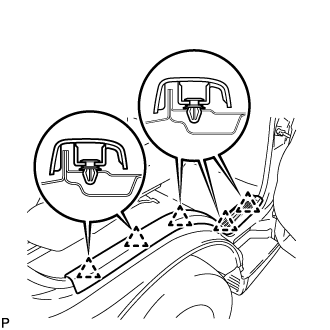
Detach the 5 clips and remove the front door scuff plate RH.
-
-
REMOVE FRONT SEAT ASSEMBLY RH
-
for Hi-back Seat Type Click here
-
for Low-back Seat Type Click here
-
for Split Bench Seat Type Click here
-
-
REMOVE ECM
-
Fold back the floor carpet.
-
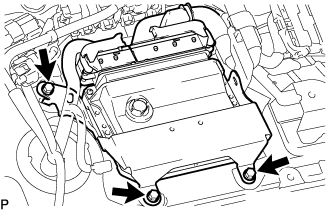
Remove the 3 bolts from the ECM.
-

Detach the 2 wire harness clamps from the No. 1 ECM bracket and No. 2 ECM bracket.
-
Raise the 2 levers while pushing the locks on the 2 levers, disconnect the 2 ECM connectors and remove the ECM.
Text in Illustration *a Push *b Lock Note
After disconnecting a ECM connector, make sure that dirt, water and other foreign matter does not contact the ECM connector.
-
-
REMOVE NO. 1 ECM BRACKET
-
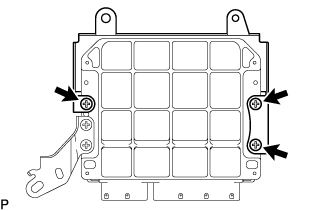
Remove the 3 screws and No. 1 ECM bracket.
-
-
REMOVE NO. 2 ECM BRACKET
-
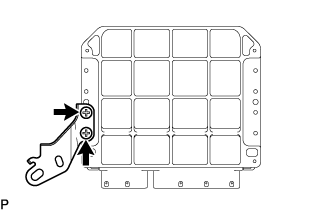
Remove the 2 screws and No. 2 ECM bracket.
-