EXHAUST GAS TEMPERATURE SENSOR (for DPF) INSTALLATION
-
INSTALL NO. 3 EXHAUST GAS TEMPERATURE SENSOR
Note
If the sensor is dropped, replace it with a new one.
-
Using a 14 mm union nut wrench, install the No. 3 exhaust gas temperature sensor.
- Torque:
- 30 N*m { 306 kgf*cm, 22 ft.*lbf }
Tech Tips
-
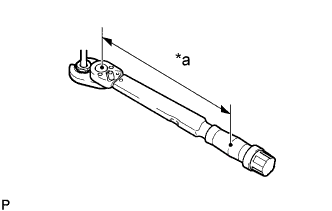
Calculate the torque wrench reading when changing the fulcrum length of the torque wrench.
Text in Illustration *a Torque Wrench Fulcrum Length -
When using a union nut wrench (fulcrum length of 25 mm (0.984 in.)) + torque wrench (fulcrum length of 180 mm (7.087 in.)): 26 N*m (268 kgf*cm, 19 ft.*lbf)
-
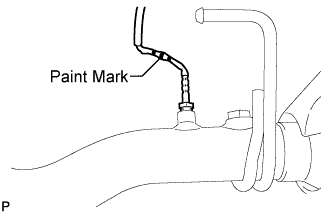
The sensor has 3 paint marks as shown in the illustration.
-
-
INSTALL NO. 2 EXHAUST GAS TEMPERATURE SENSOR
Note
If the sensor is dropped, replace it with a new one.
-
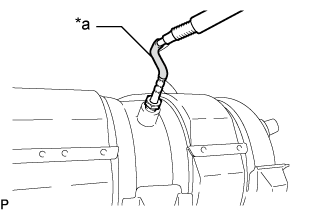
Text in Illustration *a Wire Harness Tube Color
(Orange)
Using a 14 mm union nut wrench, install the No. 2 exhaust gas temperature sensor.
- Torque:
- 30 N*m { 306 kgf*cm, 22 ft.*lbf }
-
-
INSTALL EXHAUST GAS TEMPERATURE SENSOR
Note
If the sensor is dropped, replace it with a new one.
-
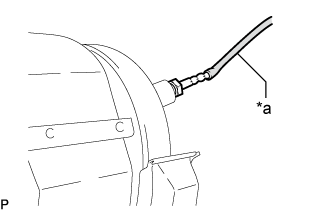
Text in Illustration *a Wire Harness Tube Color
(Yellow)
Using a 14 mm union nut wrench, install the exhaust gas temperature sensor.
- Torque:
- 30 N*m { 306 kgf*cm, 22 ft.*lbf }
-
-
INSTALL FRONT EXHAUST PIPE ASSEMBLY