EGR COOLER (w/o DPF) REMOVAL
-
REMOVE NO. 1 ENGINE UNDER COVER (for Cold Area Specification Vehicles)
-
Remove the 4 bolts and No. 1 engine under cover.
-
-
REMOVE NO. 2 ENGINE UNDER COVER (for Cold Area Specification Vehicles)
-
Remove the 6 bolts and No. 2 engine under cover.
-
-
DRAIN ENGINE COOLANT
CAUTION:
Do not remove the radiator reservoir cap sub-assembly while the engine and radiator are still hot. Pressurized, hot engine coolant and steam may be released and cause serious burns.
-
Loosen the radiator drain cock plug.
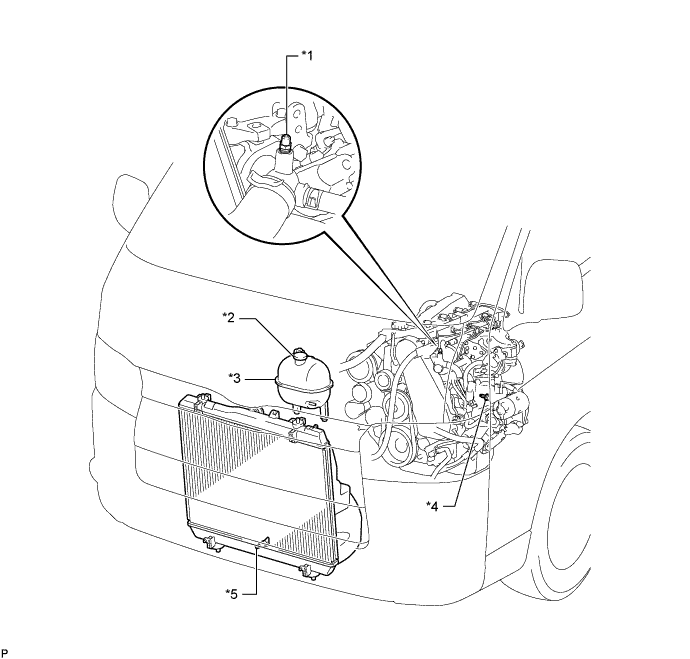
Text in Illustration *1 Bleeder Plug *2 Radiator Reservoir Cap Sub-assembly *3 Radiator Reservoir Assembly *4 Cylinder Block Drain Cock Plug *5 Radiator Drain Cock Plug - - -
Remove the radiator reservoir cap sub-assembly.
-
Loosen the cylinder block drain cock plug (on the engine oil cooler cover), and drain the engine coolant.
-
Tighten the radiator drain cock plug.
-
Tighten the cylinder block drain cock plug (on the engine oil cooler cover).
- Torque:
- 8.0 N*m { 82 kgf*cm, 71 in.*lbf }
-
-
REMOVE NO. 2 ENGINE SERVICE HOLE COVER (for Standard Body)
-
REMOVE TRANSMISSION OIL FILLER TUBE SUB-ASSEMBLY (for Automatic Transmission)
-
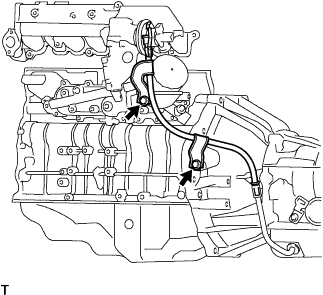
Remove the 2 bolts and transmission oil filler tube sub-assembly.
-
Remove the O-ring from the oil filler tube sub-assembly.
-
-
REMOVE DIESEL THROTTLE BODY ASSEMBLY
-
REMOVE ENGINE OIL LEVEL DIPSTICK GUIDE
-
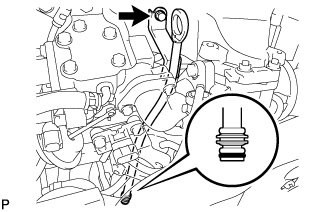
Remove the bolt and engine oil level dipstick guide.
-
Remove the O-ring from the engine oil level dipstick guide.
-
-
DISCONNECT NO. 1 GAS FILTER
-
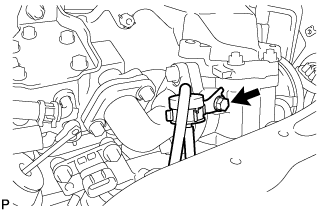
Remove the bolt and disconnect the vacuum hose together with the No. 1 gas filter.
-
-
REMOVE VACUUM SWITCHING VALVE ASSEMBLY
-
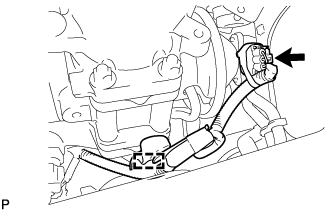
Disconnect the connector from the electric EGR control valve.
-
Detach the clamp and wire harness.
-
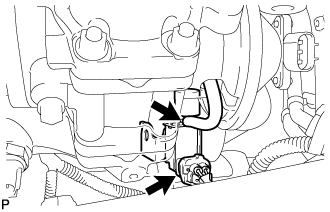
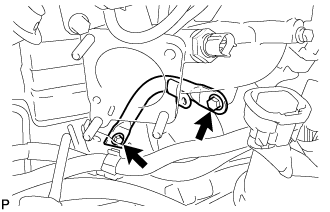
Disconnect the connector and vacuum hose from the vacuum switching valve.
-
Remove the bolt and vacuum switching valve.
-
-
REMOVE MANIFOLD STAY
-
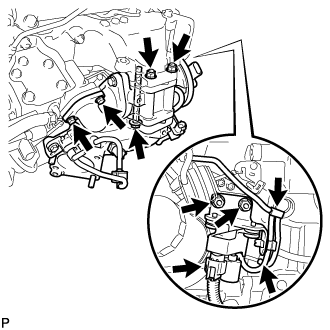
Remove the 2 bolts and manifold stay.
-
-
REMOVE ELECTRIC EGR CONTROL VALVE ASSEMBLY
-
Remove the 2 bolts and disconnect the No. 2 EGR pipe from the No. 2 EGR valve and gasket.
-
Remove the bolt and 2 nuts, disconnect the electric EGR control valve together with the intake air connector from the intake manifold and remove the gasket.
-
Remove the electric EGR control valve and gasket from the intake air connector.
-
Disconnect the connector from the vacuum regulating valve.
-
Disconnect the 2 vacuum hoses from the vacuum regulating valve.
-
Remove the 2 bolts and vacuum regulating valve.
-
-
DISCONNECT NO. 4 VACUUM TRANSMITTING HOSE ASSEMBLY
-
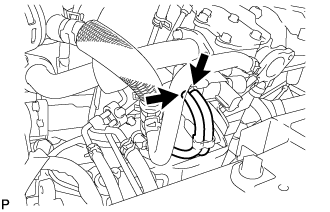
Disconnect the No. 4 vacuum transmitting hose from the EGR cooler.
-
-
DISCONNECT WATER BY-PASS HOSE ASSEMBLY
-
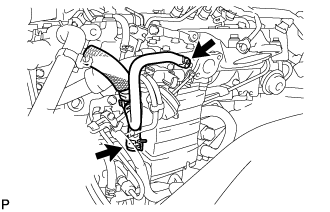
Disconnect the water by-pass hose from the EGR cooler.
-
-
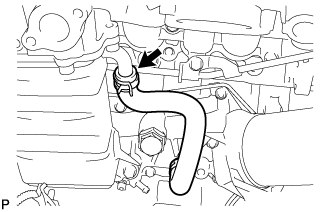
DISCONNECT NO. 4 WATER BY-PASS HOSE
-
REMOVE EGR COOLER ASSEMBLY
-
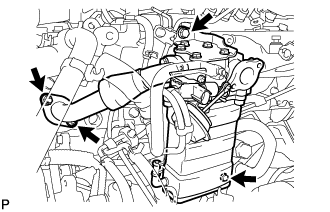
Remove the 2 bolts, 2 nuts and No. 1 EGR pipe together with the No. 2 EGR valve and EGR cooler.
-
Remove the gasket from the cylinder head.
-
-
REMOVE NO. 1 EGR PIPE SUB-ASSEMBLY
-

Remove the 2 nuts, No. 1 EGR pipe and gasket.
-