FRONT SEAT ASSEMBLY(for Power Seat) REMOVAL
CAUTION / NOTICE / HINT
CAUTION:
Wear protective gloves. Sharp areas on the parts may injure your hands.
Tech Tips
-
Use the same procedure for RHD and LHD vehicles.
-
The procedure listed below is for LHD vehicles.
-
Use the same procedure for the RH and LH sides.
-
The procedure listed below is for the LH side.
PROCEDURE
-
REMOVE FRONT SEAT HEADREST ASSEMBLY
-
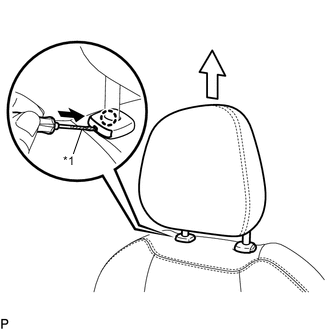
Text in Illustration *1 Protective Tape Using a screwdriver, push the headrest support lock to release the lock and remove the front seat headrest assembly.
Tech Tips
Tape the screwdriver tip before use.
-
-
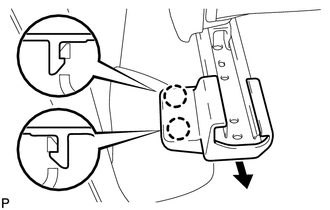
REMOVE FRONT SEAT REAR INNER TRACK COVER
-
Operate the front power seat switch (slide switch) to move the front seat assembly to the foremost position.
-

Detach the 2 claws and remove the front seat rear inner track cover.
-
-
REMOVE FRONT SEAT REAR OUTER TRACK COVER
-
Detach the 2 claws and remove the front seat rear outer track cover.
-
-
REMOVE FRONT SEAT INNER TRACK BRACKET COVER
-
Operate the front power seat switch (slide switch) to move the front seat assembly to the rearmost position.
-
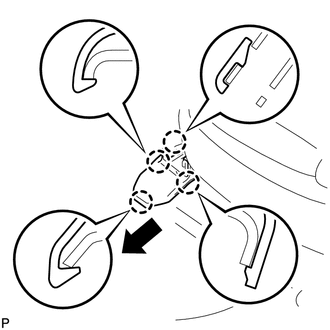
Detach the 4 claws and remove the front seat inner track bracket cover.
-
-
REMOVE FRONT SEAT OUTER TRACK BRACKET COVER
-
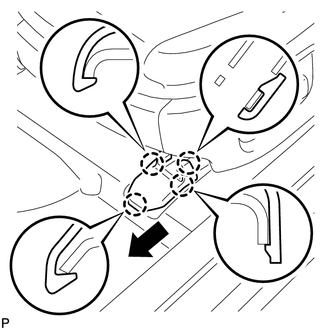
Detach the 4 claws and remove the front seat outer track bracket cover.
-
-
REMOVE FRONT SEAT ASSEMBLY
-

Remove the 2 bolts.
-
Operate the front power seat switch (slide switch) and move the front seat assembly to the center position, operate the front power seat switch (reclining switch) and move the seatback to the upright position, and operate the front power seat switch (front vertical switch) and move the front seat assembly to the highest position.
-
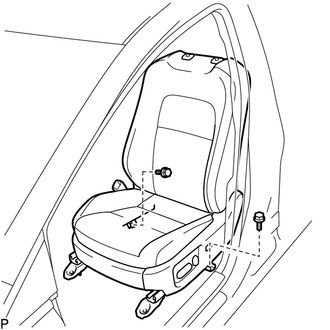
Remove the 2 bolts.
-
Disconnect the cable from the negative (-) battery terminal.
CAUTION:
Wait at least 90 seconds after disconnecting the cable from the negative (-) battery terminal to disable the SRS system.
Note
-
After turning the ignition switch off, waiting time may be required before disconnecting the cable from the battery terminal. Therefore, make sure to read the disconnecting the cable from the battery terminal notice before proceeding with work Click here.
-
When disconnecting the cable, some systems need to be initialized after the cable is reconnected Click here.
-
-
Disconnect the connectors under the front seat assembly.
-
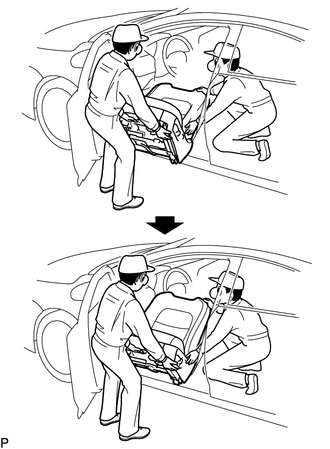
Remove the front seat assembly as shown in the illustration.
Note
-
Make sure the front power seat switch knob does not contact the center pillar.
-
Make sure the seatback does not contact the shift lever knob.
-
Be careful not to damage the vehicle body.
Tech Tips
Remove the front seat assembly through the door frame so that it passes under the steering wheel.
-
-