CAMERA HEATER INSTALLATION
PROCEDURE
-
INSTALL PRE-CRASH SAFETY CITY HEATER
Tech Tips
-
Perform this step only when necessary.
-
If a pre-crash safety city heater has been removed, replace it with a new one. Install a new pre-crash safety city heater with the pre-crash safety city heater wire as a set.
-
If the sticker is creased or folded it may result in an open circuit.
-
Water may enter and cause a short if the sticker adhesive layer and wiring layer are separated.
-
Clean the wind shield glass surface.
-
When work environment temperature is below 15°C:
-
Using a heat light, heat the pre-crash safety city heater and windshield glass surface.
Heating Temperature Item Temperature Pre-crash safety city heater 15 to 80 °C (59 to 176 °F) Windshield glass 15 to 80 °C (59 to 176 °F)) CAUTION:
-
Do not touch the heat light and heated parts, touching the heat light may result in burns.
-
Touching heated parts for a long time may result in burns.
Note
Do not heat the pre-crash safety city heater or windshield glass excessively.
-
-
-
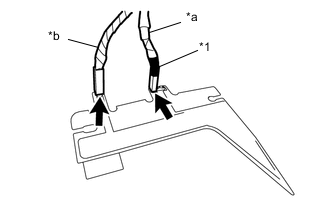
Text in Illustration *1 Tape *a Long connector *b Short connector Connect the 2 connectors to a new pre-crash safety city heater as shown in the illustration.
-
Remove the release paper from a new pre-crash safety city heater.
Tech Tips
After removing the release paper, keep the exposed adhesive free from foreign matter.
-
Install the pre-crash safety city heater with pre-crash safety city heater wire by aligning it to the specified application position as shown in the illustration.
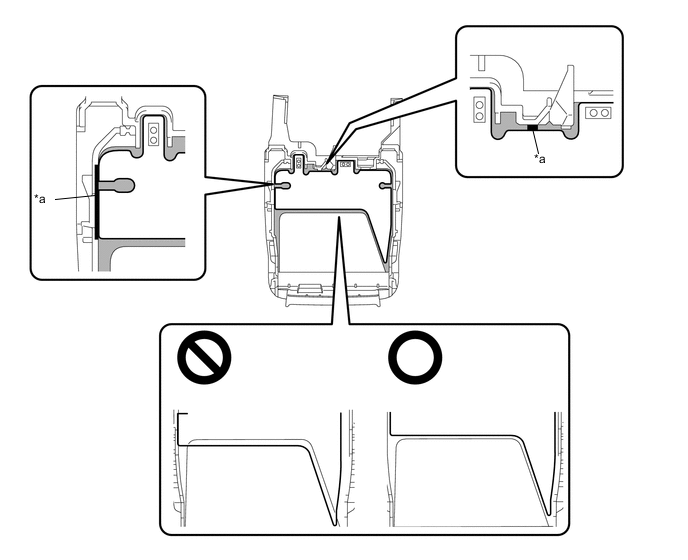
Text in Illustration *a Specified Application Position - - 
Black ceramic - - Note
-
Make sure that the sticker is within the black ceramic area.
-
The double-sided tape of a pre-crash safety city heater will deteriorate if it is detached. Make sure to replace the pre-crash safety city heater with a new one when reattachment is necessary.
Tech Tips
Apply the pre-crash safety city heater along the bracket.
-
-
-
INSTALL PRE-CRASH SAFETY CITY HEATER WIRE
-
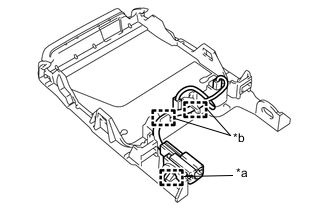
Text in Illustration *a Clamp *b Guide Attach the clamp and 2 guides to install the pre-crash safety city heater wire.
-
-
INSTALL PRE-CRASH SAFETY CITY SENSOR