LUGGAGE COMPARTMENT DOOR GARNISH REMOVAL
PROCEDURE
-
REMOVE BACK DOOR ASSIST GRIP
-
REMOVE DOOR ASSIST GRIP
-
REMOVE BACK DOOR TRIM COVER
-
REMOVE REAR LIGHT ASSEMBLY LH
-
REMOVE REAR LIGHT ASSEMBLY RH
-
REMOVE LUGGAGE COMPARTMENT DOOR OUTSIDE GARNISH SUB-ASSEMBLY
-
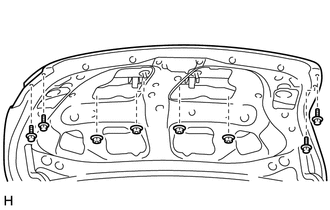
Remove the 4 nuts.
-
Remove the 4 bolts.
-

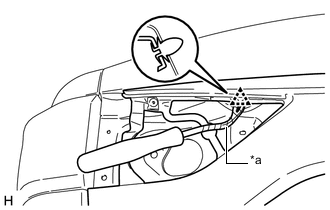
Text in Illustration *a Protective Tape Put protective tape around the luggage compartment door outside garnish sub-assembly.
-

Text in Illustration *a Protective Tape Using a clip remover, detach the clip.
CAUTION:
Do not damage the luggage compartment door outside garnish sub-assembly.
Tech Tips
-
Tape the clip remover tip before use.
-
Use the same procedure for the other side.
-
-
Text in Illustration *a Protective Tape Using a clip remover, detach the clip.
Note
Do not damage the luggage compartment door outside garnish sub-assembly.
Tech Tips
-
Tape the clip remover tip before use.
-
Use the same procedure for the other side.
-
-

Detach the 5 clips in the order shown in the illustration and remove the luggage compartment door outside garnish sub-assembly.
Text in Illustration 
Remove in this Direction -
Remove the protective tape.
-
-
REMOVE BACK DOOR OPENER SWITCH ASSEMBLY