HIGH INTENSITY DISCHARGE HEADLIGHT BULB INSTALLATION
CAUTION / NOTICE / HINT
CAUTION:
Make sure that the No. 1 headlight back cover is not connected or hot before disassembling the No. 1 headlight back cover.
Tech Tips
-
Use the same procedure for the RH and LH sides.
-
The procedure listed below is for the LH side.
PROCEDURE
-
INSTALL DISCHARGE HEADLIGHT BULB
-
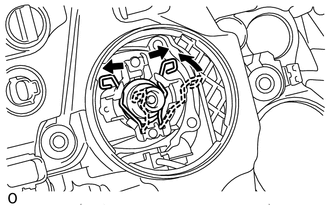
Lock the set spring as shown in the illustration to install the discharge headlight bulb.
Note
Do not touch the glass part of the bulb.
-
-
INSTALL NO. 1 HEADLIGHT BACK COVER
-
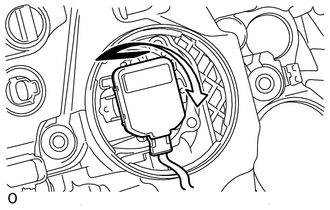
Turn the No. 1 headlight back cover socket in the direction indicated by the arrow in the illustration to connect the No. 1 headlight back cover socket.
Note
After installing the No. 1 headlight back cover socket, confirm that the cord is not twisted, and then store the cord inside the headlight in such a way so that it is not pinched.
-
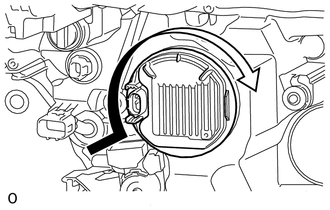
Turn the No. 1 headlight back cover in the direction indicated by the arrow in the illustration to install the No. 1 headlight back cover.
-
Connect the connector.
-
-
CONNECT CABLE TO NEGATIVE BATTERY TERMINAL
Note
When disconnecting the cable, some systems need to be initialized after the cable is reconnected Click here.
-
INSTALL RADIATOR SUPPORT OPENING COVER