CLUTCH MASTER CYLINDER(for LHD) INSTALLATION
PROCEDURE
-
INSTALL CLUTCH MASTER CYLINDER ASSEMBLY
-
Install the clutch master cylinder bracket.
-
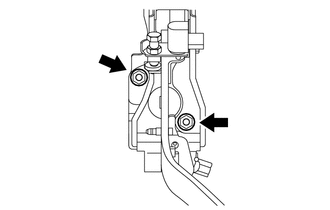
Install the clutch master cylinder assembly with the 2 nuts.
- Torque:
- 18 N*m { 178 kgf*cm, 13 ft.*lbf }
-
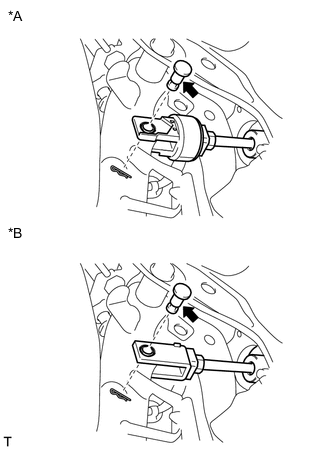
Text in Illustration *A for 2WW *B for 1WW 
MP grease Apply MP grease to the contact surface of the clutch master cylinder push rod clevis with hole pin.
-
Connect the clevis to the clutch pedal sub-assembly with the clutch master cylinder push rod clevis with hole pin.
Tech Tips
Install the clutch master cylinder push rod clevis with hole pin from the right side of the vehicle.
-
Install a new clip to the clutch master cylinder push rod clevis with hole pin.
-
-
CONNECT CLUTCH MASTER CYLINDER TO FLEXIBLE HOSE TUBE
-
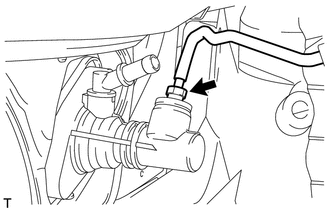
Using a union nut wrench, connect the clutch master cylinder to flexible hose tube.
- Torque:
- 15 N*m { 155 kgf*cm, 11 ft.*lbf }
Note
Use the formula to calculate special torque values for situations where a union nut wrench is combined with a torque wrench Click here.
-
-
INSTALL CLUTCH RESERVOIR TUBE
-
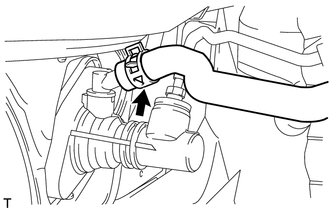
Connect the clutch reservoir tube to the clutch master cylinder assembly, and slide the clip to secure it.
-
-
INSTALL BRAKE BOOSTER ASSEMBLY
-
BLEED CLUTCH LINE
-
INSPECT FLUID LEVEL
-
INSPECT FOR FLUID LEAK
Tech Tips
Check for leaks in the clutch system.
-
INSPECT AND ADJUST CLUTCH PEDAL SUB-ASSEMBLY
-
INSTALL LOWER NO. 1 INSTRUMENT PANEL AIRBAG ASSEMBLY