AUTOMATIC TRANSAXLE ASSEMBLY REMOVAL
PROCEDURE
-
REMOVE ENGINE ASSEMBLY WITH TRANSAXLE
-
Remove the engine with transaxle Click here.
-
-
REMOVE STARTER ASSEMBLY (for DENSO Made)
-
REMOVE STARTER ASSEMBLY (for VALEO Made)
-
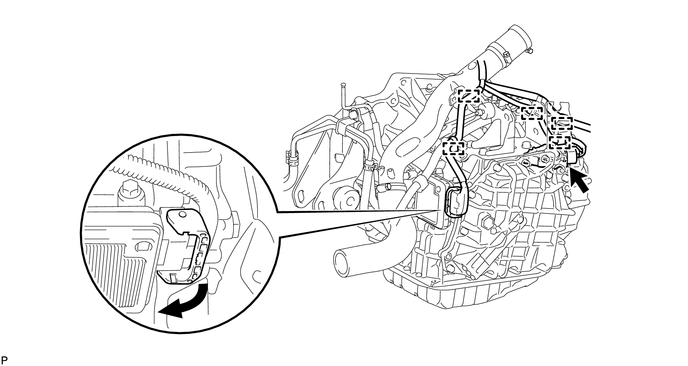
DISCONNECT WIRE HARNESS
-
Disconnect the park/neutral position switch connector and TCM connector, and detach the 5 wire harness clamps from the transaxle.
Tech Tips
Detach the claw, turn the lock lever, and then disconnect the TCM connector.
-
-
REMOVE GROUND CABLE
-
Detach the 2 clamps.
-
Remove the bolt and ground cable.
-
-
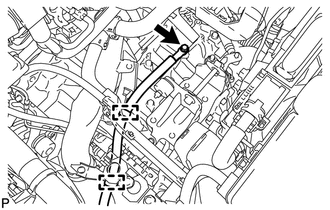
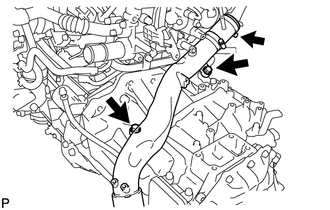
REMOVE NO. 1 OIL COOLER TUBE SUB-ASSEMBLY

-
Disconnect the breather plug hose from the No. 1 oil cooler tube.
-
Disconnect the 2 oil cooler hoses from the transaxle.
-
Remove the bolt and No. 1 oil cooler tube with 2 oil cooler hoses.
-
-
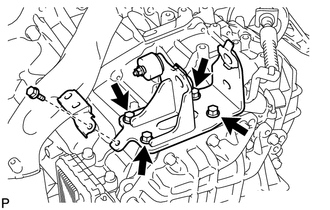
REMOVE FRONT ENGINE MOUNTING BRACKET
-
Remove the 4 bolts and front engine mounting bracket from the transaxle.
-
-
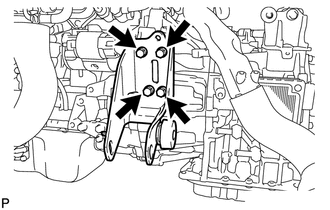
REMOVE REAR ENGINE MOUNTING BRACKET
-
Remove the 4 bolts and rear engine mounting bracket from the transaxle.
-
-
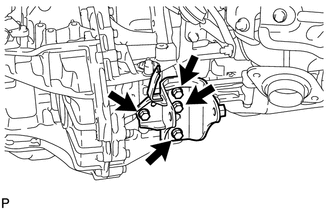
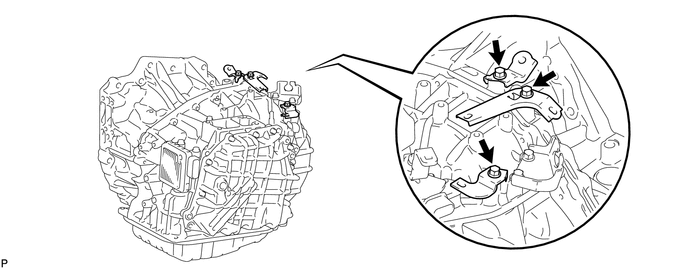
REMOVE ENGINE MOUNTING BRACKET LH
-
Remove the bolt and wire harness clamp bracket.
-
Remove the 4 bolts and engine mounting bracket LH from the transaxle.
-
-
REMOVE NO. 1 AIR TUBE ASSEMBLY
-
Loosen the hose clamp, and remove the 2 bolts and No. 1 air tube.
-
-
REMOVE DRIVE PLATE AND TORQUE CONVERTER CLUTCH SETTING BOLT

-
Remove the 2 bolts and oil pan insulator.
-
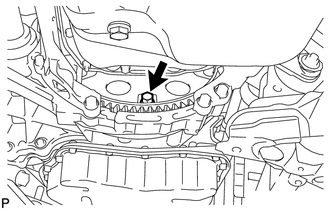
Turn the crankshaft to gain access to the 6 bolts and remove each bolt while holding the crankshaft pulley bolt with a wrench.
-
-
REMOVE AUTOMATIC TRANSAXLE ASSEMBLY
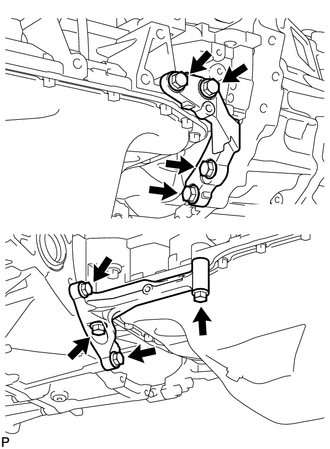
-
Remove the 8 bolts and stiffener plate LH and RH.
-

Remove the 5 bolts and transaxle.
Note
To prevent damage to the knock pins, do not pry between the transaxle and engine.
-
-
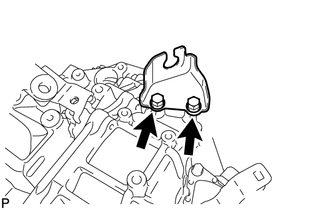
REMOVE WIRE HARNESS CLAMP BRACKET
-
Remove the 3 bolts, 2 wire harness clamp brackets and air tube support.
-
-
REMOVE NO. 1 TRANSMISSION CONTROL CABLE BRACKET
-
Remove the 2 bolts and transmission control cable bracket from the transaxle.
-
-
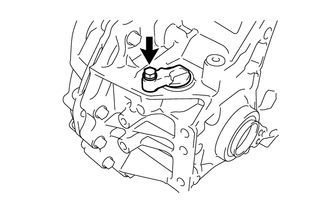
REMOVE SPEEDOMETER DRIVEN HOLE COVER SUB-ASSEMBLY
-
Remove the bolt and speedometer driven hole cover from transaxle.
-
Remove the O-ring from the hole cover.
-
-
REMOVE TCM
-
REMOVE TORQUE CONVERTER CLUTCH ASSEMBLY
-
INSPECT TORQUE CONVERTER CLUTCH ASSEMBLY
-
INSPECT DRIVE PLATE