LANE RECOGNITION CAMERA SENSOR INSTALLATION

CAUTION / NOTICE / HINT
Tech Tips
-
Use the same procedure for RHD and LHD vehicles.
-
The procedure listed below is for the LHD.
PROCEDURE
-
INSTALL LANE RECOGNITION CAMERA SENSOR ASSEMBLY
-
Install a new roof side inner garnish clip to the lane recognition camera sensor assembly.
-
Install the camera with the new clip.
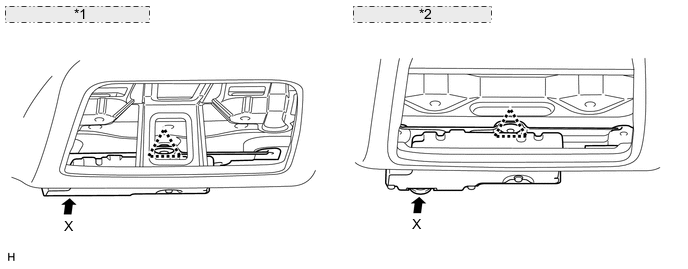
*1 w/o Roof Sunshade System: *2 w/ Roof Sunshade System: Note
When removing the rain sensor cover, do not apply force to the lane recognition camera sensor assembly areas labeled "X".
-
Install the 2 bolts in the alphabetical order.
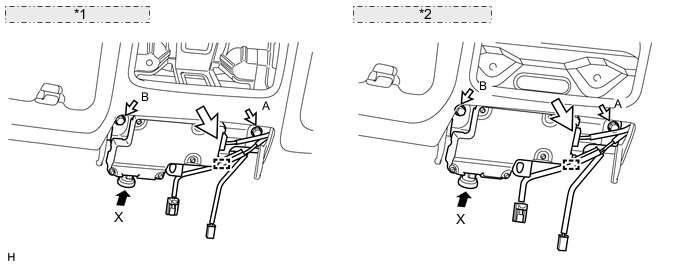
*1 w/o Roof Sunshade System: *2 w/ Roof Sunshade System: Note
When removing the rain sensor cover, do not apply force to the lane recognition camera sensor assembly areas labeled "X".
- Torque:
- 16 N*m { 163 kgf*cm, 12 ft.*lbf }
-
Connect the camera connector and attach the clamp.
-
-
INSTALL REAR INNER VIEW MIRROR ASSEMBLY
-
INSTALL INNER REAR VIEW MIRROR STAY HOLDER COVER
-
INSTALL NO. 1 RAIN SENSOR COVER
-
INSTALL FRONT ROOF TOP GARNISH
-
Attach the 2 claws and clip to install the front roof top garnish.
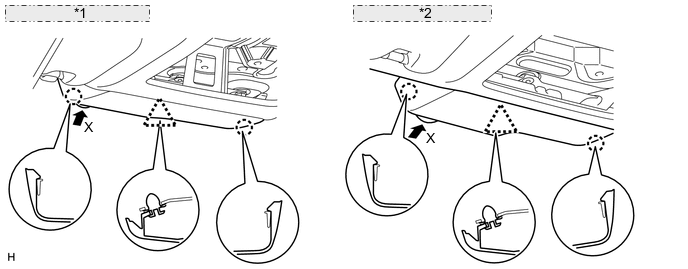
*1 w/o Roof Sunshade System: *2 w/ Roof Sunshade System: Note
When removing the rain sensor cover, do not apply force to the lane recognition camera sensor assembly areas labeled "X".
-
-
INSTALL MAP LIGHT ASSEMBLY
-
ADJUST LANE RECOGNITION CAMERA SENSOR ASSEMBLY