ROOF DRIP SIDE FINISH MOULDING(for Wagon) INSTALLATION
CAUTION / NOTICE / HINT
Tech Tips
-
Use the same procedures for the RH side and LH side.
-
The procedures listed below are for the LH side.
-
When installing the front roof side garnish, heat the vehicle body and front roof side garnish using a heat light.
Standard Item Temperature Front Roof Side Garnish 20 to 30°C (68 to 86°F) Vehicle Body 40 to 60°C (104 to 140°F) Note
Do not heat the front roof side garnish and vehicle body excessively.
PROCEDURE
-
INSTALL FRONT ROOF SIDE GARNISH LH
-
Clean the vehicle body surface.
-
Using a heat light, heat the vehicle body surface.
-
Remove the double-sided tape from the vehicle body surface.
-
Wipe off any tape adhesive residue with cleaner.
-
-
If reusing the front roof side garnish:
Clean the front roof side garnish.
-
Using a heat light, heat the front roof side garnish.
-
Remove the double-sided tape from the front roof side garnish.
-
Wipe off any tape adhesive residue with cleaner.
-
Apply new double-sided tape to the front roof side garnish as shown in the illustration.
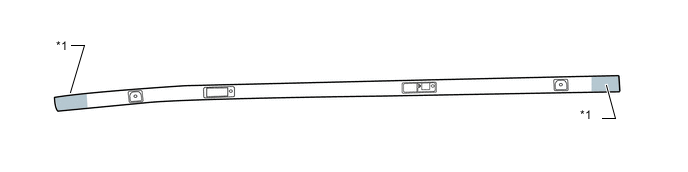
Text in Illustration *1 Double-sided Tape - -
-
-
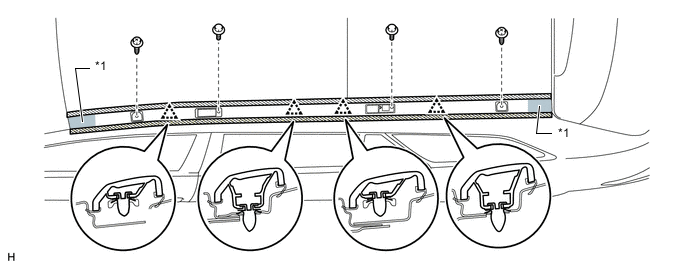
Install the front roof side garnish.
-
Using a heat light, heat the vehicle body and front roof side garnish.
-
Attach the 4 clips to install the front roof side garnish.
-
Install the 2 screws and 2 bolts.
- Torque:
- for Bolt
- 5.5 N*m { 56 kgf*cm, 49 in.*lbf }
-
Remove the peeling paper from the face of the front roof side garnish.
Tech Tips
Press the front roof side garnish firmly to install it.
Text in Illustration *1 Double-sided Tape - -
-
-
-
INSTALL NO. 3 ROOF SIDE GARNISH LID LH

-
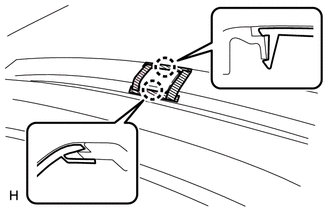
Attach the 4 claws to install the No. 3 roof side garnish lid.
-
-
INSTALL NO. 2 ROOF SIDE GARNISH LID LH

-
Attach the 4 claws to install the No. 2 roof side garnish lid.
-
-
INSTALL NO. 1 ROOF SIDE GARNISH LID LH
Tech Tips
Use the same procedure to install the other No. 1 roof side garnish lid.
-
Attach the 2 claws to install the No. 1 roof side garnish lid.
-