ROOF DRIP SIDE FINISH MOULDING(for Wagon) REMOVAL
CAUTION / NOTICE / HINT
Tech Tips
-
Use the same procedures for the RH side and LH side.
-
The procedures listed below are for the LH side.
-
When removing the front roof side garnish, heat the front roof side garnish and vehicle body using a heat light.
Standard Item Temperature Front Roof Side Garnish 20 to 30°C (68 to 86°F) Vehicle Body 40 to 60°C (104 to 140°F)
Note
Do not heat the front roof side garnish and vehicle body excessively.
PROCEDURE
-
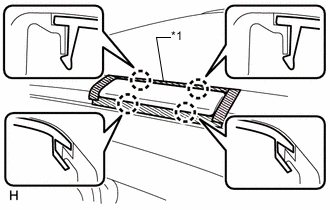
REMOVE NO. 1 ROOF SIDE GARNISH LID LH

Text in Illustration *1 Protective Tape Tech Tips
Use the same procedure to remove the other No. 1 roof side garnish lid.
-
Put protective tape around the No. 1 roof side garnish lid.
-
Detach the 2 claws and remove the No. 1 roof side garnish lid.
-
-
REMOVE NO. 2 ROOF SIDE GARNISH LID LH
Text in Illustration *1 Protective Tape
-
Put protective tape around the No. 2 roof side garnish lid.
-
Detach the 4 claws and remove the No. 2 roof side garnish lid.
-
-
REMOVE NO. 3 ROOF SIDE GARNISH LID LH
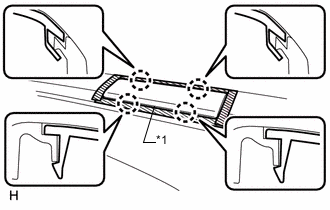
Text in Illustration *1 Protective Tape
-
Put protective tape around the No. 3 roof side garnish lid.
-
Detach the 4 claws and remove the No. 3 roof side garnish lid.
-
-
REMOVE FRONT ROOF SIDE GARNISH LH
-
Put protective tape around the front roof side garnish.
-
Remove the 2 screws and 2 bolts.
-
Using a moulding remover, detach the 4 clips and double-sided tape to remove the front roof side garnish.
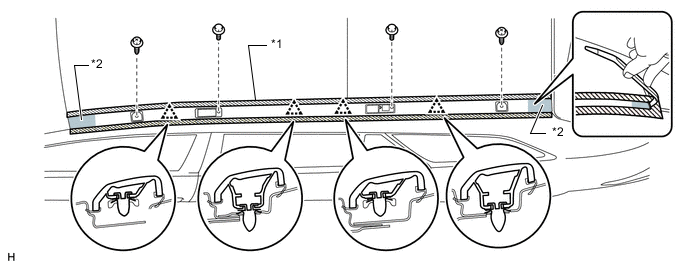
Text in Illustration *1 Protective Tape *2 Double-sided Tape
-