UPPER INSTRUMENT PANEL DISASSEMBLY
CAUTION / NOTICE / HINT
Tech Tips
-
Use the same procedure for RHD and LHD vehicles.
-
The procedure listed below is for LHD vehicles.
PROCEDURE
-
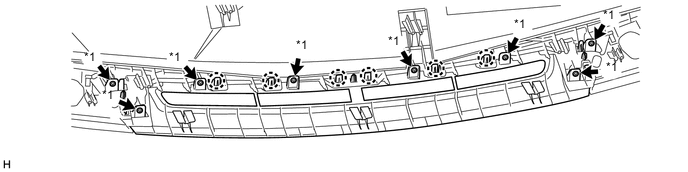
REMOVE NO. 1 HEATER TO REGISTER DUCT
-
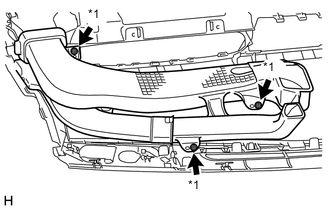
Text in Illustration *1 Screw <A> Remove the 3 screws <A> and No. 1 heater to register duct.
-
-
REMOVE NO. 3 HEATER TO REGISTER DUCT
-
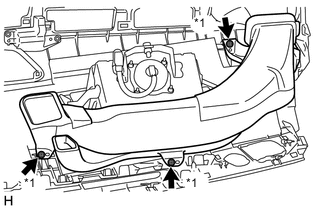
Text in Illustration *1 Screw <A> Remove the 3 screws <A> and No. 3 heater to register duct.
-
-
REMOVE NO. 1 METER HOOD RETAINER
-
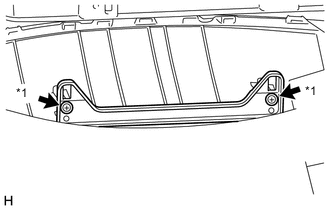
Text in Illustration *1 Screw <C> Remove the 2 screws <C> and No. 1 meter hood retainer.
-
-
REMOVE NO. 1 INSTRUMENT PANEL CUSHION
-
Remove the No. 1 instrument panel cushion.
-
-
REMOVE INSTRUMENT PANEL CUSHION
-
Remove the instrument panel cushion.
-
-
REMOVE NO. 1 DEFROSTER NOZZLE GARNISH
-
Remove the 8 screws <C>.
-
Detach the 6 claws and remove the No. 1 defroster nozzle garnish.
Text in Illustration *1 Screw <C> - -
-
-
REMOVE NO. 2 SIDE DEFROSTER NOZZLE
-
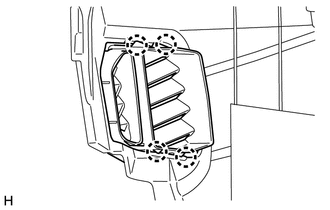
Detach the 4 claws and remove the No. 2 side defroster nozzle.
-
-
REMOVE NO. 1 SIDE DEFROSTER NOZZLE
-
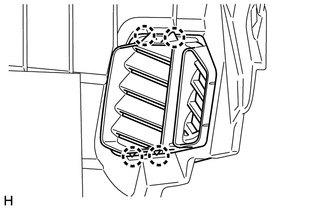
Detach the 4 claws and remove the No. 1 side defroster nozzle.
-
-
REMOVE NO. 2 INSTRUMENT PANEL WIRE
-
REMOVE INSTRUMENT PANEL PASSENGER WITHOUT DOOR AIRBAG ASSEMBLY
-
REMOVE NO. 1 INSTRUMENT PANEL STAY
-

Text in Illustration *1 Screw <A> Remove the 2 screws <A> and No. 1 instrument panel stay.
-
-
REMOVE INSTRUMENT PANEL CUSHION (w/ Cushion)
-
Remove the instrument panel cushion.
-
-
REMOVE NO. 2 INSTRUMENT PANEL REGISTER ASSEMBLY
-
Detach the 9 claws and remove the No. 2 instrument panel register assembly from the instrument panel finish panel end LH.
-
-
REMOVE NO. 1 INSTRUMENT PANEL REGISTER ASSEMBLY
-

Detach the 9 claws and remove the No. 1 instrument panel register assembly from the instrument panel finish panel end RH.
-
-
REMOVE GLOVE COMPARTMENT DOOR LOCKCYLINDER ASSEMBLY (for RHD)
-

Text in Illustration *1 Protective Tape *2 Stopper Using a screwdriver, push the stopper of the glove compartment door lock cylinder as shown in the illustration and remove the glove compartment door lock cylinder in the direction of the arrow.
Tech Tips
Tape the screwdriver tip before use.
-