INSTRUMENT PANEL SPEAKER INSTALLATION
CAUTION / NOTICE / HINT
Tech Tips
-
Use the same procedure for the RH and LH sides.
-
The procedure listed below is for the LH side.
PROCEDURE
-
INSTALL FRONT NO. 2 SPEAKER ASSEMBLY (for 10 Speakers)
-
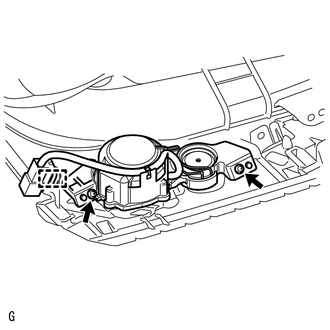
Install the speaker with the 2 screws.
Note
Do not touch the cone part of the speaker.
-
Attach the clamp.
-
-
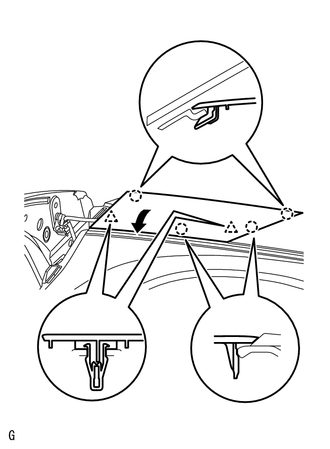
INSTALL UPPER INSTRUMENT PANEL SUB-ASSEMBLY (for 10 Speakers)
-
Install the upper instrument panel Click here.
-
-
INSTALL FRONT NO. 2 SPEAKER ASSEMBLY (for 6 Speakers)
-
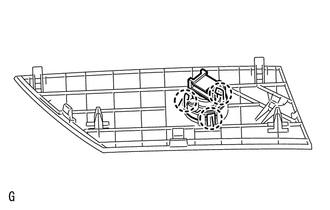
Attach the 3 claws to install the front No. 2 speaker.
Note
Do not touch the cone part of the speaker.
-
-
INSTALL NO. 2 INSTRUMENT PANEL SPEAKERPANEL SUB-ASSEMBLY (for 6 Speakers)
-
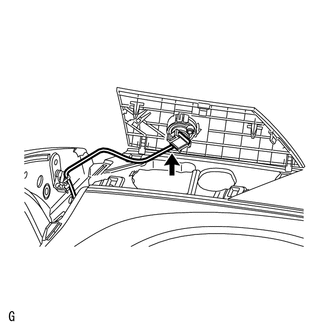
Connect the speaker connector
-
Set the 2 claws on the side of the speaker panel towards the front of the vehicle in place and using them as pivot points, lower the panel in the direction indicated by the arrow in the illustration, and then attach the claws and clips to the instrument panel to install the speaker panel.
-
-
INSTALL FRONT PILLAR GARNISH LH (for 6 Speakers)
-
CONNECT CABLE TO NEGATIVE BATTERY TERMINAL
Note
When disconnecting the cable, some systems need to be initialized after the cable is reconnected Click here.